
Learn how to remove GPU drivers using DDU on Windows 11/10 for a safe and complete cleanup. Remove NVIDIA, AMD, or Intel driver remnants and prepare your PC for a clean driver installation.
If you are dealing with sudden black screens, persistent game crashes, annoying stuttering, or an update that simply refuses to install, your graphics drivers might be the culprit. Graphics drivers act as the essential software bridge between your Windows 11 operating system and your graphics hardware. They are specialized software designed to translate high-level commands from your OS and applications into low-level commands that the graphics processing unit (GPU) can understand. This process allows for the smooth rendering of visuals on your monitor. When they become corrupted or outdated, your entire system’s performance can suffer.
Normally, updating drivers is a straightforward process. The safest, most reliable route for most users is to let Windows Update handle routine deliveries, as Microsoft distributes validated vendor drivers that prioritize stability and security. However, a standard uninstallation via Windows sometimes leaves behind stubborn registry keys, broken files, and driver remnants. These leftovers can cause conflicts when you try to install a fresh driver or swap in a new graphics card.
That is where learning how to remove gpu driver ddu comes in. In this guide, we will walk you through using Display Driver Uninstaller to completely wipe the slate clean, ensuring your next driver installation is flawless and your system runs smoothly.
What is Display Driver Uninstaller (DDU)? Why Device Manager No Longer Works for GPU Cleanup in Windows 11
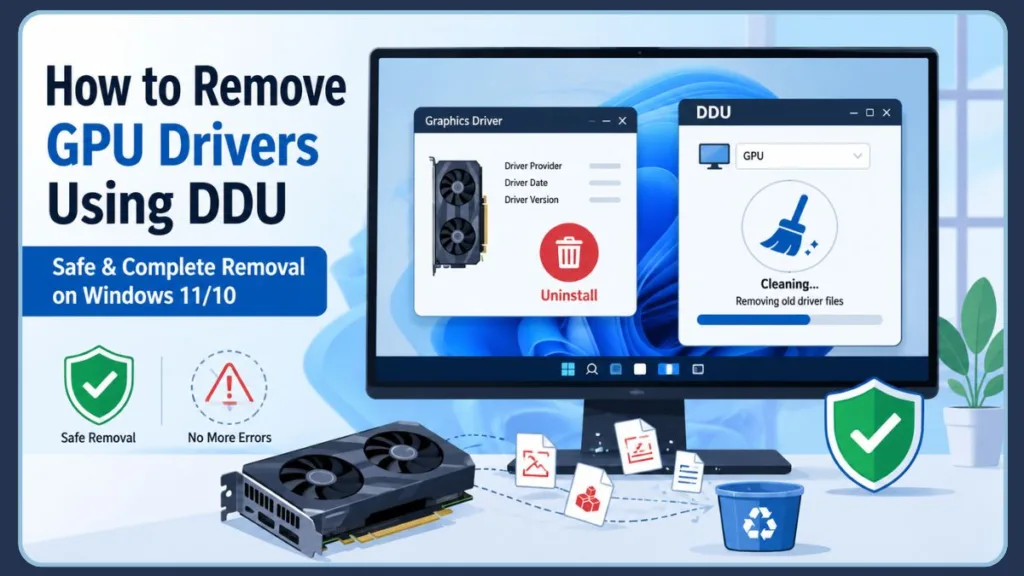
Display Driver Uninstaller (often referred to as DDU) is a specialized, highly effective cleanup utility designed to remove graphics driver completely.
Unlike the standard Windows Device Manager—which might leave behind fragmented files, user settings, and registry entries—DDU bypasses standard OS-managed cleanup steps. It digs deep to eradicate all traces of old software, including stubborn driver leftovers, embedded registry keys and folders, and hidden driver stores. Providing a truly blank canvas for your next installation, this display driver uninstaller fully supports NVIDIA, AMD, and Intel graphics drivers.
To ensure you are getting the legitimate software, always look for the official wagnardsoft download link.
Why Windows Update and Device Manager May Still Return a Need for a GPU Driver Uninstaller DDU
It is important to note that DDU is an advanced cleanup tool, not a mandatory step for every routine driver update. For day-to-day updates, Windows Update or your manufacturer’s official installer is usually all you need. You should use vendor or OEM tools only when you need specific features, performance gains, or fixes that Microsoft hasn’t staged for your device.
However, you should uninstall gpu driver with ddu in the following problem scenarios to fix graphics driver crashing:
- Driver installation failures: When official installers crash or refuse to complete.
- GPU upgrade or replacement: Prepping your system before physically installing a new graphics card (a major graphics card upgrade).
- Switching brands: Moving from AMD to NVIDIA, or NVIDIA to AMD, where leftover files frequently cause conflicts.
- Persistent graphics issues: Unexplainable lag, visual artifacts, or stuttering in graphics-heavy applications.
- BSODs (Blue Screen of Death): Crashes directly related to graphics driver faults.
- Black screen issues: Displays turning off or failing to wake from sleep.
- Driver corruption: Resulting from improper installations, malware, system crashes, or interrupted updates.
- Transitioning from a Beta Version: If you’ve been testing beta graphics drivers, reverting to a stable version often requires wiping the beta drivers first.
Best Practices for System Preparation When GPU Drivers Are Failing
Preparation is the key to a stress-free troubleshooting experience. Before changing any drivers, take these essential steps to protect your system:
- Create a System Restore Point: This is your fastest recovery option if something unexpected happens. Press
Windows + S, type “Create a restore point”, select your main drive, and click “Create”. - Backup Important Files: Ensure your critical data is safely backed up to an external drive or cloud service.
- Record the Current Driver Version: Open Device Manager > Display adapters > Right-click your GPU > Properties > Driver tab. Note the Driver Provider, Driver Date, and Driver Version. Also, note your precise Windows build (type
winverin the Start menu) so you can match driver guidance to the correct OS version. Keep this information handy in case you need to roll back. - Download the Latest Replacement Driver First: Go to the official NVIDIA, AMD, or Intel website (or your laptop manufacturer’s support page) and download the new driver executable. Have it ready in your Downloads folder.
- Disconnect from the Internet: This is incredibly important. Unplug your Ethernet cable or turn off Wi-Fi. You must disable internet for driver install to prevent windows update from installing gpu drivers automatically in the background while you are trying to clean the system.
Crucial Tip: Always download your replacement graphics drivers before disconnecting from the internet and running DDU. This ensures you aren’t left stranded without basic display drivers when you reboot.
Alternative Safe Paths Before Using a Display Driver Uninstaller
Before jumping straight to DDU, you might want to try standard removal methods. You can use Device Manager to uninstall the driver (make sure to check “Delete the driver software for this device”). For advanced IT troubleshooting, Windows also provides pnputil via an elevated Command Prompt (e.g., pnputil /enum-drivers) to list and remove problematic published driver packages from the driver store. If these methods fail, proceed with DDU.
How to Boot Windows Into Safe Mode Without Network Interference
For the best results, you need to run ddu safe mode. Safe Mode (specifically windows safe boot minimal) prevents Windows Security and background processes from locking the driver files that DDU needs to delete.
Step-by-step on how to boot into safe mode windows 11:
- Click the Windows Start button and select the Power icon.
- Hold down the Shift key on your keyboard and click Restart.
- Your PC will boot into a blue recovery screen. Navigate to Troubleshoot > Advanced options > Startup Settings, then click Restart.
- When the system restarts, you will see a list of options. Press the number key corresponding to Enable Safe Mode (usually
4orF4).
How Do You Uninstall Intel Graphics Drivers in Safe Mode Without Leaving Remnants?
Now that you are in Safe Mode and disconnected from the internet, you are ready to perform a clean wipe. Whether you need an amd driver removal tool, an intel arc ddu cleanup, or an NVIDIA wipe, the steps are the same:
- Launch DDU: Locate your downloaded DDU software. If you downloaded the Portable/self-extracting version, look for the executable and extract it (remember the path!). Find the newly extracted executable file, right-click it, and select Run as administrator.
- Bypass Options: If an Options window pops up first, you can generally leave the default settings and click Close.
- Select Device Type: On the right side of the main interface, use the top drop-down menu to set the device type to GPU.
- Select the GPU Vendor: In the drop-down menu directly below that, choose the brand of the driver you want to remove (NVIDIA, AMD, or Intel). If you are doing a massive clean-up, you can choose all GPUs one by one.
Best Practices for Choosing a Cleaning Option When Performing a Clean Install
DDU offers a few distinct ways to execute the cleanup. Choose the one that matches your goal for effective display issues troubleshooting:
- Clean and Restart: This is the most common option. It wipes the driver entirely and automatically reboots your PC back into normal Windows. Use this if you are keeping your current graphics card and simply want to perform a clean gpu driver install to fix corruption or act as a game stuttering fix.
- Clean and Shutdown: This will wipe the driver and completely power off your computer. Use this option specifically when you are performing a hardware swap (e.g., taking out an old GPU to put in a new one). Once the PC is off, you can safely swap the physical cards.
Safety Reminder: Use the “Clean and Shutdown” option only if you are physically replacing your graphics card. For fixing software issues on your existing card, always choose “Clean and Restart.”
How to Reinstall GPU Drivers in Windows 11 Without Background Interference
Once your PC reboots into standard Windows (or after you’ve installed your new hardware and booted up), it is time to reinstall gpu drivers after ddu. Remember to stay disconnected from the internet until the installation is complete!
If you are wondering how to install new graphics card drivers, here are your best paths:
- NVIDIA, AMD, and Intel Drivers: Locate the driver file you downloaded earlier. Right-click it, select Run as Administrator, and follow the wizard. If the installer offers a “Custom Installation” with a “Clean Installation” checkbox, go ahead and select it. This option removes all previous settings related to the driver and installs a fresh copy.
- Intel Driver & Support Assistant (IDSA): If you use an Intel GPU, you can run the IDSA tool. Allow it to detect your installed Intel GPU, review the recommended package, and install the vendor’s installer.
- OEM Laptop Drivers: If you are using a prebuilt laptop or prebuilt desktop (like Dell, HP, or Lenovo), it is usually safest to use the specific graphics drivers provided on your laptop manufacturer’s support page. OEM packages are often the most thoroughly validated for a particular model, as they maintain compatibility with the laptop’s firmware and power-management features.
- Windows Update Method: For everyday users who simply want the most stable, Microsoft-validated driver, you can reconnect to the internet, open Settings > Windows Update, and click “Check for updates”. Click “View optional updates” to see if any specific driver updates are staged for your machine.
Important Caution: We strongly advise against using third-party “driver updater” software. They promise convenience but often pull packages from unvetted sources and can install unsigned, incorrect, or malicious drivers. Stick to official vendor sites, OEM pages, or Windows Update.
Best Practices for Verifying Installation When Drivers Are Updated
After installation, ensure everything is functioning properly:
- Check Device Manager: Right-click the Start button, select Device Manager, and expand the Display adapters section. Your GPU should be listed without any yellow warning triangles.
- Verify the Version: Right-click your GPU, select Properties, and check the Driver tab to confirm the version and date match the one you just installed.
- Test the System: Launch a graphics-intensive application or a favorite game to ensure performance is smooth and stable.
Why Your Games and Apps May Still Return a Stuttering Issue
If your system is still experiencing hiccups after a clean installation, try these targeted troubleshooting steps:
- Roll Back or Reinstall an Older Driver: Sometimes the newest driver has an undiscovered bug. Use Device Manager’s “Roll Back Driver” option if available. If not, use DDU to clean the system again, but this time, install an older, known-stable version of the driver.
- Use System Restore: If things went completely sideways, use the restore point you created earlier to revert your PC to its previous working state.
- Check Power Settings: Ensure that your power settings are set to High Performance. You can access this by right-clicking the battery icon in the taskbar, selecting Power Options, and choosing the High Performance plan.
- DirectX or OpenGL Errors: These errors can be related to outdated drivers. Ensure that your graphics drivers support the latest versions of DirectX or OpenGL required by the applications you are running.
- Check for Memory Integrity Conflicts: If Windows Security flags the Intel kernel-mode driver (
igdkmd64.sys) as incompatible, it can cause issues and block Core Isolation. You will need to download a driver specifically signed and built for Memory Integrity from your OEM or Intel. - Verify HAGS Support: Hardware-Accelerated GPU Scheduling (HAGS) can improve input latency by offloading scheduling to the GPU, but it requires a WDDM 2.7+ supported driver. It can also cause regressions on some systems. If you notice stuttering after an update, try toggling HAGS off in your Windows Graphics settings and restarting.
Frequently Asked Questions
Is DDU safe? Yes, DDU is very safe when used correctly. However, because it deeply modifies your system by removing registry keys and driver stores, you should always create a System Restore point before using it.
Do I need Safe Mode? While you can technically run DDU in normal mode, Safe Mode is highly recommended. It ensures no background applications or Windows security protocols are actively using the driver files you are trying to delete.
Does DDU delete personal files? No. DDU exclusively targets display drivers, audio drivers associated with GPUs, and driver stores. It will not touch your personal documents, photos, or games.
When should I use Clean and Shutdown? You should use the “Clean and Shutdown” option only when you are physically removing your current graphics card to install a new one.
Can DDU remove Intel, AMD, and NVIDIA drivers? Yes, DDU is fully equipped to completely remove driver packages from all three major graphics hardware manufacturers.
Will DDU improve gaming performance? If your current gaming performance is suffering due to corrupted drivers, conflicting leftover files, or a botched update, yes—a clean installation using DDU can restore lost performance and act as an excellent game stuttering fix.
Should I disconnect from the internet before running DDU? Absolutely. If your PC is connected to the internet after you wipe the drivers, Windows Update will immediately try to download and install a generic replacement driver in the background, which can ruin your clean installation process.
Is DDU better than Device Manager? For thorough uninstalls, yes. Device Manager is great for basic rollbacks or quick uninstalls, but it often leaves behind leftover files and registry keys. DDU removes everything to prevent future conflicts.
Best Practices for System Maintenance When a Display Driver Uninstaller is Used
Dealing with driver issues can be frustrating, but learning how to remove gpu driver ddu puts you back in control of your PC’s performance.
The quickest and safest workflow is simple: Download your new drivers from official sources first, disconnect from the internet, boot into Safe Mode, and let DDU perform a “Clean and Restart.” Once you are back in Windows, run your fresh installer. By treating DDU as your go-to advanced cleanup tool for stubborn problems—and leaning on Windows Update and OEM drivers for routine maintenance—you can ensure your Windows 11 system remains stable, fast, and ready for whatever games or applications you throw at it.
Visit Our Post Page: Blog Page
Discover more from Izoate
Subscribe to get the latest posts sent to your email.