
Accidentally clicked ‘Add Friend’? Learn how to see sent friend requests on Facebook in 2026. View your pending list and easily cancel requests on app or web.
We have all experienced that sudden spike of panic. You are deep-scrolling through the profile of a distant acquaintance, a new coworker, or perhaps an ex late at night, and your thumb slips.
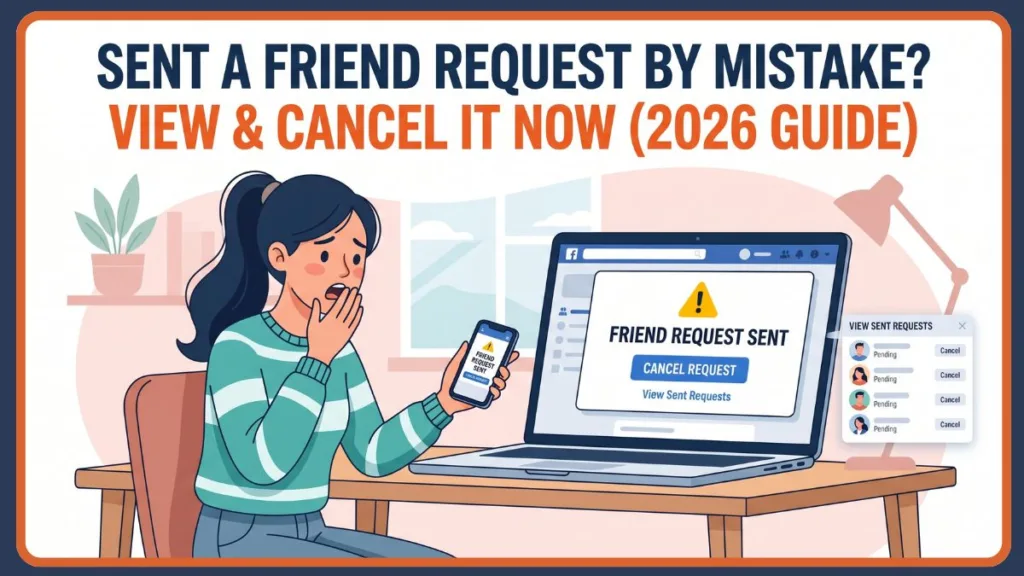
Suddenly, you realize you might have accidentally clicked the button to send friend request on Facebook.
Or perhaps you are taking a more strategic approach to your social media presence. You might be engaging in some necessary digital housekeeping, looking to clean up my friend requests on Facebook that have been sitting unanswered for months.
Leaving old invitations hanging can feel messy, and tracking these interactions is an essential part of managing your online reputation.
Can You See Sent Friend Requests on Facebook 2026?
Let’s answer that question immediately: yes, you absolutely can. If you are feeling anxious about an accidental click, you can breathe a sigh of relief.
Facebook maintains a specific sent friend requests list hidden within its settings.
This list acts as a complete ledger of every invitation you have dispatched that has not yet been accepted or explicitly rejected by the recipient.
How Do You View Sent Friend Requests On Facebook
This comprehensive guide will walk you through the exact steps to locate your outgoing invitations, cancel the ones you regret, and manage your social network effectively.
Whether you are looking to do immediate damage control or you simply want to see pending friend requests Facebook has logged on your account, regaining control of your digital footprint is entirely possible.
If you are currently on a computer and need the absolute fastest route to this page to undo a mistake, you can use the facebook sent requests link directly.
By navigating to your browser’s URL bar and typing in facebook.com/friends/requests, you can bypass the menus entirely and jump straight to your pending incoming and outgoing connection portal.
How to “Cancel” (Withdraw) a Friend Request You Sent
If you spot a request you sent in error, or one that has been lingering for too long, you can easily withdraw it.
For those wondering, “How do I see my sent requests?” through standard navigation, the process requires clicking through a few specific menus.
Whether you are searching for the Facebook send friend request link to audit your past networking attempts or just want a clean slate, the interface provides all the tools you need.
Step-by-Step on Mobile (iPhone & Android)
If you are on an iPhone or Android phone, learning how to see sent friend requests on facebook 2026 requires understanding the current app layout. Here is how to view as well as cancel your sent friend requests on the go:
- Launch the Facebook app on your phone.
- Tap the Menu icon (represented by three horizontal lines). It is located at the bottom right on the iPhone app, and the upper right corner on the Android app.
- On the following screen, scroll down if necessary and select Friends.
- On the “Friends” page, look next to the “Friend Requests” header and tap See All.
- On the screen that opens, look to the top-right corner, tap the three dots, and choose View Sent Requests in the pop-up menu.
- If you want to remove an outgoing invitation, simply tap the Cancel option next to that specific request.
Tip: Because Facebook’s mobile website doesn’t fully support these advanced connection management features, you will need to use the dedicated mobile application for these steps.
Step-by-Step on Desktop
If you are using a Windows PC, Mac, Linux machine, or Chromebook, the Facebook desktop website allows for easy viewing and cancellation of your outgoing friend requests.
- Launch your preferred web browser and open Facebook.com. Sign in to your account if you haven’t already done so.
- In the site’s left vertical pane (the sidebar), click on Friends.
- On the following page, look at the left sidebar again and select Friend Requests.
- Click on the option to View sent requests.
- Find that specific request on the list and select Cancel Request next to the recipient’s name. By doing this, you terminate the request so it will not go to the recipient.
Tip: Facebook currently does not offer a bulk-cancel option for friend requests. You must cancel them individually, one by one. Alternatively, from the top menu bar on your homepage, you can click the Friend Requests icon (two silhouettes), select See All, and click View Sent on the left sidebar.
What to Do After You Accidentally Send a Friend Request
Sometimes, the platform doesn’t behave as expected. If you are asking, “why can’t I see my sent friend requests on facebook?“, there are several common issues and technical hurdles that could be the culprit.
Here is how to handle troubleshooting and tracking:
- Check Privacy Settings: Some users have strict privacy settings that only allow friend requests from “friends of friends.” In such cases, you won’t see a button to send a friend request, or it will be unclickable. You essentially cannot block friend requests on Facebook entirely, but limiting them reduces incoming invites. They will need to send you a friend request to connect.
- Track the Request: If you want to actively check friend request status Facebook does not offer a progress bar or read receipts. The only way to track it is by monitoring your sent requests list.
- Verify Connections & Cache: Weak internet can prevent Facebook from loading requests properly. Restart your router. If on a browser, clear your cache and cookies. If on mobile, ensure your app is updated to the latest version.
- Review Server Status: Occasionally, Facebook experiences outages. Visit platforms like DownDetector to confirm if services are disrupted.

How to Manage Facebook Pending Friend Requests
Monitoring your sent friend requests on Facebook is an essential step for maintaining your online presence.
Checking these requests is useful for several reasons. It helps you prevent sending duplicate or unnecessary requests, which can be perceived as spammy or pushy.
If you notice many Facebook pending friend requests sitting in your log, it allows you to evaluate your outreach strategy.
If a request has been pending for an extended period, it might be best to cancel it and leave it be, ensuring you respect others’ boundaries.
It is important to differentiate between outgoing and incoming requests. If you want to see requests that other people have sent to you, you simply navigate to the “Friends” section and look at the primary “Friend Requests” tab to view a pending friend request on Facebook awaiting your approval.
FAQs About Sent Friend Requests on Facebook
1. Can you see a history of friend requests on Facebook? / How do I see my friend request history?
While Facebook does not provide a permanent, archived history of every person you have ever requested to be friends with, your “Sent Requests” list acts as your active history. Once a request is either accepted or denied, it is permanently removed from this list, keeping the page restricted only to currently pending invitations.
2. Is Facebook still sending automatic friend requests?
No. There was a known bug that caused the platform to automatically send friend requests from users’ accounts simply by viewing a profile. However, this is fixed. As of September 2023, Facebook isn’t sending automatic friend requests anymore.
3. How do I know if my friend request was denied?
Facebook doesn’t tell you directly via a notification if your friend request was denied. However, you can still check if someone rejected your request. The first indication is that you won’t find that person on your outgoing friend request screen. Another way to confirm is to go to that user’s profile on Facebook; if you see the “Add Friend” option has returned, they’ve rejected your previous friend request.
Conclusion: Efficiently Managing Facebook Friend Requests
Tracking your sent friend requests on Facebook is an essential step to manage your account effectively and maintain a clean friend list.
By accessing the dedicated menus on mobile or desktop, you can review all outgoing requests, allowing you to identify invitations that have not been accepted, canceled, or expired.
Regularly checking this list ensures you are aware of pending interactions and prevents sending duplicate requests to the same users.
Tip: Check your sent requests list frequently to maintain a clean digital footprint, minimize the awkwardness of long-pending invitations, and manage your social network like a pro.
Visit Our Post Page: Blog Page
Discover more from Izoate
Subscribe to get the latest posts sent to your email.