
Trying to turn long videos and livestreams into engaging Shorts and earn money from clipping? Learn how to start clipping on YouTube in 2026, find the best moments, and create videos that attract viewers. From choosing creators and editing Shorts to finding paid clipping opportunities and understanding monetization, build your skills and turn your editing work into an earning opportunity.
A three-hour livestream can contain several moments that deserve attention, but most viewers won’t watch the entire recording to find them. They’re more likely to discover a creator through a funny reaction, an impressive gameplay moment, or a memorable statement that takes less than a minute to watch.
That’s why YouTube clipping has become a useful way to turn long-form content into short-form videos. You identify the strongest moments, edit them into focused clips, and help viewers discover the original creator. You don’t need to record your own videos or appear on camera, but you do need good editing skills, sound content judgment, and permission to use the footage.
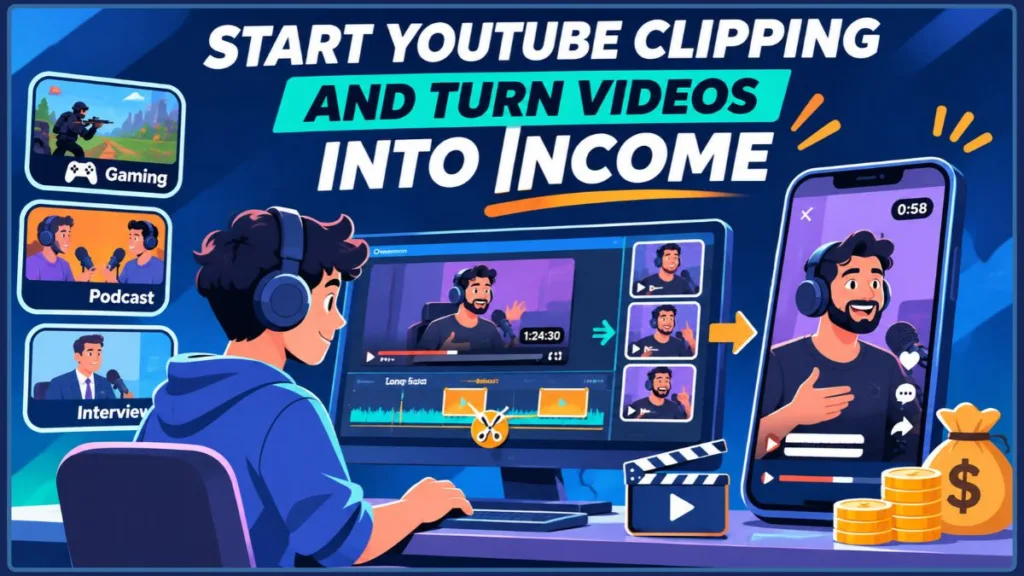
You can start in two ways: build your own YouTube clipping channel or work as a paid clipper for streamers, podcasters, and other creators. Your own channel is about building an audience and qualifying for monetization. Client work is about delivering clips under an agreed payment arrangement.
Start by mastering moment selection before chasing views. A strong clip needs an engaging opening, enough context to make sense, and a satisfying payoff. Fancy effects cannot rescue a moment that isn’t worth watching.
What Is YouTube Clipping?
YouTube clipping is the process of selecting worthwhile moments from longer videos and turning them into shorter pieces of content. Your source material might be a gaming livestream, podcast, interview, educational video, or recorded discussion.
Imagine a gaming streamer broadcasting for three hours. The recording might contain an unexpected win, a hilarious reaction, or an impressive play that viewers would enjoy watching on its own. You find that moment, remove unnecessary footage, and edit it into a focused YouTube Short.
This process is also known as long-form to short-form content repurposing. Instead of asking viewers to watch an entire recording, you give them a complete highlight that can introduce them to the original creator.
As a YouTube clipper, your work usually involves three responsibilities:
- Moment selection: Find interesting reactions, memorable statements, gameplay highlights, or useful explanations.
- Video editing: Remove unnecessary footage, improve pacing, adjust the framing, and add readable captions.
- Quality control and delivery: Check the context, audio, captions, and export before publishing or handing the video to a client.
Some creators provide timestamps and expect you to handle the editing. Others expect you to review hours of Twitch VODs (Video on Demand) or YouTube recordings, identify the best moments, and complete the entire production process.
Should You Build a Clipping Channel or Work for Creators?
Before you look for footage, decide whether you want to build your own clipping channel or provide clipping services to other creators.
Build your own YouTube clipping channel: Choose a niche, obtain permission to use suitable footage, publish clips, and work towards building an audience. This can be a faceless YouTube channel, but you are still responsible for adding original value, following copyright rules, and meeting YouTube’s monetization requirements.
Work as a paid clipper: Create short-form videos for streamers, podcasters, brands, or agencies. You can agree on payment per clip, per project, through a monthly retainer, or under a campaign’s performance-based terms.
You can pursue both approaches, but keep their earning models separate. Client payments and YouTube advertising revenue are different income sources. A creator paying you to edit their videos does not automatically make your own channel eligible for YouTube monetization.
What Do You Need to Start Clipping Videos?
You don’t need an expensive workstation or a collection of paid subscriptions to become a YouTube clipper. Start with equipment and software that let you review recordings, select moments, edit videos, and export them reliably.
| What you need | What to prepare |
|---|---|
| YouTube channel | Create one if you plan to publish clips and build your own audience |
| Computer or smartphone | Use a computer for long recordings and detailed editing; a phone is suitable for simpler projects |
| Video editing software | Choose an editor that supports trimming, captions, vertical framing, and video exports |
| Authorized footage | Use your own recordings, licensed content, or footage you have permission to publish |
| Editing skills | Learn moment selection, pacing, captions, framing, and audio correction |
A publicly accessible YouTube or Twitch video is not automatically free to download, edit, and republish. Before starting a client project, confirm that your permission covers editing, publishing, commercial use, and the platforms where you intend to distribute the clips.
You can start with free video editing software and upgrade when your workload demands more advanced features. Your first priority is to learn how to produce a complete, understandable video rather than spending money on effects and automation.
How to Start Clipping Videos: A Six-Step Workflow
Build a repeatable workflow that takes you from choosing a niche to publishing finished clips. You can use the same process for gaming streams, podcasts, interviews, and other long-form recordings.
Step 1: Choose a Niche You Understand
Start with one YouTube clipping niche instead of publishing random moments from unrelated creators. A focused category helps you understand the audience, identify suitable source material, and recognize the moments people are most likely to watch.
| Clipping niche | Moments worth selecting |
|---|---|
| Gaming | Funny reactions, impressive plays, unexpected wins, and memorable streamer moments |
| Podcasts | Strong opinions, interesting conversations, and practical explanations |
| Interviews | Surprising answers, personal experiences, and memorable statements |
| Business | Entrepreneurship advice, useful insights, and business discussions |
| Education | Short lessons, demonstrations, and clear explanations |
Choose your niche based on your knowledge of the subject, the availability of creators who allow clipping, and your ability to recognize worthwhile moments.
For example, if you regularly watch gaming streams, you’ll probably identify an impressive play faster than someone unfamiliar with the game. Podcast clipping requires a different approach because you need to understand the conversation and retain enough of the question and answer to make the excerpt meaningful.
Before choosing a niche, evaluate these four factors:
- Content availability: Do creators regularly publish long-form videos, podcasts, or livestreams?
- Clipping potential: Do their recordings contain moments that can work as independent short-form videos?
- Audience interest: Is there an identifiable audience interested in the subject?
- Permission: Can you find creators who allow independent clippers to use their footage?
My recommendation: Start with one creator whose content you genuinely enjoy. You’ll understand the subject more quickly, identify interesting moments more accurately, and develop a better sense of what the audience expects.
Step 2: Find Creators Who Allow Clipping
After choosing your niche, shortlist creators who regularly publish long-form content and have enough interesting material to repurpose.
Don’t select creators based on subscriber count alone. A large channel may already have an established editing team, while a smaller creator might need someone who can consistently turn their recordings into Shorts.
Evaluate potential creators using the following checklist:
| Factor | What to check | Why it matters |
|---|---|---|
| Long-form content | Regular streams, podcasts, or interviews | Provides a consistent source of footage |
| Existing Shorts | Whether useful moments are already being repurposed | Helps you identify potential editing opportunities |
| Content quality | Clear audio and visible subjects | Makes the footage easier to edit |
| Niche familiarity | Whether you understand the topic | Helps you recognize worthwhile moments |
| Clipping permission | Published guidelines or direct authorization | Establishes whether you can use the footage |
| Contact method | Business email, management, or official community | Gives you a way to approach the creator |
Look for YouTube creators, Twitch streamers, podcasters, interview channels, and creators with official clipping programs.
Get permission before publishing someone else’s footage. Start by checking the creator’s clipping guidelines. When the rules are unclear, contact the creator or their management directly.
Ask whether their permission covers:
- Editing and shortening their original recordings.
- Publishing clips on your own YouTube channel.
- Repurposing the edits for TikTok and Instagram Reels.
- Using their content for commercial purposes.
- Keeping published clips online if the original recording is changed or removed.
- Using any third-party music, gameplay footage, guest appearances, or other material included in the recording.
For Twitch stream clipping, don’t assume that watching a public livestream or using Twitch’s built-in Clip feature automatically gives you permission to download and republish a separate edited video elsewhere. Check the Twitch Terms of Service and obtain the necessary authorization for your intended use.
Keep written permission so you can refer to the agreed conditions when publishing or delivering the finished videos.
How to Ask a Creator for Permission to Clip Their Content
You don’t need a lengthy sales pitch to approach a streamer or podcaster. Explain why you are interested in their content, what you can deliver, and whether they allow independent clippers.
You can adapt this message:
Hi, I’ve been watching your [podcast/stream/channel] and noticed several moments that could work well as short-form videos. I’m building my clipping portfolio and would like to discuss creating a few Shorts from your content. Do you allow independent clippers to edit and publish your footage? I’d be happy to share sample edits and follow your content and attribution requirements.
Don’t promise viral results or guaranteed views. Show the creator that you understand their content and can produce useful, well-edited videos.
Step 3: Identify Moments That Work as Shorts
Your ability to recognize a worthwhile moment is one of the most important YouTube clipping skills you can develop.
A long recording might contain dozens of interesting reactions, statements, and gameplay events, but not every moment deserves its own Short. You need to select excerpts that hold attention while retaining the original meaning.
Use this four-part test before choosing a moment.
1. Hook — Does the opening make viewers stop scrolling?
Look for an interesting statement, question, reaction, disagreement, or gameplay event. Avoid starting with a long introduction when the main moment can establish the subject more quickly.
2. Context — Can viewers understand what’s happening?
Retain the question, setup, or relevant event whenever viewers need it to understand the main moment. Don’t remove an explanation that makes a statement meaningful.
3. Payoff — Does the clip deliver something worthwhile?
Your selected moment should provide a useful explanation, funny reaction, surprising result, strong opinion, or impressive gameplay highlight.
4. Completion — Does the video reach a natural ending?
End when the thought, reaction, or event is complete. Don’t cut halfway through an explanation or remove a qualification that changes what the speaker originally meant.
Example: Imagine an interview where a guest explains how a business mistake nearly caused their company to fail. A strong clip would introduce the problem, retain the explanation, and finish with the lesson. Removing the original question or an important qualification could leave viewers with a misleading statement.
Track Your Best Moments with a Timestamp Log
Don’t immediately edit the first interesting moment you find. Mark several potential highlights while watching the recording, then compare them before deciding which ones deserve production time.
| Source | Start | End | Hook | Payoff | Context needed |
|---|---|---|---|---|---|
| Podcast | 08:42 | 09:18 | Unexpected opinion | Clear explanation | Keep the question |
| Gaming stream | 41:15 | 41:49 | Surprising reaction | Impressive play | Show the encounter |
| Interview | 17:30 | 18:12 | Surprising statement | Practical lesson | Retain the explanation |
These timestamps are illustrative examples, not references to actual videos.
Follow this selection process:
- Review the recording and note every promising moment.
- Mark the beginning and approximate ending of each candidate.
- Watch each potential clip from start to finish.
- Identify any missing questions, setup, or explanations.
- Compare your candidates and select the strongest moments.
When you’re learning how to start clipping on YouTube, practice with a few selections from an authorized podcast or livestream. Create a 20–40-second sample edit and check whether the opening gets to the point and the complete moment makes sense. You can also practice with your own recordings while arranging permissions for creator footage.
Important: Select a complete moment, not simply the shortest possible section of a recording. A short clip that removes the meaning is a weak edit.
Step 4: Choose How to Create or Share Each Clip
After selecting a moment, decide how you want to use it. YouTube provides different ways to share or repurpose video moments, and the right workflow depends on whether you want to share a timestamp, create a standalone Short, or shorten an existing upload.
Create a Standalone Clip from Authorized Footage
For a podcast recording, Twitch VOD, or another creator’s video, import the authorized source file into your editing application. Locate the selected moment and create a rough cut.
Follow this editing workflow:
- Import the authorized footage. Start a new editing project and keep the original source file unchanged.
- Locate the timestamp. Move the editing playhead to the beginning of your selected moment.
- Mark the start and end. Include enough context to introduce the moment and retain its complete payoff.
- Split the footage. Use your editor’s split or cut function at both boundaries.
- Remove unnecessary sections. Delete unrelated footage, repeated statements, and pauses that don’t help viewers understand the moment.
- Close the gaps. Check that the remaining footage plays in the correct order without unwanted black frames or silent gaps.
- Check audio transitions. Listen for clipped words, sudden volume changes, and cuts that interrupt sentences.
- Review the complete rough cut. Watch the video from its opening frame to the ending before adding effects or captions.
- Save your project. Keep the editable project separate from the exported video so you can make revisions.
For regular client work, organize your files into separate folders for source footage, selected moments, editing projects, exports, and completed deliveries.
Name each file using the creator or project name, video topic, and timestamp. This makes it easier to locate a particular edit when a client requests changes.
Remember that a rough cut isn’t a finished YouTube Short. Its purpose is to preserve the complete moment. You still need to work on framing, captions, visual presentation, audio, and final export.
Share a Timestamp Link When You Don’t Need a Separate Video
YouTube changed its viewer-facing Clips feature on April 16, 2026. Share at Timestamp became the primary way to share specific moments from videos. Previously created Clips remain viewable, but you can no longer use the former feature to set a custom ending time or add a custom description to a new shared moment.
A timestamp link is useful when you want someone to start watching an original video at a particular moment. However, it doesn’t create a standalone MP4 video or a separate Short.
To share a timestamp:
- Open the YouTube video you want to share.
- Play the video or move the playback position to your selected moment.
- Select Share.
- On desktop, enable Start at and check the selected timestamp. On mobile, move playback to the desired moment and use the timestamp-sharing option.
- Copy the generated link or select where you want to share it.
- Open the link to confirm that playback starts at the correct point.
The link continues playing the original recording; it doesn’t give you a separately edited video with a custom ending.
For the official explanation, visit YouTube’s Share at Timestamp and Clips announcement.
Create a Short from Your Own YouTube Upload
When you own the source recording, you can use the Clips and Shorts tools in YouTube Studio to extract a moment from an existing long-form upload.
Follow these steps:
- Open YouTube Studio and sign in.
- Select Content, then Videos.
- Open the long-form video you want to repurpose.
- Select Clips and Shorts from the left-hand menu.
- Choose Create clip or Short, then select Short.
- Select the section you want to extract by highlighting text in the transcript and confirming your selection, or enter the start and end timestamps in the timeline editor.
- Where available, review YouTube’s AI-powered suggestions and select a suitable moment.
- Select Preview Short and review the selected footage, crop, and captions.
- Adjust the selection and caption styling as needed, then choose Create draft.
- Complete the upload details and publish when your Short is ready.
YouTube also supports AI-powered suggestions and transcript outlines for eligible creators. Its current availability information includes India and languages such as English and Hindi. Availability can still depend on the selected video and account.
You can find the full instructions in YouTube’s Video clips and Shorts in YouTube Studio.
Important: This workflow is for repurposing videos available to you as the creator. For another creator’s footage, obtain the necessary authorization and use a permitted editing workflow.
Create a Separate Video Clip in YouTube Studio
YouTube Studio also provides a separate Video clip option within its Clips and Shorts workflow. This lets creators extract a selected section of their longer videos and publish it as a separate video clip.
The general workflow is:
- Open YouTube Studio.
- Select Content, then Videos.
- Choose the original video.
- Open Clips and Shorts.
- Select Create clip or Short, then choose Video clip.
- Select the moment using the transcript or timeline.
- Review the selection and make any necessary adjustments.
- Create a draft and complete the upload details.
You can use this option when you want to publish an individual highlight rather than simply share a timestamp link. Check the current YouTube Studio video clips instructions for the available options.
Trim an Existing Upload Without Creating a New Video
If your goal is to shorten your own uploaded video rather than publish a separate Short, use Trim & cut in YouTube Studio.
- Open YouTube Studio and select Content.
- Choose the video you want to modify.
- Select Editor, then Trim & cut.
- To remove the beginning or ending, adjust the blue selection box to cover the footage you want to keep.
- To remove a section from the middle, select New Cut and mark the section you want removed.
- Select Preview to check how the remaining footage joins together.
- Save only after reviewing the changes.
YouTube says this editing method preserves the original video’s URL, views, and comments. It is available for videos shorter than six hours, subject to other restrictions.
Save carefully: Since June 2025, YouTube Studio has not provided the Revert to original option for undoing saved editor changes. Keep your original source file and carefully preview the edit before selecting Save.
Step 5: Edit Your Clips for YouTube Shorts
Your rough cut now contains the moment you want to share. The next step is to make it easy to watch on a mobile screen.
Set the vertical framing.
Use a 9:16 aspect ratio as your starting point, commonly exporting at 1080 × 1920 pixels when the source supports it.
Adjust the crop manually instead of automatically centering every recording. For podcast footage, keep the person speaking visible. For gameplay, preserve the important action and game details that viewers need to see.
Add accurate captions.
Captions help viewers follow spoken content, including when they aren’t listening with sound.
Review automatically generated subtitles for incorrect words, names, punctuation, and timing. Break lengthy statements into manageable lines, choose a readable font, and avoid placing captions where YouTube’s interface controls might cover them.
Create an honest opening hook.
Start with the most interesting part of the moment, but don’t use a misleading statement that changes what the speaker actually said.
Your opening should create curiosity while accurately representing the complete conversation or event.
Keep the pacing natural.
Remove unnecessary pauses, repeated statements, and unrelated footage. However, don’t cut so aggressively that viewers lose track of the explanation.
Check the audio and image quality.
Make sure the speaker is audible, important details remain visible, and any background music doesn’t compete with the original audio or introduce additional copyright problems.
Review the Final Export Before Publishing
Use this checklist before uploading a finished Short:
| What to check | What a finished clip should achieve |
|---|---|
| Aspect ratio | Vertical 9:16 framing |
| Resolution | Clear 1080 × 1920 export where the source supports it |
| Frame rate | Matches the original footage where practical |
| Audio | Clear speech without clipping or competing music |
| Captions | Accurate words, readable size, and suitable timing |
| Framing | Important people, actions, and gameplay details remain visible |
| Opening | Introduces the moment quickly without misleading viewers |
| Ending | Completes the thought or event naturally |
Don’t force the same frame rate or export bitrate on every project. Match the original footage and use settings appropriate for your editing application and destination platform.
Always watch the exported video on a smartphone before publishing. A desktop preview may not reveal captions that are too small, poorly positioned, or hidden by mobile interface elements.
Choose the right duration. YouTube currently supports square or vertical Shorts up to three minutes. You don’t need to force every clip into 15, 30, or 60 seconds. Choose the duration that lets the original moment make sense.
Editing recommendation: A complete 35-second explanation is more valuable than a 15-second edit that removes information viewers need. Prioritize the viewing experience over a fixed duration.
Step 6: Publish Your Shorts and Improve Their Performance
Once your edit is ready, export the video and upload it through YouTube Studio.
- Sign in to YouTube Studio.
- Select Create, then Upload videos.
- Choose your square or vertical video, up to three minutes long.
- Add a title that describes the main moment without making misleading claims.
- Write a short description and include appropriate creator attribution or a link to the original recording.
- Check the audience and visibility settings.
- Review the video before publishing.
When uploading someone else’s footage, make sure your permission covers the chosen platform. An agreement that allows you to publish on YouTube doesn’t automatically authorize distribution on TikTok or Instagram Reels.
Use YouTube Analytics to Understand Viewer Behaviour
Don’t judge your clipping performance by public views alone.
YouTube changed its public view-counting method on August 24, 2026. A view is now counted when a video starts playing across formats, including Shorts, long-form videos, and livestreams. However, YouTube continues to use engaged Shorts views and engaged watch hours for earnings, while YPP eligibility uses qualified views and watch hours.
For that reason, use your engagement metrics to understand whether viewers are actually choosing to watch your clips.
| Metric | What it tells you | What to improve |
|---|---|---|
| Stayed to watch | Percentage of viewers who stay beyond a Short’s initial seconds | Opening frame and hook |
| Engaged views | How often viewers continue watching beyond the initial seconds, excluding loops | Moment selection and early pacing |
| Average view duration | How long engaged viewers watch on average | Clip structure and pacing |
| Average percentage viewed | How much of the video viewers watch on average | Whether the entire clip maintains interest |
You can find explanations of these metrics in YouTube’s Shorts and video analytics documentation.
Use your analytics to make specific editing decisions:
- Low Stayed to watch: Test a stronger opening frame or begin closer to the main statement.
- Good opening but low average percentage viewed: Check whether the middle contains unnecessary setup, repetitive information, or confusing cuts.
- Strong average percentage viewed but limited engagement: Experiment with moments that provide a clearer reason to comment, share, or explore the creator’s other content.
- Repeatedly successful topics: Compare their hooks, pacing, subject matter, and duration before repeating the format.
Compare multiple clips from similar topics instead of making decisions based on one upload. Your objective is to identify editing patterns that consistently improve the viewing experience.
Which Editing Software Should You Use for YouTube Clips?
Select your editing software based on the work you need to complete. You don’t need several subscriptions to begin, and you shouldn’t pay for advanced features before your workflow requires them.
| Software | Best for | What it helps you do |
|---|---|---|
| CapCut | Beginner editing | Trim footage, create captions, and prepare vertical videos |
| OpusClip | AI-assisted clipping | Find potential highlights and reframe longer recordings |
| DaVinci Resolve | Advanced editing | Work with detailed timelines, audio, and visual adjustments |
| Adobe Premiere Pro | Professional projects | Handle precise edits, multiple tracks, and client revisions |
| YTClip | Browser-based clipping | Select start and end points from a public YouTube video |
| Riverside, VEED, and Kapwing | Online editing | Edit recordings, add captions, and prepare short-form videos |
CapCut: A Beginner-Friendly Video Editor
CapCut is a practical starting point for learning video trimming, captions, and vertical editing. Its editor supports automatic captions that you can review and correct before exporting.
Start by learning its timeline, cutting controls, text placement, and export settings. You don’t need elaborate transitions or advanced effects for every clip.
A clean edit with readable captions, natural pacing, and suitable framing is a better starting point than an overloaded video.
Visit the official CapCut website to explore its editing tools.
OpusClip: AI-Assisted Highlight Selection
OpusClip can help you identify potential highlights from long recordings and prepare them with captions and suitable framing.
This can save time when reviewing lengthy podcasts, interviews, and livestreams. However, you should still watch every suggested clip before exporting it.
Check that the selected moment retains its original meaning, the opening is interesting, and the captions are accurate. An automated tool may select an incomplete answer or miss the context that makes a moment worthwhile.
AI suggestions should make your workflow faster, not replace your editorial judgment.
Check the current OpusClip plans and features for available credits, export options, and plan restrictions.
DaVinci Resolve: Advanced Editing with a Free Version
DaVinci Resolve is worth considering when you need more editing control without immediately subscribing to professional software.
Its free version provides a wide range of post-production tools, while the Studio edition offers additional capabilities.
Choose it when your projects require detailed timelines, audio adjustments, colour correction, or precise editing control.
Visit the official DaVinci Resolve website to compare the available versions.
Adobe Premiere Pro: Editing for Professional Projects
Adobe Premiere Pro is suitable for more advanced clipping projects involving multiple tracks, precise trimming, layered graphics, and client revisions.
It can be useful when you handle recurring editing assignments and need greater control over the production process. However, you don’t need to start with a professional subscription while you’re still learning how to identify and edit strong moments.
Explore the official Adobe Premiere Pro features and plans before choosing a subscription.
YTClip: Browser-Based Video Clipping
YTClip is a browser-based option when you already know which moment you want to extract from a public YouTube video.
You can paste a video link, preview the recording, choose the start and end timestamps, and export the selected moment.
Its website currently advertises three free clips per month, with each free clip limited to 60 seconds. Paid plans offer additional export and editing features, so check the current limits before using it for regular client work.
Try the YTClip online clipping tool to explore its current options.
Remember that a tool’s ability to process a public YouTube link does not give you permission to republish the footage. Use it only for content you own or are authorized to edit and publish.
Riverside, VEED, and Kapwing: Online Editing and Captioning
Riverside focuses on recording and repurposing interviews and podcasts, while VEED and Kapwing provide browser-based video editing and captioning workflows.
These applications can suit different clipping projects, particularly when you don’t want to install a full desktop editing application.
Before selecting one, compare its supported file formats, export quality, watermark restrictions, caption tools, and current plan limits.
My recommendation: Start with CapCut for manual editing. Add OpusClip when reviewing long recordings becomes time-consuming. Consider DaVinci Resolve or Premiere Pro when your client projects require more precise editing control. You don’t need every tool to produce a good clip.
How Can You Make Money Clipping Videos?
Once you can produce consistent edits, you can explore three ways to make money clipping videos: work directly with creators, participate in paid clipping campaigns, or monetize your own YouTube channel.
These approaches have different requirements. Client work pays for an agreed editing service, campaigns pay according to their specific conditions, and your own channel must qualify for YouTube monetization.
Build a Portfolio That Demonstrates Your Editing Skills
If you want to earn money clipping YouTube videos, prepare a portfolio that demonstrates what you can actually deliver.
Start with two or three strong sample edits. Show that you can identify an interesting moment, preserve its context, create readable captions, and produce a clean vertical video.
Your portfolio should demonstrate:
- A strong opening hook.
- Natural cuts and a complete ending.
- Accurate captions.
- Suitable vertical framing.
- Clear audio and natural pacing.
- Samples relevant to the niche you want to work in.
Use recordings you own or footage you have permission to use. If you’re approaching a gaming streamer, demonstrate your editing ability with gaming content rather than unrelated podcast highlights.
Prepare a simple portfolio page or shared folder containing your sample clips, editing services, and supported delivery formats.
You can also keep a record of the opening hook, caption style, editing approach, and performance of your published work. This helps demonstrate how your editing decisions improve over time.
Your goal is to show creators that you can deliver a consistent editing standard, not simply list the applications you know.
Find Creators Who Need Help Producing Shorts
Look for podcasters, gaming streamers, interview channels, and other creators who need assistance turning longer recordings into YouTube Shorts.
Send a personalized message with two relevant sample edits. Explain what you can deliver and ask whether they’re interested in working with an independent clipper.
Before starting a project, agree on:
- The number and length of clips.
- Whether you select timestamps or the creator provides them.
- Captions, framing, and export formats.
- Deadlines and revision limits.
- Publishing responsibilities and usage rights.
- Payment amount and payment schedule.
You can charge per clip, per project, through a monthly retainer, or through an agreed performance-based arrangement.
Calculate Your Costs Before Quoting a Client
Don’t price a clipping project only by the number of finished videos.
Reviewing four hours of footage to find five worthwhile highlights can require considerably more work than editing five timestamps supplied by a creator.
Before quoting a fee, estimate:
- Source review: How much time will you spend watching the recordings and identifying moments?
- Editing: How many clips are required, and how complex are the cuts?
- Finishing: Are captions, animations, graphics, and audio adjustments required?
- Versions: Does the creator need separate exports for YouTube, TikTok, and Instagram Reels?
- Revisions: How many rounds of corrections are included?
- Delivery: Are you supplying video files only, or also uploading and managing posts?
A practical way to establish your minimum fee is to estimate your total working hours, multiply them by your minimum acceptable hourly rate, and account for software costs, revisions, and other project expenses.
When you’re new, consider offering a small paid trial. It gives the creator an opportunity to evaluate your work and helps you understand the actual workload before agreeing to recurring assignments.
Find Paid Clipping Campaigns and Check Their Terms
Paid clipping campaigns provide approved footage and a brief explaining what you can publish, where you can publish it, and how your submissions are evaluated.
These campaigns can be useful when you don’t want to spend time negotiating an individual arrangement with every creator.
However, don’t judge a campaign only by its advertised CPM. Review its deliverables, publishing requirements, approval process, payment conditions, and expected production time.
Evaluate these details before editing:
| Campaign detail | What to check |
|---|---|
| Approved footage | Are you authorized to use the supplied source material? |
| Eligible platforms | Does the campaign accept YouTube Shorts, TikTok, or Instagram Reels? |
| Qualifying views | How are views counted, verified, and attributed? |
| Minimum threshold | Must a clip reach a particular number of views before earning money? |
| Payment cap | Is there a maximum amount payable per clip? |
| Remaining budget | Is sufficient campaign funding still available? |
| Deadline | How much time do you have to publish and submit your clip? |
| Approval process | What can cause your submission to be rejected? |
| Fees and settlement | Are fees deducted, and when can you withdraw your earnings? |
Explore Clipping Opportunities on Whop
Whop hosts clipping communities and campaign opportunities where you can explore potential paid work.
However, don’t assume that every community uses the same payment model or provides the same opportunities. Membership requirements, approved footage, training, and payout conditions vary between communities.
Explore the Whop clipping communities and review each offer before joining.
When evaluating an opportunity, check whether it is accepting clippers, whether you need to complete training, which videos you are allowed to use, and how payments are calculated.
Don’t pay for membership simply because a community advertises guaranteed clipping income. Read its terms and evaluate the actual earning conditions before spending money.
Find Brand Campaigns Through Content Rewards
Content Rewards connects brands and agencies with clippers who create short-form videos using approved campaign material.
The platform provides a campaign-based workflow, where you review available opportunities, follow their publishing requirements, and submit your finished videos for evaluation.
A typical workflow is:
- Connect and verify the social media account you plan to use.
- Open Discover and filter campaigns by platform, category, and payment model.
- Open a campaign and read its complete brief.
- Check the approved footage, eligibility conditions, qualifying views, payment caps, and deadlines.
- Join an available campaign or apply if the brand requires approval.
- Edit and publish your clip according to the campaign instructions.
- Submit the public post link for review.
Content Rewards currently requires standard submissions to come from a connected and verified account. The post must be public and submitted within 30 minutes of publishing. Some campaigns use a pre-approval process in which you submit a draft before publishing.
Read the Content Rewards video submission requirements before participating.
Understand How Clipping Campaigns Pay
Clipping campaigns can use different payment arrangements. Three common models are:
- CPM: Payment for every 1,000 qualifying views, subject to the campaign’s payment cap and available budget.
- Per post: A fixed payment for an approved clip that meets the required conditions.
- Retainer: A recurring payment for an agreed set of deliverables during each payment cycle.
Content Rewards currently explains these three campaign payment models in its campaign payment documentation.
Calculate the potential payout before editing.
For example, imagine a hypothetical campaign offers a $1 CPM. If your clip receives 20,000 qualifying views, the calculation would be:\[ 20,000 \div 1,000 \times \$1 = \$20 \]
Your calculated payment would be $20 before applicable deductions.
However, suppose the same campaign has a hypothetical $15 payment cap per clip. Your potential $20 payout would be limited to $15 before applicable deductions.
Also compare that amount with the time required to review the source recording, find the moment, edit the video, publish it, and submit the link.
A campaign with a lower CPM may be more worthwhile if its footage is easier to edit and its payment conditions are straightforward.
Campaign recommendation: Read the complete campaign brief and calculate your potential payout before editing. A high advertised CPM isn’t valuable when the campaign has a restrictive payment cap, limited budget, or excessive production requirements.
How to Avoid Copyright Problems When Clipping Videos
Copyright should be part of your clipping workflow before you start editing or publishing.
There is no editing setting, caption style, or video transformation that guarantees protection from copyright claims. Even a short excerpt can contain copyrighted material that you don’t have permission to republish.
Get Permission and Understand Copyright Exceptions
Get permission from the original creator unless you already have a valid licence or another legal authorization to use the footage.
Check whether the permission covers commercial use, other social platforms, editing, and third-party material included in the recording.
Fair use and fair dealing are not universal permissions to repost videos. Copyright exceptions vary by country, and the applicable rules depend on the circumstances.
In India, Section 52 of the Copyright Act, 1957 recognizes specific fair-dealing exceptions, including:
- Private or personal use, including research.
- Criticism or review of a work or another work.
- Reporting current events and current affairs, including certain public lectures.
Simply clipping a creator’s video for entertainment or reposting it to attract views isn’t automatically covered by these fair-dealing exceptions.
In the United States, fair use is evaluated case by case using four factors:
- The purpose and character of the use.
- The nature of the copyrighted work.
- The amount and substantiality of the portion used.
- The effect of the use on the potential market for the original work.
The U.S. Copyright Office Fair Use Index explains how these factors are considered.
Don’t rely on rules such as “use less than 30 seconds” or “give credit and you’re safe.” Neither is a universal copyright exemption. Cropping, mirroring, changing playback speed, or adding captions also doesn’t automatically make unauthorized content legal to publish.
Understand Content ID Claims and Copyright Strikes
YouTube uses Content ID to identify copyrighted material that matches its reference files.
Depending on the copyright owner’s settings, a Content ID claim can:
- Block a video from being viewed.
- Monetize the video by running advertisements, sometimes sharing revenue with the uploader.
- Track the video’s viewership.
A Content ID claim is different from a copyright strike. A claim does not automatically mean your channel has received a strike. A strike can result from a valid copyright removal request.
There is an additional restriction worth remembering when creating longer Shorts.
YouTube blocks Shorts between one and three minutes long when they have an active Content ID claim, regardless of the claim’s policy. The video remains blocked until the claim is resolved. An active Content ID claim does not automatically produce a copyright strike.
Read YouTube’s copyright claim and dispute instructions and three-minute Shorts copyright rules before publishing clips that contain third-party material.
Understand YouTube’s Reused Content Policy
Having permission to publish another creator’s footage doesn’t automatically make your clipping channel eligible for monetization.
YouTube’s reused content policy considers whether your channel adds significant original commentary, substantive modifications, or educational or entertainment value.
YouTube reviews channels as a whole, including videos, titles, descriptions, and channel information. The policy specifically covers content such as commentary, clips, compilations, and reaction videos.
A podcast highlight with only basic captions and simple trimming may not provide enough original contribution.
More meaningful additions can include:
- Original commentary that explains or discusses the moment.
- Critical analysis that examines what the creator said or demonstrated.
- Additional explanation that gives viewers useful context.
- Creative storytelling that meaningfully changes how viewers experience the source material.
YouTube also identifies repetitive or mass-produced videos as inauthentic content. Simply automating the clipping process does not replace the need to provide original value.
Remember: Copyright permission, reused content, and inauthentic content are separate considerations. A creator’s permission does not guarantee YouTube monetization approval.
Can a YouTube Clipping Channel Get Monetized?
You can work towards monetizing a YouTube Shorts clipping channel, but consistently publishing videos doesn’t guarantee acceptance into the YouTube Partner Program (YPP).
Your channel must meet the applicable eligibility requirements, follow YouTube’s monetization policies, and pass the channel review.
Meet the YouTube Partner Program Eligibility Requirements
YouTube offers two important eligibility levels. The lower threshold provides access to certain fan-funding and Shopping features, while the higher threshold is used for advertising and YouTube Premium revenue sharing.
In eligible countries, including India, the expanded YPP provides earlier access to selected monetization features.
1. Earlier access to monetization features
You need:
- 500 subscribers.
- Three valid public uploads during the previous 90 days.
- Either 3,000 qualified public watch hours during the previous 12 months or 3 million qualified public Shorts views during the previous 90 days.
This level can unlock eligible features such as Channel Memberships, Super Chat, Super Stickers, Super Thanks, and Shopping. It does not automatically provide Shorts advertising revenue sharing.
2. Advertising and YouTube Premium revenue sharing
Under the requirements applicable through January 31, 2027, you need:
- 1,000 subscribers.
- Either 4,000 qualified public watch hours during the previous 12 months or 10 million qualified public Shorts views during the previous 90 days.
You also need to satisfy the other YPP requirements and pass the channel review.
Shorts Feed watch time does not count towards the 4,000-hour long-form watch-time threshold.
What Changes to YouTube Monetization Begin on February 1, 2027?
YouTube has announced an important change for new creators applying for advertising and Premium revenue sharing.
Effective February 1, 2027
Starting February 1, 2027, new applicants will need:
- 1,000 subscribers.
- Either 8,000 qualified watch hours during the previous 365 days or 20 million qualified Shorts views during the previous 90 days.
The earlier 500-subscriber threshold for fan funding, YouTube Shopping, and Creator Partnerships remains unchanged, subject to the applicable requirements. Existing YPP members are not affected by the new entry thresholds.
YouTube has also announced that, from February 1, 2027, Shorts advertising and Premium revenue sharing will require maintaining 10 million qualified Shorts views during the previous 90 days for the relevant monthly payout. Channels below that threshold remain in YPP and can continue earning from eligible long-form content.
Check the YouTube Partner Program changes and expanded YPP eligibility requirements before planning your monetization strategy.
Why Creator Permission Doesn’t Guarantee Monetization
You might have written permission from a streamer to publish their highlights, but YouTube can still determine that your channel relies too heavily on reused content.
Don’t treat captions, basic trimming, and automatic reframing as your entire editing strategy.
Think about what additional value your channel provides through original commentary, analysis, explanation, or a meaningful creative narrative.
For example, instead of simply publishing a podcast excerpt with animated subtitles, you could add original commentary that explains the speaker’s argument, provides relevant context, or critically examines the discussion.
There is no editing technique that guarantees monetization approval. Your contribution must be meaningful, and the channel must comply with the applicable YouTube policies.
There is also no guaranteed monetization timeline. Your results depend on audience interest, content quality, publishing consistency, and policy compliance.
You can pursue paid clipping work while building your own channel, provided you keep client agreements, campaign requirements, and your own channel’s monetization separate.
Common YouTube Clipping Mistakes to Avoid
Avoid these mistakes when developing your YouTube clipping workflow.
- Choosing too many niches: Publishing unrelated topics makes it harder to establish a recognizable channel. Start with one category and understand what its audience responds to.
- Editing before securing permission: You could spend hours creating videos you cannot legally publish. Confirm your usage rights before starting.
- Overusing effects: Transitions and animations cannot compensate for a weak moment or confusing edit. Improve your selection and pacing first.
- Relying completely on AI: Review every selected moment, correct captions, preserve context, and check the final framing yourself.
- Ignoring campaign conditions: Review approved footage, qualifying views, deadlines, and payment caps before editing.
- Accepting unclear payment terms: Agree on fees, revisions, deliverables, publishing responsibilities, and usage rights before accepting client work.
- Publishing without mobile checks: Review the final captions, cropping, and audio on a smartphone.
- Expecting immediate income: Building a portfolio, finding reliable clients, and qualifying for YouTube monetization require consistent work.
The best way to improve is to treat every clip as a complete editing project. Focus on selecting a strong moment, preserving its meaning, and delivering a video that viewers actually want to finish.
YouTube Clipping FAQs
Can You Start Clipping YouTube Videos for Free?
Yes. You can start with a computer or smartphone and a free video editing application.
You don’t need paid software or an expensive editing setup to learn trimming, captions, vertical framing, and export settings.
However, you still need footage you’re authorized to edit and publish. Free editing software does not provide permission to use another creator’s content.
How Many YouTube Clips Should You Upload Each Day?
There is no universal number of daily uploads that guarantees channel growth.
Start with a publishing schedule you can maintain without sacrificing editing quality. Review your audience retention, engaged views, and engagement before increasing your output.
Publishing fewer complete and interesting videos is better than uploading several weak clips simply to maintain a daily target.
Can AI Tools Help You Run a YouTube Clipping Channel?
Yes. AI clipping tools can help identify highlights, generate captions, shorten pauses, and reframe long-form videos.
However, you must still check the meaning of each selected moment, correct transcription errors, preserve context, and confirm your rights to publish the footage.
Use AI to reduce repetitive editing work, not to replace your editorial judgment.
How Long Does It Take to Monetize a Clipping Channel?
There is no guaranteed monetization timeframe.
You must build an audience, meet the applicable YouTube Partner Program requirements, and pass YouTube’s channel review.
Even a channel receiving substantial views can face monetization problems if its videos rely too heavily on reused or repetitive content.
What Happens If Your Clipping Channel Gets a Copyright Strike?
YouTube may remove the affected video following a valid copyright removal request and apply a copyright strike to your channel.
A Content ID claim is different and does not automatically result in a copyright strike.
Check the copyright notice in YouTube Studio, identify the claimed material, and understand the reason for the restriction before deciding whether you have grounds to dispute it.
Final Thoughts: Focus on Creating Better Clips
You don’t need an elaborate setup to start clipping YouTube videos. You need a clear niche, authorized source footage, and a repeatable process for turning worthwhile moments into finished Shorts.
Start with one creator, identify several promising moments, and record their timestamps before editing. Create a small batch of sample clips, review their openings and pacing, and check the exported videos on a smartphone.
Once your work demonstrates consistent quality, use your portfolio to approach creators, offer paid editing services, or evaluate suitable clipping campaigns.
Don’t measure your progress only by the number of clips you publish. Measure it by how well you select moments, how efficiently you edit them, whether your clients can use the finished videos, and how viewers respond.
Also, keep copyright and monetization requirements in mind from the beginning. In the United States, fair use remains a case-specific assessment rather than a fixed number of seconds or percentage of a video.
Become a better clipper before trying to become a bigger one. Your ability to recognize strong moments, preserve their meaning, and turn them into worthwhile short-form videos is what makes your work valuable to viewers and creators.
Visit Our Post Page: Blog Page
Discover more from Izoate
Subscribe to get the latest posts sent to your email.