
Did Fleeca just reject Jason and Lucia? Don’t let that rejection cost you your early-game fortune. Learn how to get a bank account in GTA 6. Unlock BuckMe after Coming Home, find ATMs, and move $5,000 into Family Savings before Tourist Trap wipes your money. Protect the cash you’ve worked for before Chapter 1 ends.
GTA 6 drops you into a massive open world packed with ways to earn money, but there is one early catch: you cannot walk into a bank and open an account on your own. Apparently, even basic banking requires a story mission.
If you are trying to figure out how to get a bank account in GTA 6, you must progress through Chapter 1 until the 13th main mission, Buck Me (Set Up Bank Account), begins roughly half a day after completing Coming Home (Lucia’s Release). After running a credit check at Fleeca Bank, the manager rejects both Jason and Lucia and steers them onto a fintech banking app called BuckMe instead.
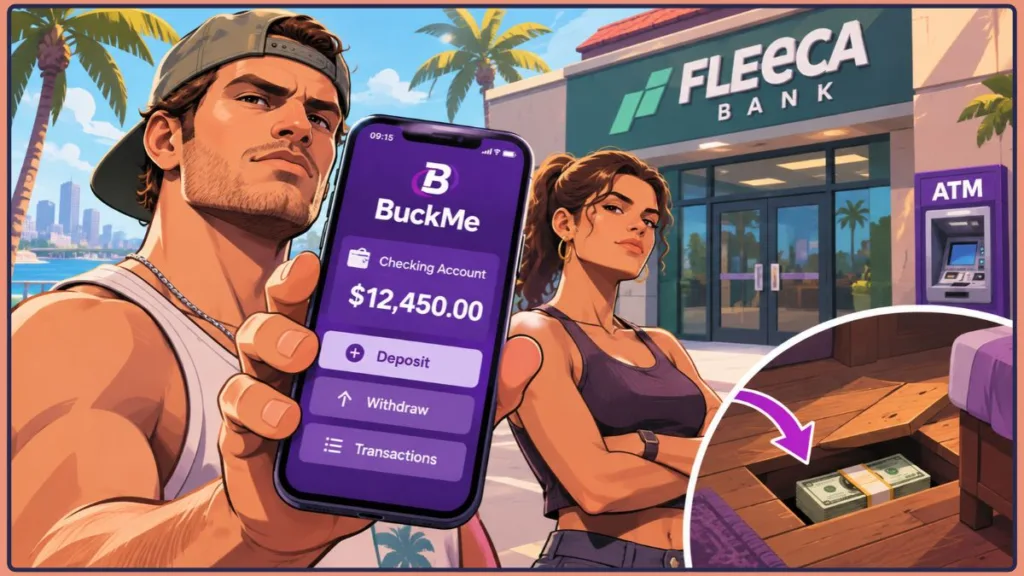
Getting BuckMe running early is not just about convenience—certain points in the campaign will not advance until Jason and Lucia have enough money saved up, including a $15,000 requirement near the end of Chapter 2. Here is how to unlock banking, protect your early cash, and avoid the traps that can cost you thousands.
GTA 6 Bank Account Unlock: Quick Facts
| Feature | Details |
| Unlock Mission | Buck Me (Chapter 1, Mission #13 — triggers roughly half a day after Coming Home) |
| Bank Location | Fleeca Bank in Key Lento, Mariana County |
| Pre-Unlock Safe Spot | Under the loose floorboards in Jason’s bedroom |
| Cash Deposit Method | Physical ATMs only (cannot deposit paper bills from the BuckMe phone app) |
Where to Store Cash Before You Unlock BuckMe
Before the Buck Me mission unlocks, both Jason and Lucia can carry up to $20,000 in pocket cash each. Carrying a full wallet around Key Lento, however, is one of the fastest ways to wipe out your early progress.
Important Survival Tip: Getting Wasted or Busted wipes out 100% of your carried pocket cash, charges a small BuckMe maintenance fee (once unlocked), and usually costs you any stash bags on your person.
Until you can use ATMs, store spare bills inside Jason’s house in Key Lento:
- Walk into Jason’s bedroom and approach the loose floorboards until the interaction prompt appears.
- Open the hidden compartment and deposit your clean pocket cash.
- Return anytime to withdraw cash for early weapons or supplies without risking it during free-roam.
Clean Cash vs. Stolen Loot (Stash Bags): Only clean cash can go under the loose floorboards or into an ATM. Jewelry, narcotics, and Marked Bills sit in separate stash bags until fenced or laundered. When carrying hot loot during free-roam, store stash bags in your car trunk or hand them to your partner to fence for you—you take a slightly smaller cut, but it saves the drive and keeps valuables off your back during police chases.
How to Unlock Banking in the “Buck Me” Mission
You play Buck Me as Jason after Lucia calls asking for help opening an account to receive her community service payments. Follow these steps to complete setup:
- Speed Up Lucia’s Call: After completing Coming Home (Lucia’s Release), press Up on the D-Pad to check the in-game clock on your phone, or sleep at Jason’s house to pass time quickly until Lucia calls.
- Drive to Fleeca Bank in Key Lento: Head to the Fleeca Bank branch in Key Lento, Mariana County, walk inside, and speak to the bank teller about opening an account.
- Meet the Bank Manager: Follow the teller’s directions to the right-corner desk, speak with the bank manager (the man in the blue shirt), and follow him into the back office.
- Pick “Saved Cash”: When Lucia joins the meeting and the manager asks about deposit funds, select Saved Cash (breakdown below).
- Activate BuckMe at Home: Once the scene cuts back to Jason’s house, follow this menu path: Open Phone > Purple “B” BuckMe App > Watch Intro Video.
- Complete the Tutorial Transfer: Finish setup via BuckMe App > Checking Account > “Buck Yourself” > “Buck Yourself” again to transfer your $100 welcome bonus into Family Savings.
Time-Skip Tip: Arrived at Fleeca Bank in the evening after closing hours? Walk up to the front doors anyway—the game automatically skips time forward to 9:15 AM so you can start the mission immediately.
Saved Cash or Say Nothing? Pick the Relationship Boost
When the bank manager asks if Jason and Lucia have deposit money ready, you choose between two dialogue options:
- Saved Cash: Jason mentions the money he set aside, improving his relationship with Lucia.
- Say Nothing: Jason stays quiet, hurting his relationship with Lucia with zero financial upside.
Dialogue Verdict: Always choose Saved Cash. Neither response changes the banking outcome, and managing money transparently matters—even your later Family Savings contributions influence Jason and Lucia’s relationship interactions as the story unfolds.
How to Deposit Cash Into BuckMe (Missing ATM Marker Fix)
Right after activating BuckMe, you receive two follow-up tasks: Deposit Cash Into BuckMe and Save for the Future. Because neither places an automatic map marker on your minimap, many players get stuck wondering where to go.
Important GTA Online Difference: Unlike GTA Online‘s Maze Bank website, the BuckMe phone app cannot deposit physical pocket cash remotely. You must visit a physical ATM to bank paper bills, though Checking > Family Savings transfers work anywhere from your phone.
Find the Nearest ATM and Track Banking Missions
- Open Jason’s phone and navigate to BuckMe App > ATM Finder – Set Destination (you can also filter for ATMs in the map index).
- Follow the GPS route to the closest ATM near Jason’s house at Chuck’s Tackle & Shot—the same shop where the Kingfishers tried to jump Jason.
- Interact with the ATM to deposit clean pocket cash into BuckMe Checking (you can also withdraw cash from Checking at any ATM later).
- To check your progress on markerless savings goals anytime, go to Map Screen > Storybook Icon (Quest List) > Save for the Future.
Two Small Tricks That Save Time After Every Job
- Fence First, Bank Second: After any robbery, sell stolen stash bags to a matching fence (or have your partner deliver them, and later use stash boxes inside owned garages for fence pickups) before stopping at an ATM to deposit the clean payout.
- Instant HUD Balance Check: Tap the D-Pad to view both your BuckMe balance and pocket cash in the top-right corner of the screen without opening your phone.
4 BuckMe Rules and Early-Game Traps to Avoid
Unlike GTA V’s single bank balance, GTA 6 divides your usable money across three pools—Pocket Cash, BuckMe Checking, and BuckMe Family Savings—each with different access and risk rules.
| Feature | Pocket Cash | BuckMe Checking | BuckMe Family Savings |
| Max / Cap Behavior | Up to $20,000 per character | $15,000 to $2,000,000 by tier; excess pay is held | Milestone tiers ($5,000 to $2,000,000) |
| How to Deposit | Looted or earned on hand | Physical ATMs only | Anywhere via BuckMe phone app |
| Can You Withdraw? | Already on hand | Yes, at any ATM | No — permanently locked |
| Death / Arrest Risk | 100% lost (plus carried stash bags) | Small BuckMe maintenance fee only | 0% risk — never lost |
Rule 1: Family Savings Locks Cash Forever—But Unlocks Tiers, Perks, and Interest
Selecting Checking Account > “Buck Yourself” transfers money into the shared Family Savings fund for Tomas tied to Save for the Future.
One-Way Lock Warning: Cash moved into Family Savings can never be withdrawn for weapons, cars, or upgrades. Always keep enough liquid cash in Checking for immediate gear before locking extra funds away.
In exchange, Family Savings generates higher interest payments as you climb tiers, raises your Checking Account cap, and unlocks permanent discounts:
| BuckMe Tier | Family Savings Goal | Checking Account Limit | Passive Perk |
| Buckin’ Broke | $5,000 | $15,000 | None |
| BuckeDry | $10,000 | $100,000 | 20% off all RydeMe journeys |
| BuckMe Gold | $100,000 | $500,000 | 20% off all garage purchases |
| BuckMe Premium (“BuckMe Black”) | $500,000 | $2,000,000 | 10% off all liveries |
| Rich as Buck | $1,000,000 | $2,000,000 | None |
Chapter 4 Shortcut: Do not burn yourself out grinding $500,000 early just for a bigger cap—you automatically receive BuckMe Premium (called “BuckMe Black” in your phone alert) at the start of Chapter 4, regardless of your Family Savings total.
Rule 2: Hitting Your Checking Cap Holds Payouts (Without Deleting Them)
Once your BuckMe Checking Account reaches its current balance ceiling, incoming job and mission payments are held until you spend money down or transfer funds into Family Savings.
Important Payout Protection: Held payments are never lost. Pending payouts stay queued and clear automatically as soon as you free up Checking space or hit a story upgrade—just monitor your cap before big jobs so your cash flow keeps moving toward story gates like Chapter 2’s $15,000 requirement.
Rule 3: Use the “$0 Pocket Cash” Rule Everywhere
Shops only accept physical pocket cash for purchases costing up to $999, while anything priced at $1,000 or more automatically draws from BuckMe.
The “$0 Pocket Cash” Rule: If you carry $0 in pocket cash, even small purchases under $1,000 automatically pull straight from BuckMe Checking.
Because carrying bills exposes 100% of your wallet to death or arrest—whereas BuckMe Checking only takes a small maintenance fee—there is zero reason to keep loose bills in your pockets once ATMs unlock.
Rule 4: Protect Your Progress Before “Tourist Trap” (Chapter 1 Warning)
Minor Chapter 1 Transition Warning (No Story Spoilers): When Chapter 1 concludes with Tourist Trap, a scripted setback wipes all pocket cash, your regular BuckMe Checking balance, any cash left under Jason’s floorboards, and Jason’s personal car along with its upgrades. Pocket cash carried into the preceding mission, Recalibration, is also lost.
Before launching Tourist Trap, follow these three protective steps:
- Create a Manual Save & Cap Family Savings at $5,000: Make a manual save before starting, then move up to $5,000 into Family Savings—it is the only cash pool that survives the transition into Chapter 2.
- Spend Remaining Liquid Cash on Permanent Unlocks: Put leftover Pocket Cash or Checking funds toward Ammu-Nation weapons, clothing, or tattoos, all of which carry over.
- Wait for Mid-Game Money Loops to Grind: Early small-time grinds pale next to later chapters—selling stolen vehicles to Moses in Chapter 2 and unlocking the Dye Pack Jammer during Chapter 3’s Credit Check to launder Marked Bills through Yasmani pay far faster without Chapter 1 wipe risk.
GTA 6 Bank Account FAQs
Can You Deposit Cash Directly Through the BuckMe Phone App?
No. The BuckMe phone app only manages digital balances—such as checking funds, moving money from Checking > Family Savings, and opening ATM Finder. Physical bills must be deposited at a physical ATM.
Can You Withdraw Money From Family Savings in GTA 6?
No. Transfers into Family Savings via “Buck Yourself” are permanent and cannot be reversed. However, that money is completely immune to death penalties and story wipes, earns higher interest across tiers, and unlocks larger Checking limits and discounts.
Do Jason and Lucia Share a Bank Account in GTA 6?
Jason and Lucia share the joint Family Savings pot inside BuckMe (tracked under Save for the Future), while maintaining separate Checking balances and separate $20,000 pocket cash caps for day-to-day spending.
How Do You Bank Marked Bills and Stolen Jewelry in GTA 6?
You cannot deposit stolen valuables or Marked Bills straight into an ATM. Sell jewelry, electronics, or narcotics to a matching fence for clean cash, and wait until Chapter 3’s Credit Check unlocks the Dye Pack Jammer to launder Marked Bills—Yasmani in Vice City pays the strongest documented rates for both jewelry and Marked Bills.
Visit Our Post Page: Blog Page
Discover more from Izoate
Subscribe to get the latest posts sent to your email.