
Trying to access a team inbox but can’t find it in Outlook in 2026? Learn how to add a shared mailbox in Outlook with quick step by step instructions. From automatic setup and manual configuration to sending emails from a shared address and fixing common visibility issues. Stay in control of your team email today.
If your IT admin told you that you now have access to a shared mailbox but you can’t find it anywhere in Outlook, you’re in the right place. This is one of the most common questions people have after being added to a team inbox — and the good news is that it’s usually a quick fix.
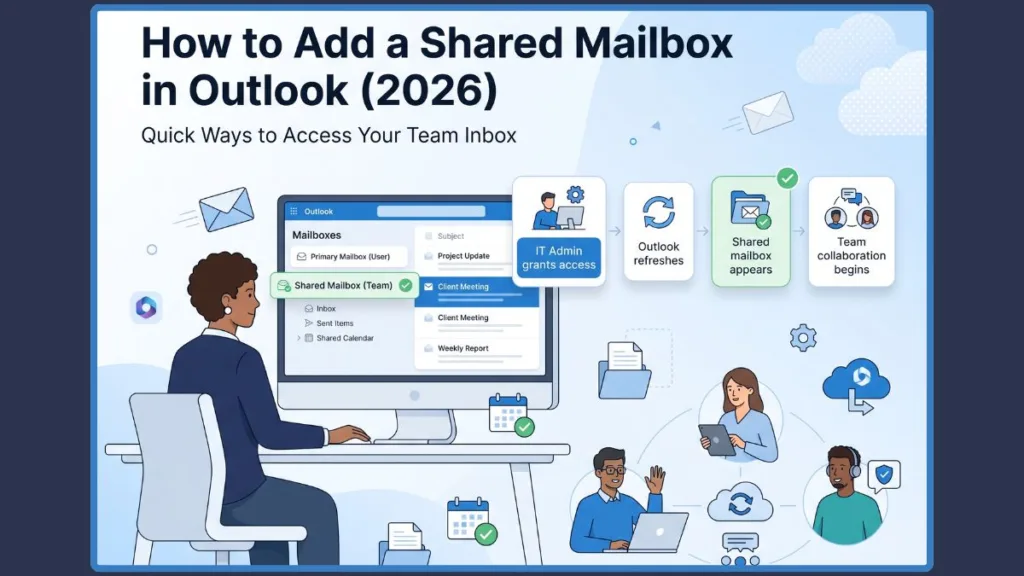
In some cases, Outlook will add the shared mailbox on its own after a simple restart. In other cases, you’ll need to add it manually — and that’s exactly what this guide walks you through. You’ll also learn how to send emails from the shared address and what to do if something doesn’t go as expected.
Quick Answer: How to Add a Shared Mailbox in Outlook
If your Microsoft 365 administrator has already granted you Full Access to a shared mailbox, Outlook will often add it to your folder pane automatically after you restart the app. If it doesn’t appear on its own, you can add it manually in New Outlook, Classic Outlook, Outlook on the web, or the Outlook mobile app — all covered step by step in this guide.
What Is a Shared Mailbox in Outlook?
A shared mailbox is a single email address that an entire team can access and manage together. Instead of one person owning the inbox, everyone on the team can read incoming messages, reply to them, and keep track of conversations — all from the same shared email address.
You’ve probably seen shared mailboxes in action without realizing it. Addresses like support@company.com, info@company.com, or hr@company.com are almost always shared mailboxes. They give teams a professional, centralized point of contact without routing everything through one person’s personal account.
Here’s what makes a Microsoft 365 shared mailbox practical for everyday use:
- Multiple people can access the team mailbox at the same time
- It can include a shared calendar for scheduling team events
- All sent messages stay in one place so the whole team can see what’s been replied to
- It works across Outlook for desktop, web, and mobile
Unlike a personal Outlook mailbox, a shared mailbox doesn’t have its own username or password. Instead, your Microsoft 365 administrator grants you access, and you open the shared Outlook mailbox directly through your own account — no separate login required.
The one thing to know before you get started: your IT admin must give you access first. The shared mailbox won’t appear in Outlook until they’ve added you as a member and assigned the right permissions.
Tip: If you’re not sure whether your admin has set up your access yet, send them a quick message before working through the steps below. It’ll save you from going through the setup process only to find out the permissions aren’t in place yet.
What You Need Before Adding a Shared Mailbox in Outlook
Before jumping into the setup steps, take a moment to run through this quick checklist. Having everything in place first will make the process much smoother.
- You need a Microsoft 365 work or school account. Shared mailboxes are part of Microsoft 365 and Exchange environments. Personal Outlook.com accounts don’t support them.
- Your Microsoft 365 administrator must grant you Full Access. This is the permission that allows you to open and manage the shared mailbox. Without it, the mailbox simply won’t appear.
- Restart Outlook after your admin assigns permissions. This is one of the most commonly missed steps. Outlook needs to refresh before it can detect the new shared mailbox.
- Give it a few minutes if access was just granted. Permission changes don’t always take effect instantly. If you restart Outlook and still don’t see the shared mailbox, wait a few minutes and try again.
Once all of these are in place, adding the Outlook shared mailbox is straightforward. The next sections walk you through every version of Outlook, step by step.
Note: Not sure if your admin has granted access yet? A quick message to your IT team before you start will confirm everything is ready on their end.
Shared Mailbox Permissions Explained: Full Access, Send As, and Send on Behalf
Your admin can give you different levels of access depending on what you need to do with the shared mailbox. Here’s a simple breakdown of what each permission means in practice:
| Permission | What It Lets You Do |
|---|---|
| Full Access | Open the shared mailbox, read emails, manage folders, and organize messages. This is the standard permission most users receive. |
| Send As | Send emails that appear to come directly from the shared email address. Recipients only see the shared mailbox name — not your personal email. |
| Send on Behalf | Send emails from the shared mailbox while still showing your identity. Recipients will see something like “Alex on behalf of Support.” |
Important: Having Full Access lets you open and manage the shared mailbox, but it does not automatically let you send emails from it. To send emails from the shared address, you’ll also need Send As or Send on Behalf permission from your Microsoft 365 administrator. Reading and sending permissions are managed separately.
Most users only need Full Access to read and manage the mailbox day to day. If your role requires responding to customers or team contacts directly from the shared email address, ask your admin to add Send As permission on top of your existing access.
Tip: Not sure what permissions you currently have? Try opening the shared mailbox first. If you can read emails but the shared address doesn’t appear in your From field when composing, ask your admin to add Send As permission.
Check If Outlook Already Added Your Shared Mailbox Automatically
Before going through any manual setup steps, it’s worth checking whether Outlook has already done the work for you.
When an admin grants you Full Access to an Exchange shared mailbox, Microsoft 365 often adds it to your Outlook automatically. This is handled through a feature called automapping, which detects your new access and places the shared mailbox directly in your folder pane — no extra steps needed on your end.
Here’s what to do first:
- Step 1: Close Outlook completely and reopen it. A full restart gives Outlook the chance to detect any new mailboxes linked to your account.
- Step 2: Look in the folder pane on the left side of the screen, just below your primary inbox. Shared mailboxes added automatically will appear here as a separate section.
- Step 3: If you’re using New Outlook, check for a section called Shared with me — that’s where automatically added shared mailboxes appear in the updated interface.
If the shared mailbox is there — great, you’re all set. If it’s not showing up, don’t worry. The next sections cover how to add it manually in every version of Outlook.
Note: Permission changes can sometimes take a few minutes to sync across Microsoft 365. If you just received access and nothing is appearing yet, wait a moment and restart Outlook one more time before moving on to the manual steps.
How to Add a Shared Mailbox in New Outlook
New Outlook has a cleaner, more streamlined design compared to the classic version. If your Outlook has a simplified top bar with a Settings gear icon rather than a full ribbon menu with a File tab, you’re using New Outlook.
If Outlook didn’t automatically display the shared mailbox after you restarted the app, you can add it manually in less than a minute. Here’s how:
- Step 1: Open New Outlook on your computer. Make sure you’re signed in with your Microsoft 365 work or school account.
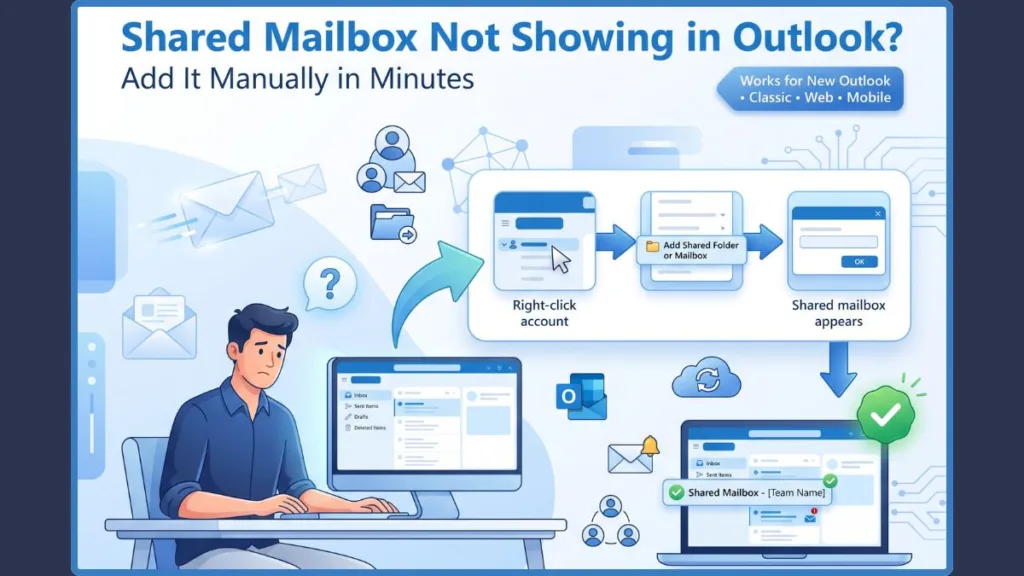
- Step 2: In the folder pane on the left side of the screen, right-click your account name. A small context menu will appear with several options.
- Step 3: Select Add shared folder or mailbox from the menu. This opens a search box where you can look up the shared mailbox you want to add.
- Step 4: Type the name or email address of the shared mailbox. As you type, Outlook will display matching results from your organization’s directory.
- Step 5: Select the correct mailbox from the results. Double-check the email address to make sure you’re adding the right one, especially if your organization has multiple shared mailboxes.
- Step 6: Click Add to complete the process. Outlook will connect to the shared mailbox and add it to your folder pane.
- Step 7: Look for the shared mailbox under the Shared with me section in your folder pane. Click on it to expand the view and access its folders.
Once added, you can browse the shared mailbox, sent items, and any custom folders your team has set up — just like navigating your own Outlook mailbox.
Tip: If you don’t see your account name in the folder pane, look for the three-dot (…) menu next to your email address and select Add shared folder or mailbox from there instead.
How to Add a Shared Mailbox in Classic Outlook
Classic Outlook is the older desktop version with a ribbon menu across the top and a visible File tab in the top-left corner. You’ll find the File tab in the upper-left corner of the Outlook window if you’re using this version — that’s the quickest way to confirm you’re in the right place before following these steps.
Adding an Outlook shared mailbox in the classic version takes a few more clicks than the newer interface, but it’s still straightforward once you know where to look:
- Step 1: Open Outlook and click the File tab in the top-left corner of the window. This opens the Account Information panel.
- Step 2: Click Account Settings, then click Account Settings again from the dropdown menu that appears. This opens the Account Settings window where your email accounts are listed.
- Step 3: In the Email tab, select your Microsoft 365 email account from the list and click Change. This opens the account configuration window for your selected account.
- Step 4: In the window that opens, click More Settings in the bottom-right corner. A separate dialog box will appear with additional configuration options.
- Step 5: Go to the Advanced tab at the top of the dialog box. This is where you can manually add additional mailboxes to your Outlook profile.
- Step 6: Click Add under the mailboxes section. A small input box will appear asking for the mailbox you want to add.
- Step 7: Type the full email address of the shared mailbox — for example, support@company.com — and click OK. The shared mailbox address will now appear in the list of additional mailboxes.
- Step 8: Click OK to close the dialog, then click Next, Finish, and finally Close to save all your changes.
- Step 9: Restart Outlook. After reopening, the shared mailbox will appear in your folder pane below your primary inbox, ready to use.
Note: Not sure whether you’re using Classic or New Outlook? Classic Outlook has a ribbon menu at the top with a clearly visible File tab. New Outlook has a simplified top bar with a Settings gear icon instead.
How to Add a Shared Mailbox in Outlook on the Web (OWA)
If you access your email through a browser rather than a desktop app, you’re using Outlook on the web — also known as OWA. You can reach it by going to outlook.office.com and signing in with your Microsoft 365 work account.
Unlike the desktop versions of Outlook, the web app doesn’t automatically add shared mailboxes to your folder list — even if automapping is enabled. This means you’ll always need to add the shared mailbox manually before you can access it.
There are two ways to do this depending on how you prefer to work.
Add the Shared Mailbox to Your Folder List in OWA
Use this method if you want the shared mailbox to sit alongside your own inbox so you can check both in one place:
- Step 1: Go to outlook.office.com and sign in with your Microsoft 365 work or school account.
- Step 2: In the folder pane on the left, right-click Folders or click the three-dot menu next to it. A context menu will appear with several folder management options.
- Step 3: Select Add shared folder or mailbox from the menu. A search box will appear.
- Step 4: Type the name or email address of the shared mailbox you want to add. Outlook on the web will display matching results from your organization.
- Step 5: Select the correct mailbox from the list and click Add. The shared email account will now appear in your folder pane underneath your own folders, giving you easy access from the same view.
Open the Shared Mailbox in a Separate Browser Tab
Use this method if you spend most of your day working exclusively from the shared mailbox and want a dedicated, full view of it:
- Step 1: Click your profile icon in the top-right corner of the Outlook on the web window.
- Step 2: Select Open another mailbox from the dropdown menu.
- Step 3: Type the shared mailbox email address in the search box and select it from the results.
- Step 4: Click Open. The shared mailbox will open in a new browser tab with its own complete folder view, calendar, and settings.
Tip: The Open another mailbox option is ideal for support agents or receptionists who primarily work from the team mailbox throughout the day. It keeps it completely separate from your personal view, making it much easier to stay focused.
How to Add a Shared Mailbox in Outlook Mobile on iPhone and Android
If you need access to the shared mailbox while you’re away from your desk, the Outlook mobile app has you covered. The steps are the same whether you’re on an iPhone or an Android device.
You won’t sign in to the shared mailbox directly — instead, you add it through your existing Microsoft 365 work account, just like the desktop versions of Outlook.
Note: Once added, the shared mailbox appears inside the Outlook account switcher rather than as a completely separate Outlook account. You can quickly switch between your personal inbox and the shared mailbox without leaving the app.
Here’s how to set it up:
- Step 1: Open the Outlook app on your iPhone or Android device. Make sure you’re signed in with your Microsoft 365 work or school account.
- Step 2: Tap your profile icon in the top-left corner of the screen. This opens the account switcher panel where your email accounts are listed.
- Step 3: Tap the Add account icon — this usually looks like an envelope with a plus sign at the bottom of the account list.
- Step 4: Select Add a Shared Mailbox from the options that appear. If prompted, confirm which Microsoft 365 work or school account the shared mailbox is connected to.
- Step 5: Enter the full email address of the shared mailbox in the field provided — for example, support@company.com.
- Step 6: Tap Add Shared Mailbox to complete the process. Outlook will connect to the shared mailbox and add it to your account switcher.
Once added, tap the shared mailbox in the account switcher to open its inbox and start managing emails directly from your phone.
Tip: If you don’t see the Add a Shared Mailbox option in the menu, your app may need an update. Head to the App Store on iPhone or Google Play on Android and install the latest version of Outlook.
Note: This feature only works with a Microsoft 365 work or school account. If you’re signed into a personal Outlook.com account, the option to add a shared mailbox won’t be available.
How to Send an Email from a Shared Mailbox in Outlook
Once you have access to the shared mailbox, you may also need to send emails from it — especially if your team handles customer inquiries or external communications from the shared email address.
Before you can do this, your admin needs to give you either Send As or Send on Behalf permission.
Here’s a quick reminder of what each one means:
- Send As — Your email appears to come directly from the shared address. Recipients only see the shared mailbox name and email address in the From field.
- Send on Behalf — Your email shows both your name and the shared address. Recipients see something like “Alex on behalf of Support.”
Once your permissions are in place, here’s how to send from the shared mailbox in any version of Outlook:
- Step 1: Start a new email or open a message you want to reply to. The compose window will open as usual.
- Step 2: Look for the From field at the top of the compose window. If you don’t see it, click Options in the toolbar and select Show From to make it visible.
- Step 3: Click the From dropdown to see a list of available sender addresses linked to your account.
- Step 4: Select the shared mailbox address from the dropdown list. If you’ve been added to multiple shared mailboxes, make sure you choose the correct one.
- Step 5: If the shared address isn’t listed yet, choose Other email address and type the shared mailbox address manually. Outlook will verify it against your organization’s directory.
- Step 6: Compose your message as normal and click Send. The recipient will see the email as coming from the shared email address based on your permission type.
After you’ve sent one email from the shared address, Outlook will remember it and add it to your From dropdown automatically — so you won’t need to search for it again next time.
Important: If you can open the shared mailbox and read emails but can’t send from the shared address, the most likely reason is that your admin hasn’t added Send As or Send on Behalf permission yet. Reach out to your IT team and ask them to set this up for you.
Common Mistakes That Prevent You from Adding a Shared Mailbox
Before jumping into troubleshooting, it’s worth checking whether one of these common mistakes is the reason things aren’t working. Most setup problems come down to one of the following.
Using a personal Outlook.com account instead of a work account Shared mailboxes are part of Microsoft 365 and Exchange environments. If you’re signed into Outlook with a personal @outlook.com or @hotmail.com account, the shared mailbox option won’t be available. Make sure you’re signed in with your Microsoft 365 work or school account before following any of the setup steps.
Assuming Full Access includes the ability to send emails This is one of the most common misunderstandings. Full Access lets you open and read the shared mailbox — but it doesn’t give you permission to send emails from the shared address. If you need to send from the mailbox, your admin must separately assign Send As or Send on Behalf permission to your account.
Forgetting to restart Outlook after permissions are assigned Once your admin grants you access, Outlook won’t detect the new mailbox until it re-syncs with Microsoft 365. Simply minimizing and reopening the window isn’t always enough — close Outlook completely and reopen it to trigger a proper refresh.
Trying to sign in directly to the shared mailbox A shared mailbox isn’t designed to be signed into directly like a regular email account. You access it through your own Microsoft 365 account — not by entering the shared mailbox address and a separate password. If you’re being prompted to log in to the shared mailbox itself, you’re most likely trying to add it as a new account rather than a shared mailbox. Go back and follow the correct steps for your version of Outlook.
Quick Reminder: If any of the above sounds familiar, fix the underlying issue first before working through the troubleshooting steps below. It’ll save you a lot of time.
Note: Microsoft regularly updates Outlook and Microsoft 365. Depending on your Outlook version or recent updates, some menu names, button locations, or interface layouts may look slightly different from the examples shown in this guide. If something looks a little different on your screen, the overall process will still be the same.
Shared Mailbox Not Showing in Outlook? Try These Fixes
If you’ve gone through the setup steps and the shared mailbox still isn’t appearing, one of the following fixes will almost certainly sort it out. The steps below are arranged from the simplest fix to the more specific ones — start at the top and work your way down.
Fix 1: Restart Outlook First
This is always the first thing to try. Close Outlook completely — don’t just minimize the window — and open it again fresh. Many shared mailbox visibility issues resolve themselves with a full restart because Outlook re-syncs with Microsoft 365 when it reopens.
Fix 2: Wait for Permissions to Sync
If restarting Outlook doesn’t help straight away, the issue may simply be timing. Microsoft 365 permission changes don’t always take effect immediately after an admin makes them. Give it up to an hour — though in most cases things sync much faster — then restart Outlook again and check whether the shared mailbox has appeared.
Fix 3: Confirm Your Permissions Are Set Up Correctly
If you’ve waited and restarted and still nothing is showing up, get in touch with your IT team. Ask them to confirm that Full Access has been properly assigned to your account for that specific mailbox. It’s possible the permission was set on the wrong account or the wrong mailbox by mistake — it happens more often than you’d think.
Fix 4: Test It in Outlook on the Web First
Not sure whether the problem is with your desktop app or your actual Microsoft 365 permissions? Open a browser and go to outlook.office.com. Try adding the shared mailbox there using the steps in the Outlook on the web section above.
If it works in the browser but not in the desktop app, the issue is most likely with your local Outlook installation rather than your permissions. Try restarting your computer or reinstalling the Outlook app.
Fix 5: Add the Shared Mailbox Manually
If automapping didn’t pick up the shared mailbox automatically, you can bypass it entirely by following the manual setup steps for your version of Outlook earlier in this guide. Manual setup gives you direct control and doesn’t depend on automapping working correctly on your account.
Fix 6: The Shared Mailbox Keeps Disappearing After You Add It
If you add the shared mailbox manually and it keeps vanishing every time you restart Outlook, automapping is likely disabled on your account. This means Outlook isn’t retaining the connection between sessions.
Contact your admin and ask them to either re-enable automapping for your account or re-assign your permissions with automapping turned on — this will make the shared mailbox stick permanently.
Tip: If you’ve worked through every fix here and the shared mailbox still won’t appear, ask your IT admin to remove your access and re-add it from scratch. This often clears any underlying sync issues that built up during the initial setup.
Which Outlook Version Are You Using? Find the Right Method Here
Not sure where to start? Use this table to find the right solution for your situation in seconds.
| If You Are… | Use This Method |
|---|---|
| Using New Outlook (simplified interface with gear icon) | Right-click your account and select Add shared folder or mailbox |
| Using Classic Outlook (ribbon with File tab visible) | File → Account Settings → Advanced → Add |
| Using Outlook in a browser | Right-click Folders and select Add shared folder or mailbox |
| On your iPhone or Android | Outlook app → Profile icon → Add a Shared Mailbox |
| Just received access from your admin | Restart Outlook first — it may appear automatically |
| Can’t send emails from the shared address | Ask your admin for Send As or Send on Behalf permission |
| Shared mailbox not showing at all | Work through the troubleshooting fixes in the section above |
Tips for Using Your Shared Mailbox More Efficiently
Getting the shared mailbox set up is the first step — but a few simple habits will keep things running smoothly for everyone on your team once you start using it regularly.
- Always access the shared mailbox through your own account. Never ask for or share the mailbox password. Every team member should connect through their own Microsoft 365 login — it’s more secure and makes it easier to manage access if someone changes roles or leaves the team.
- Use folders to track the status of messages. A simple folder structure like New, In Progress, and Resolved makes it easy for the whole team to see what’s been handled and what still needs attention.
- Agree on who owns each email before things get busy. One of the most common shared mailbox problems is two people replying to the same message at the same time. A quick team agreement — even just a simple rule about assigning emails before replying — prevents this from becoming a regular issue.
- Use color categories to assign emails to team members. Most versions of Outlook let you apply color-coded categories to messages. Assigning a color to each person on the team makes it immediately clear who is handling what without needing to open every message.
- Keep the folder structure simple. It’s tempting to create a folder for every client, topic, or project — but too many folders makes things harder to find, not easier. A small set of clearly named folders works better for most teams.
- Check in on access periodically. If you’re responsible for managing the team’s mailbox, it’s worth asking your admin every few months to review who still has access. Removing people who no longer need it keeps the shared mailbox secure and the member list accurate.
Tip: If your team uses the shared mailbox for customer-facing replies, putting a simple folder system and email ownership process in place before the inbox gets busy will save a lot of confusion down the line.
When Does a Shared Mailbox Make Sense for Your Team?
A shared mailbox works best when multiple people need to manage emails from a single, consistent address. Here are some of the most common business scenarios where a Microsoft 365 shared mailbox makes a real difference.
Customer Support
Teams handling customer inquiries through an address like support@company.com benefit from a shared mailbox because every agent can see incoming requests, track responses, and pick up where a colleague left off. Nothing gets lost in a personal inbox, and customers always reach the right place — regardless of who’s available.
Human Resources
HR teams often manage sensitive communications through a shared address like hr@company.com. A shared mailbox keeps recruitment correspondence, employee queries, and onboarding emails organized and accessible to the right people, while remaining completely separate from anyone’s personal account.
Finance
Finance departments frequently receive invoices, payment confirmations, and billing queries through a shared email address like accounts@company.com. A shared mailbox ensures nothing gets missed and gives the team a full, visible trail of all financial correspondence — which is especially useful during audits or end-of-month reviews.
Sales
Sales teams that manage inbound leads through a common address like sales@company.com can use a shared mailbox to distribute inquiries, track follow-ups, and make sure no potential customer goes unanswered. Everyone on the team sees the same messages, so leads don’t slip through the cracks when someone is out of the office.
Reception or Front Desk
A reception team mailbox — such as reception@company.com or info@company.com — gives front-desk staff a shared point of contact for scheduling, visitor coordination, and general inquiries. Everyone covering the role has full visibility, so nothing gets missed during shift changes or busy periods.
In each of these scenarios, the shared email address creates a consistent, professional point of contact that the whole team can manage — without relying on one person’s personal inbox or sharing login credentials.
Frequently Asked Questions About Shared Mailboxes in Outlook
Why Isn’t My Shared Mailbox Showing Up in Outlook?
The most common reasons are that permissions haven’t fully synced yet or automapping didn’t trigger. Start by restarting Outlook and waiting a few minutes. If the shared mailbox still doesn’t appear, try adding it manually using the steps for your version of Outlook. If nothing works, ask your IT admin to confirm that Full Access has been properly assigned to your account.
Do I Need a Separate Password to Open a Shared Mailbox?
No. A shared mailbox doesn’t have its own password in the traditional sense. You access it through your own Microsoft 365 account — there’s no separate login required. Your IT admin grants you access, and from that point, you open it directly from your own Outlook profile.
Can Multiple People Use the Same Shared Mailbox at the Same Time?
Yes. That’s one of the main advantages of a Microsoft 365 shared mailbox. Multiple team members can have the shared mailbox open simultaneously, read the same messages, and respond to different emails — all at the same time without interfering with each other.
How Long Does It Take for a Shared Mailbox to Appear in Outlook?
In most cases, the shared mailbox appears within a few minutes of your admin granting access — especially after you restart Outlook. In some situations, particularly in larger Microsoft 365 environments, it can take up to an hour for permissions to fully sync. If it still hasn’t appeared after an hour and a restart, follow the manual setup steps in this guide.
Can I Send Emails from a Shared Mailbox in Outlook?
Yes, as long as your admin has given you Send As or Send on Behalf permission. Without one of these, you’ll be able to read and manage emails in the shared mailbox but won’t be able to send from the shared email address. Contact your IT team if you need this permission added to your account.
How Do I Add a Shared Mailbox in New Outlook?
Right-click your account name in the folder pane and select Add shared folder or mailbox. Type the name or email address of the shared mailbox, select it from the results, and click Add. It will appear under Shared with me in your folder pane.
Why Does the Shared Mailbox Keep Disappearing After I Restart Outlook?
This usually happens when automapping is turned off for your account. Outlook isn’t retaining the shared mailbox connection between sessions. Ask your IT admin to check your automapping settings — or re-assign your permissions with automapping enabled to fix it permanently.
Can I Access a Shared Mailbox on My Phone?
Yes. Open the Outlook mobile app, tap your profile icon, select the option to add an account, and choose Add a Shared Mailbox. Enter the shared mailbox email address and tap Add. This works on both iPhone and Android with a Microsoft 365 work or school account.
Can I Remove a Shared Mailbox from Outlook Later?
Yes. In Classic Outlook, go to File → Account Settings → Account Settings, select your account, click Change → More Settings → Advanced, select the shared mailbox from the list, and click Remove. In Outlook on the web, right-click the shared mailbox in your folder pane and select Remove shared folder. If the mailbox was added automatically through automapping, you may need to ask your admin to remove it or disable automapping for your account.
You’re All Set: Your Shared Mailbox Is Ready to Use
In most cases, all it takes to get a shared mailbox working in Outlook is a quick restart after your admin grants access. If it doesn’t appear on its own, the manual steps in this guide work across every version of Outlook — New, Classic, web, and mobile.
If you’ve worked through everything and something still isn’t right, the most likely cause is a permissions issue on the admin side. A quick message to your IT team with a description of what you’re seeing is usually all it takes to get it resolved.
A properly configured shared mailbox helps your team manage communication efficiently, collaborate from a single shared email address, and stay on top of every message — without sharing passwords, forwarding emails between personal accounts, or missing important conversations. Once it’s set up correctly, your whole team can read, reply to, and manage emails from one address — keeping communication organized, professional, and easy to track.
Visit Our Post Page: Blog Page
Discover more from Izoate
Subscribe to get the latest posts sent to your email.