
Getting virtualization errors in Windows 11 Home in 2026? Learn how to disable Credential Guard in Windows 11 Home with 6 step by step methods. From turning off Memory Integrity and editing the registry to disabling the hypervisor and removing the UEFI Lock. Fix your VMware and VirtualBox errors fast today.
If you’re running VMware Workstation, VirtualBox, or another virtualization tool on Windows 11 Home and suddenly hitting errors, Credential Guard is likely the reason. It’s a powerful security feature, but it can block virtualization software from accessing the hardware resources it needs.
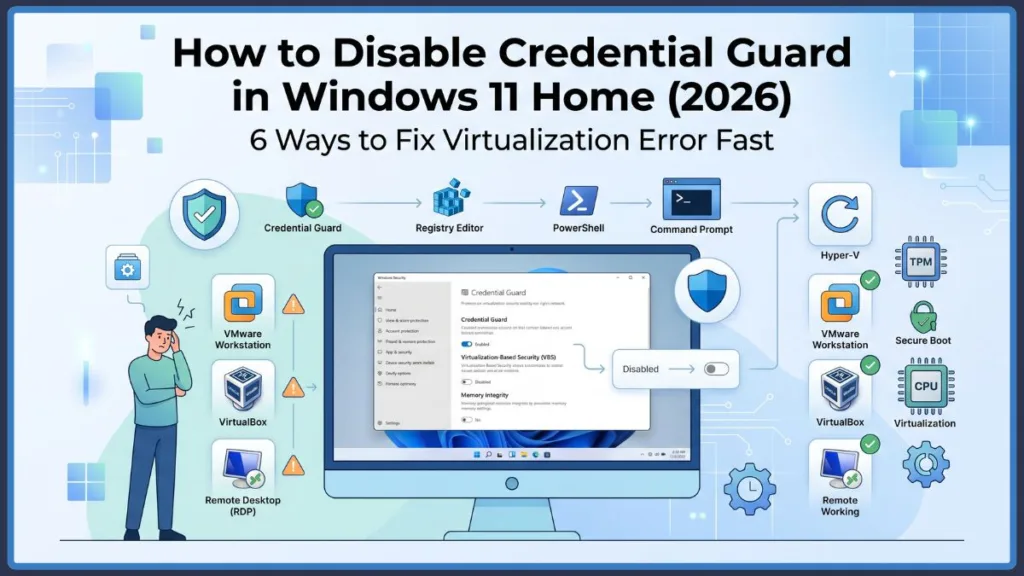
In this guide, you’ll learn exactly how to disable Credential Guard in Windows 11 Home, how to check whether it’s actually running, and what to do if it stays enabled after you’ve already made changes.
Quick Answer: How to Disable Credential Guard in Windows 11 Home
Since Windows 11 Home doesn’t include the Local Group Policy Editor (gpedit.msc), you’ll need to use Windows Security, Registry Editor, PowerShell, or Command Prompt instead.
For most users, here’s the fastest path:
- Turn off Memory Integrity from Windows Security.
- Disable Virtualization-Based Security (VBS) if it’s still active.
- Change the LsaCfgFlags registry value to disable Credential Guard.
- Disable the Windows hypervisor if VMware or VirtualBox specifically needs it.
- Restart your computer to apply the changes.
- Verify that Credential Guard is disabled using PowerShell or System Information.
Quick Tip: You don’t need to run through every method. Start with the simplest solution and only move to the advanced steps if Credential Guard is still enabled after restarting.
Not every Windows 11 Home PC uses the same security configuration. Some systems only need Memory Integrity turned off. Others may need additional registry changes or advanced steps if a UEFI Lock is enforcing Credential Guard.
What Is Credential Guard in Windows 11 Home?
Credential Guard is a Windows security feature that helps prevent attackers from stealing your login credentials. Instead of storing sensitive authentication data directly inside the operating system, it uses Virtualization-Based Security (VBS) to isolate that information inside a secure, hardware-protected environment.
This extra layer of protection makes it much harder for malware or attackers — even those with local administrator privileges — to access sensitive credentials stored on your computer.
How Credential Guard Protects Your Credentials
Credential Guard combines several Windows security technologies to create an isolated environment for authentication secrets, including:
- Windows Defender Credential Guard
- Virtualization-Based Security (VBS)
- Local Security Authority (LSA) isolation
- Trusted Platform Module (TPM)
- Secure Boot
- Hardware-assisted virtualization
Instead of storing authentication secrets in normal operating system memory, Credential Guard places them inside a secure virtual container that’s completely isolated from the rest of Windows.
This security model helps defend your PC against attacks such as:
- Pass-the-Hash (PtH) attacks
- Pass-the-Ticket attacks
- Credential dumping malware
- Unauthorized access to stored authentication secrets
Important: Even if malicious software gains administrator privileges, Credential Guard is designed to prevent direct access to protected credentials stored inside the isolated environment.
What Credential Guard Protects in Windows
When Credential Guard is enabled, it helps secure several types of authentication data, including:
- NTLM password hashes
- Kerberos tickets
- Stored Windows credentials
- Authentication secrets used by Windows
These credentials are commonly targeted by attackers because they can be used to impersonate users or gain unauthorized access to networks and resources.
While this protection significantly improves Windows security, it can also create compatibility issues with applications that expect direct access to virtualization features or rely on older authentication methods. That’s why some users choose to disable Credential Guard when running virtualization software or troubleshooting authentication-related problems.
Why You May Want to Disable Credential Guard in Windows 11 Home
Credential Guard is one of the most effective security features in Windows, but it isn’t the right choice for every situation. Because it relies on Virtualization-Based Security (VBS) and hardware virtualization, it can sometimes prevent software from working correctly or block older authentication methods.
If you’re running into any of the following issues, disabling Credential Guard may be the fix you need.
VMware Workstation Says Credential Guard Is Enabled
One of the most common reasons users disable Credential Guard is this error:
“VMware Workstation and Device/Credential Guard are not compatible. VMware Workstation can be run after disabling Device/Credential Guard.”
This happens because both Credential Guard and VMware Workstation rely on hardware virtualization. When Windows reserves those virtualization resources for VBS, VMware can’t create or run virtual machines.
If you use VMware Workstation for software testing, development, or running multiple operating systems, disabling Credential Guard often restores full compatibility.
VirtualBox Won’t Start Virtual Machines
Oracle VirtualBox runs into similar problems. When Virtualization-Based Security (VBS), Hyper-V, or Credential Guard is active, VirtualBox may:
- Fail to launch virtual machines
- Display virtualization-related errors
- Run VMs with significantly reduced performance
- Detect that hardware virtualization is unavailable
In many cases, disabling Credential Guard and related virtualization features allows VirtualBox to use your processor’s hardware virtualization support again.
Can’t Save Remote Desktop (RDP) Passwords
If Windows suddenly stops remembering your Remote Desktop credentials, Credential Guard could be responsible.
Credential Guard prevents Windows from saving passwords for RDP connections that use NTLM authentication. As a result, you may have to enter your username and password every time you connect to a remote computer.
If your workflow depends on saved RDP credentials, disabling Credential Guard may restore this functionality.
Tip: If your organization uses Remote Desktop with modern authentication methods, it’s generally better to keep Credential Guard enabled whenever possible.
Virtualization Features Are Conflicting
Sometimes these components compete for the same hardware resources:
- Virtualization-Based Security (VBS)
- Hyper-V
- Windows Hypervisor
- Credential Guard
- Memory Integrity
If these features conflict with your virtualization software, you may notice:
- Virtual machines refusing to start
- Poor VM performance
- Virtualization errors after a Windows update
- Development tools failing to detect hardware virtualization
Disabling Credential Guard is often one step in resolving these conflicts.
Older Enterprise Apps Aren’t Compatible
Some legacy applications were designed before Credential Guard became part of Windows security. Software that depends on older authentication technologies may not function correctly, including apps that use:
- NTLMv1 authentication
- Unconstrained Kerberos delegation
- Other legacy authentication mechanisms
Because Credential Guard isolates authentication credentials, these older applications may fail to authenticate or operate as expected.
You’re Testing or Running Virtual Machines
If you’re a developer, IT administrator, cybersecurity professional, or technology enthusiast who regularly uses virtualization software to test operating systems, build virtual labs, or perform malware analysis, tools like VMware Workstation and VirtualBox often require direct access to hardware virtualization features. Disabling Credential Guard may be necessary to keep those environments running properly.
Important: Don’t disable Credential Guard simply because it’s enabled. If you aren’t experiencing compatibility problems with virtualization software, Remote Desktop, or legacy applications, leaving it enabled provides stronger protection against credential theft and advanced attacks.
How to Check If Credential Guard Is Enabled in Windows 11 Home
Before making any changes, confirm whether Credential Guard is actually running on your PC.
Many users assume Credential Guard is causing the problem, but in some cases the issue is actually Memory Integrity, Hyper-V, or another Virtualization-Based Security (VBS) component. Checking the status first saves a lot of unnecessary troubleshooting.
Windows gives you several ways to verify it. The most reliable method is PowerShell, but System Information and Windows Security can also help.
Check Credential Guard Status Using PowerShell
PowerShell gives you the quickest and most accurate answer about whether Credential Guard is currently running.
Step 1: Open PowerShell
- Right-click the Start button.
- Select Windows Terminal (Admin) or PowerShell (Admin).
- Approve the User Account Control (UAC) prompt if it appears.
Step 2: Run the Following Command
(Get-CimInstance -ClassName Win32_DeviceGuard -Namespace root\Microsoft\Windows\DeviceGuard).SecurityServicesRunning
Press Enter and wait for the result.
Step 3: Interpret the Result
- 1 = Credential Guard is enabled
- 0 = Credential Guard is disabled
If the command returns 1, Windows is actively using Credential Guard and you can move on to the methods below.
Tip: This PowerShell command checks the Win32_DeviceGuard class directly, making it one of the most reliable ways to confirm whether Credential Guard is running.
Check Credential Guard Using System Information (msinfo32)
You can also verify whether Virtualization-Based Security (VBS) is active through System Information.
Step 1: Open System Information
- Press Windows + R to open the Run dialog.
- Type msinfo32 and press Enter.
Step 2: Find the Virtualization Security Details
Once System Information opens, scroll through the System Summary and look for entries such as:
- Virtualization-based Security
- Virtualization-based Security Services Running
- Credential Guard
These entries indicate whether Windows has enabled virtualization-based security features on your computer.
Note: Depending on your Windows edition and hardware configuration, you may see different VBS-related entries. Even if Credential Guard isn’t listed by name, active Virtualization-Based Security may still affect virtualization software.
Check Credential Guard from Windows Security
Although Windows Security doesn’t always display Credential Guard directly, it can show whether related security features are enabled.
Step 1: Open Windows Security
- Open the Start menu and search for Windows Security.
- Open the application.
Step 2: Navigate to Device Security
- Go to Windows Security → Device Security.
Step 3: Open Core Isolation
- Select Core Isolation Details.
- Check whether Memory Integrity is enabled.
If Memory Integrity is turned on, your PC is already using part of Virtualization-Based Security (VBS). This doesn’t always mean Credential Guard is active, but it often indicates that Windows is running virtualization-based protection.
Important: Memory Integrity and Credential Guard are different security features, but both depend on Virtualization-Based Security (VBS). Turning off one doesn’t always disable the other.
Before You Disable Credential Guard in Windows 11 Home
You’re about to make changes to Windows security settings, so taking a few minutes to prepare can save you from unnecessary headaches later.
Before continuing, go through this checklist:
✔ Sign In with an Administrator Account
Most methods in this guide require administrator privileges because they modify protected Windows settings, the registry, or boot configuration. If you’re on a standard account, switch to an administrator account first.
✔ Create a System Restore Point
A System Restore Point lets you roll back Windows if something unexpected happens after changing security settings. This is especially helpful when modifying Registry Editor, boot configuration, or VBS settings.
✔ Back Up the Windows Registry
Some methods require editing registry values such as LsaCfgFlags. Before making any changes:
- Open Registry Editor.
- Select File > Export.
- Save a backup of your current registry.
✔ Save Your BitLocker Recovery Key (If Enabled)
If your PC uses BitLocker Drive Encryption, save your BitLocker Recovery Key before making advanced boot or security changes. Disabling Credential Guard normally doesn’t trigger BitLocker recovery, but having the key available is a smart precaution.
✔ Close All Virtual Machines
If you’re running VMware Workstation, Oracle VirtualBox, or any other virtualization software, shut down every virtual machine before making changes. This helps prevent file corruption and ensures virtualization settings update correctly after you restart Windows.
Important: Some advanced methods — such as modifying boot configuration, disabling the Windows hypervisor, or removing the UEFI Lock — require a full system restart before the changes take effect.
Method 1: Turn Off Memory Integrity in Windows Security
If you’re looking for the easiest place to start, this is it. Although Memory Integrity and Credential Guard are separate security features, both rely on Virtualization-Based Security (VBS). On some systems, turning off Memory Integrity is enough to resolve virtualization conflicts and get VMware Workstation or VirtualBox working again.
Important: Turning off Memory Integrity does not always disable Credential Guard. If Credential Guard remains enabled after this method, continue with the additional methods below.
Step 1: Open Windows Security
- Click the Start menu and search for Windows Security.
- Open the app.
Step 2: Open Device Security
- Select Device Security from the left sidebar.
- Locate the Core Isolation section.
- Click Core Isolation Details.
This page manages several security features powered by Virtualization-Based Security (VBS).
Step 3: Turn Off Memory Integrity
- Find the Memory Integrity toggle.
- Switch it to Off.
- If Windows displays a confirmation message, approve the change.
Windows may ask for administrator permission before applying the new setting.
Step 4: Restart Your Computer
Restart your PC to apply the changes. Memory Integrity isn’t fully disabled until Windows completes a reboot.
Step 5: Check If the Issue Is Resolved
After restarting:
- Try opening VMware Workstation or launching VirtualBox.
- Test your Remote Desktop (RDP) connection if credential saving was failing.
- Recheck the Credential Guard status using the PowerShell command from earlier.
If everything works normally, you may not need to continue with the remaining methods.
Tip: If Credential Guard still shows as enabled after disabling Memory Integrity, it simply means another Windows security setting is keeping it active. Move on to the next method to disable Virtualization-Based Security (VBS).
Method 2: Disable Virtualization-Based Security (VBS)
Since Credential Guard is built on Virtualization-Based Security (VBS), turning off VBS is often the next step when Memory Integrity alone doesn’t solve the problem.
VBS creates an isolated, hardware-protected environment where Windows stores sensitive processes and credentials. While this significantly improves security, it can also reserve virtualization resources that software like VMware Workstation, VirtualBox, and other hypervisors need to run.
Note: On Windows 11 Home, there isn’t a single switch that disables Virtualization-Based Security completely. Depending on your PC, you may need to change Windows Security settings, modify the registry, or disable additional virtualization features.
Why VBS and Credential Guard Are Connected
Credential Guard doesn’t work on its own. It depends on Virtualization-Based Security to isolate authentication secrets from the rest of Windows. This means:
- Credential Guard requires VBS to function.
- Memory Integrity also relies on VBS.
- Other security technologies may continue using VBS even after Memory Integrity is turned off.
That’s why Credential Guard can stay enabled even after you’ve already disabled Memory Integrity.
Check Whether VBS Is Still Running
Before making registry changes, verify whether Virtualization-Based Security is still active:
- Open System Information (msinfo32).
- Look for Virtualization-based Security in the System Summary.
- Review whether virtualization security services are still running.
If VBS is active, you’ll likely need additional configuration changes.
Disable VBS Through Windows Security (If Available)
Depending on your Windows configuration:
- Open Windows Security → Device Security → Core Isolation Details.
- Turn off any available Virtualization-Based Security features.
- Restart your computer.
Not every Windows 11 Home installation displays the same security options, so don’t be concerned if your interface looks slightly different.
Registry Setting Used by VBS
Some systems also use the following registry value to control whether Virtualization-Based Security is enabled:
EnableVirtualizationBasedSecurity
The required registry changes — including LsaCfgFlags and other Credential Guard-related values — are covered in the next method.
Important: Editing the Windows Registry incorrectly can cause system problems. Always create a Registry backup or System Restore Point before making any changes.
Method 3: Disable Credential Guard Using Registry Editor
If Credential Guard is still enabled after turning off Memory Integrity and checking Virtualization-Based Security (VBS), you can disable it by modifying the Windows Registry.
This method works by changing the LsaCfgFlags registry value, which directly controls whether Credential Guard is enabled. On many Windows 11 Home systems, this is one of the most effective approaches since Group Policy Editor (gpedit.msc) isn’t available.
Warning: Editing the Windows Registry incorrectly can cause system instability. Before making any changes, create a Registry backup or System Restore Point so you can restore your system if needed.
Step 1: Open Registry Editor
- Press Windows + R to open the Run dialog.
- Type regedit and press Enter.
- Click Yes if prompted by User Account Control (UAC).
Step 2: Navigate to the LSA Registry Key
Browse to:
HKEY_LOCAL_MACHINE\SYSTEM\CurrentControlSet\Control\Lsa
This location contains settings related to the Local Security Authority (LSA), which manages Windows authentication.
Step 3: Modify the LsaCfgFlags Value
Locate the following DWORD (32-bit) value:
LsaCfgFlags
If the value already exists:
- Double-click LsaCfgFlags.
- Change its Value data to 0.
- Click OK.
If LsaCfgFlags doesn’t exist:
- Right-click an empty area in the right pane.
- Select New > DWORD (32-bit) Value.
- Name it LsaCfgFlags.
- Set its value to 0.
Setting LsaCfgFlags = 0 tells Windows to disable Credential Guard when it isn’t protected by a UEFI Lock.
Step 4: Check the Device Guard Policy Key
Next, navigate to:
HKEY_LOCAL_MACHINE\SOFTWARE\Policies\Microsoft\Windows\DeviceGuard
If the DeviceGuard key doesn’t exist, create it. Inside this key, locate or create the following DWORD (32-bit) value:
LsaCfgFlags
Set its value to 0. This ensures Windows policy settings don’t automatically re-enable Credential Guard.
Step 5: Restart Your Computer
Close Registry Editor and restart your PC. The registry changes won’t take effect until Windows boots again.
Step 6: Verify That Credential Guard Is Disabled
After restarting, run the PowerShell command from earlier:
(Get-CimInstance -ClassName Win32_DeviceGuard -Namespace root\Microsoft\Windows\DeviceGuard).SecurityServicesRunning
- 0 = Credential Guard is disabled
- 1 = Credential Guard is still running and additional steps may be required
Tip: If LsaCfgFlags is already set to 0 but Credential Guard remains enabled, your PC may be using a UEFI Lock. In that case, you’ll need the advanced method covered later in this guide.
Method 4: Disable Credential Guard by Turning Off the Hypervisor
If your main goal is to fix VMware Workstation, VirtualBox, or another virtualization application, disabling the Windows hypervisor may be the most direct solution.
Windows uses the Hyper-V hypervisor to support Virtualization-Based Security (VBS) and Credential Guard. When it’s running, third-party virtualization software may not be able to access your processor’s hardware virtualization features.
Important: Disabling the Windows hypervisor affects more than Credential Guard. Features that depend on Hyper-V — such as Windows Sandbox and Windows Subsystem for Android — may stop working until you enable it again.
Step 1: Open Command Prompt as Administrator
- Click the Start menu and search for Command Prompt.
- Right-click it and select Run as administrator.
- Approve the UAC prompt if it appears.
Step 2: Disable the Windows Hypervisor
Run the following command:
bcdedit /set hypervisorlaunchtype off
After pressing Enter, you should see a message confirming the operation completed successfully. This prevents the Windows hypervisor from starting during the next system boot.
Step 3: Restart Your Computer
Restart your PC to apply the new boot configuration. The Windows hypervisor stays active until Windows completes a reboot.
Step 4: Test Your Virtualization Software
Once Windows starts again:
- Launch VMware Workstation or open VirtualBox.
- Start one of your virtual machines.
- Check whether the previous compatibility error has disappeared.
If your virtualization software now works normally, the Windows hypervisor was likely causing the conflict.
Note: This method disables the hypervisor itself, not just Credential Guard. If your goal is only to disable Credential Guard while keeping other virtualization features available, review the remaining methods before deciding which configuration suits your needs best.
Method 5: Disable Credential Guard Protected by UEFI Lock (Advanced Method)
If you’ve already turned off Memory Integrity, modified the Registry, and disabled the Windows hypervisor, but Credential Guard is still enabled, your PC may be using a UEFI Lock.
A UEFI Lock protects Credential Guard from being disabled through normal Windows settings. It’s designed to prevent malware or unauthorized users from turning off important security features after Windows has already started. Because of this, simply changing the registry or running commands inside Windows isn’t enough. You’ll need to temporarily modify the Windows boot process and physically confirm the change during startup.
Warning: This is an advanced method intended for experienced users and IT administrators. Since it modifies your system’s boot configuration, follow each step carefully and make sure you’ve backed up important data before continuing.
When Should You Use This Method?
Only continue here if:
- Credential Guard remains enabled after completing all the previous methods.
- The PowerShell verification command still reports that Credential Guard is running.
- You’re certain the feature is protected by a UEFI Lock.
If the earlier methods already disabled Credential Guard, you can safely skip this section.
Step 1: Open Command Prompt as Administrator
- Open the Start menu and search for Command Prompt.
- Select Run as administrator.
Step 2: Prepare the EFI Boot Files
Microsoft requires you to copy the SecConfig.efi tool to the EFI System Partition before Windows can disable Credential Guard protected by a UEFI Lock.
The process includes:
- Mounting the EFI System Partition
- Copying SecConfig.efi
- Creating a temporary boot entry
- Configuring the boot loader to disable LSA Isolation
- Removing the temporary EFI mount after the configuration is complete
Important: Instead of typing each command manually, use Microsoft’s documented command sequence exactly as provided. Running incorrect BCD commands can prevent Windows from booting properly.
Step 3: Restart Your Computer
After completing the required commands, restart your PC. Instead of booting directly into Windows, you’ll see the Credential Guard Opt-out Tool.
Step 4: Confirm That You Want to Disable Credential Guard
During startup, Windows displays a message similar to:
“Do you want to disable Credential Guard? Disabling this functionality can allow malware to read passwords and other user credentials. Contact your administrator before disabling this protection if this is a managed device.”
- Press F3 when prompted to confirm.
If you don’t press F3 within the available time, Windows cancels the request and Credential Guard remains enabled.
Step 5: Verify the Result
After Windows starts normally, run the PowerShell verification command from earlier.
- 0 = Credential Guard has been successfully disabled.
- 1 = Review each previous method again or check whether additional Windows security policies are re-enabling the feature.
Tip: UEFI Lock is designed to prevent unauthorized security changes. That’s why Windows requires physical confirmation during boot instead of allowing Credential Guard to be disabled entirely from within Windows.
Method 6: Disable Credential Guard with Microsoft’s DG Readiness Tool
If you prefer using an official Microsoft solution, the Device Guard and Credential Guard Hardware Readiness Tool — commonly called the DG Readiness Tool — is a solid option.
This PowerShell utility can:
- Check whether Credential Guard is enabled
- Verify your hardware compatibility
- Enable or disable Credential Guard on supported systems
For administrators managing multiple computers, it’s often the easiest and most reliable approach.
Note: The DG Readiness Tool is provided by Microsoft and is primarily intended for supported Windows editions. Some functions may vary depending on your Windows edition and system configuration.
Step 1: Download the DG Readiness Tool
Download the latest DG Readiness Tool from Microsoft’s official website. After downloading:
- Extract the ZIP file.
- Save it to an easy-to-access folder, such as:
C:\PS\dgreadiness_v3.6\
Step 2: Open PowerShell as Administrator
- Search for PowerShell and select Run as administrator.
If PowerShell blocks scripts from running, temporarily allow script execution for the current session.
Step 3: Allow Script Execution (If Required)
Run:
Set-ExecutionPolicy -Scope Process RemoteSigned
This change only affects the current PowerShell session and doesn’t permanently modify your execution policy.
Step 4: Check the Current Credential Guard Status
Navigate to the folder containing the extracted tool, then run:
DG_Readiness_Tool_v3.6.ps1 -Ready
The tool reports which Device Guard and Credential Guard security features are currently enabled on your computer.
Step 5: Disable Credential Guard
Run:
DG_Readiness_Tool_v3.6.ps1 -Disable -CG
The script prepares Windows to disable Credential Guard.
Step 6: Restart and Confirm the Change
Restart your PC. Depending on your system configuration, Windows may display the Credential Guard Opt-out Tool during startup. If prompted, press F3 to confirm that you want to disable Credential Guard.
After Windows finishes booting, verify the result using the PowerShell method explained earlier.
Tip: The DG Readiness Tool automates many of the manual configuration steps, making it a convenient option for advanced users and IT administrators who regularly manage Windows security settings.
How to Verify Credential Guard Has Been Disabled
After completing any of the methods above, always verify that Credential Guard is actually disabled before testing VMware Workstation, VirtualBox, Remote Desktop, or other affected applications. The easiest way to confirm is with PowerShell, but System Information (msinfo32) and Windows Security also work.
Verify Using PowerShell
Step 1: Open PowerShell as Administrator
- Right-click the Start button.
- Select Windows Terminal (Admin) or PowerShell (Admin).
- Approve the UAC prompt if requested.
Step 2: Run the Verification Command
(Get-CimInstance -ClassName Win32_DeviceGuard -Namespace root\Microsoft\Windows\DeviceGuard).SecurityServicesRunning
Step 3: Review the Result
- 0 = Credential Guard is disabled
- 1 = Credential Guard is still enabled
Tip: If the command still returns 1, restart your PC once more and repeat the check. Some configuration changes don’t fully apply until Windows completes another reboot.
Verify Using System Information (msinfo32)
- Press Windows + R, type msinfo32, and press Enter.
- Within System Summary, look for:
- Virtualization-based Security
- Virtualization-based Security Services Running
- Credential Guard (if displayed)
If Credential Guard no longer appears and Virtualization-Based Security shows as disabled, your changes have likely been applied successfully.
Verify Using Windows Security
- Open Windows Security → Device Security → Core Isolation Details.
- Review whether Memory Integrity is still disabled after restarting Windows.
Note: Memory Integrity and Credential Guard are separate features. Turning off one doesn’t automatically disable the other, so always use the PowerShell method as your primary verification.
If all three checks confirm that Credential Guard is disabled, try launching the application that originally caused the problem. In most cases, VMware Workstation, VirtualBox, or Remote Desktop credential saving will start working again.
Credential Guard Still Enabled? Try These Fixes
If Credential Guard remains enabled even after following the previous methods, another setting may still be preventing it from turning off. Work through the following troubleshooting steps one by one.
Check If Secure Boot Is Enabled
Secure Boot is one of the hardware security features used by Virtualization-Based Security (VBS) and Credential Guard.
To check its status:
- Press Windows + R, type msinfo32, and press Enter.
- Look for Secure Boot State.
Important: Don’t disable Secure Boot unless it’s absolutely necessary. It protects your PC from unauthorized boot software and malware.
Verify TPM Is Working
Trusted Platform Module (TPM) is another security component used by modern Windows security features. To check your TPM:
- Press Windows + R, type tpm.msc, and press Enter.
- Verify that Windows detects the TPM correctly.
A healthy TPM doesn’t necessarily mean Credential Guard is enabled, but it’s part of the security environment that supports virtualization-based protection.
Disable Hyper-V Features
Even if you’ve disabled the Windows hypervisor, some Hyper-V components may still be installed. Open Turn Windows features on or off and review features such as:
- Hyper-V
- Virtual Machine Platform
- Windows Hypervisor Platform
If you don’t need them, disable the relevant features and restart your computer.
Tip: Some virtualization applications work best when Hyper-V and related Windows virtualization features are completely disabled.
Turn Off Memory Integrity
Double-check that Memory Integrity is still disabled. Occasionally, Windows updates or driver changes can re-enable security settings.
Open Windows Security → Device Security → Core Isolation and confirm that Memory Integrity remains turned off.
Restart Your PC Twice
It may sound simple, but certain boot configuration and Virtualization-Based Security (VBS) changes require more than one restart before Windows finishes applying them. If you’ve only restarted once, reboot again and re-verify the Credential Guard status using PowerShell.
Check BIOS/UEFI Virtualization Settings
Some virtualization settings are controlled directly from your computer’s BIOS/UEFI firmware. Restart your PC and enter the BIOS setup to review settings related to:
- Intel VT-x
- AMD-V
- Virtualization Technology
Warning: Only modify BIOS or UEFI settings if you’re familiar with your motherboard or laptop manufacturer’s recommendations. Changing firmware settings incorrectly can affect both virtualization software and Windows security features.
Remove the UEFI Lock
If none of the previous troubleshooting steps work, your system may still be protected by a UEFI Lock. In this case:
- Follow the UEFI Lock removal method covered earlier in this guide.
- Restart your computer.
- Press F3 when prompted by the Credential Guard Opt-out Tool.
This is the only supported method for disabling Credential Guard when firmware protection is enforcing the feature.
Important: If Credential Guard continues to re-enable itself on a work or school computer, the setting may be managed through your organization’s security policies. Contact your IT administrator before making additional changes.
What Happens After You Disable Credential Guard?
Disabling Credential Guard can solve compatibility problems, but it also removes an important layer of Windows security. Before deciding whether to leave it disabled, it’s worth understanding both the benefits and the risks.
Benefits of Disabling Credential Guard
Depending on your situation, turning off Credential Guard may:
- Allow VMware Workstation to launch normally
- Restore full compatibility with Oracle VirtualBox
- Allow Remote Desktop (RDP) to save login credentials that use supported authentication methods
- Resolve virtualization conflicts caused by Virtualization-Based Security (VBS)
- Improve compatibility with certain legacy enterprise applications
- Free virtualization resources for development, testing, and lab environments
For many developers, IT professionals, and virtualization enthusiasts, these improvements are the primary reason for disabling Credential Guard.
Security Risks You Should Know
While disabling Credential Guard improves compatibility, it also reduces your device’s protection against credential theft. Without Credential Guard:
- NTLM password hashes receive less protection
- Kerberos tickets become more accessible to attackers with elevated privileges
- Malware has fewer barriers protecting authentication secrets
- Your device becomes more vulnerable to Pass-the-Hash and Pass-the-Ticket attacks
Important: If you no longer need VMware, VirtualBox, or another application that required Credential Guard to be disabled, consider turning the feature back on to restore Windows’ built-in credential protection.
Can You Disable Credential Guard on Windows 11 Home?
Yes — but the answer depends on how Credential Guard is configured on your PC.
Unlike Windows 11 Pro, Enterprise, and Education, Windows 11 Home doesn’t include the Local Group Policy Editor (gpedit.msc), which is one of Microsoft’s recommended ways to manage Credential Guard and VBS. However, that doesn’t mean you’re out of options.
Many Windows 11 Home PCs still include virtualization-based security components such as Memory Integrity, VBS, Device Guard, or registry settings that behave similarly to Credential Guard. Depending on your hardware, Windows version, and OEM configuration, these features can still interfere with virtualization software and legacy authentication methods.
That’s why the methods in this guide focus on tools available to most Windows 11 Home users:
- Windows Security
- Registry Editor
- PowerShell
- Command Prompt
- Microsoft’s DG Readiness Tool (where supported)
- UEFI Lock removal for advanced scenarios
Important: Not every Windows 11 Home PC has Credential Guard enabled. Before making changes, always verify its status using the PowerShell command covered earlier in this guide.
If you’re using a work or school device, keep in mind that your organization may manage Credential Guard through security policies. In that case, local changes may not be enough, and the feature could be automatically re-enabled.
Frequently Asked Questions
How do I disable Credential Guard in Windows 11 Home?
Start by turning off Memory Integrity in Windows Security. If Credential Guard remains enabled, modify the LsaCfgFlags registry value, disable the Windows hypervisor if necessary, and verify the result using PowerShell. If your system uses a UEFI Lock, follow the advanced removal method covered earlier in this guide.
Does Windows 11 Home have Credential Guard?
Windows 11 Home doesn’t include all of the Credential Guard management features available in Pro, Enterprise, and Education editions. However, some Home devices still use Virtualization-Based Security (VBS), Memory Integrity, or related security components that can produce similar compatibility issues. Always check whether Credential Guard is actually enabled before attempting to disable it.
Is it safe to disable Credential Guard?
Yes, but only if you understand the trade-offs. Disabling Credential Guard can resolve compatibility issues with virtualization software and legacy applications, but it also removes an important layer of protection against credential theft. If your PC doesn’t require virtualization software or legacy authentication, it’s generally safer to leave it enabled.
Tip: Re-enable Credential Guard once you’ve finished troubleshooting or no longer need the compatibility workaround.
Why is VMware saying Credential Guard is enabled?
This message usually appears because Credential Guard, Virtualization-Based Security (VBS), Hyper-V, or the Windows hypervisor is using your processor’s virtualization features, leaving VMware Workstation unable to access the hardware virtualization resources it needs to run virtual machines.
Does disabling Memory Integrity disable Credential Guard?
Not always. Although both features rely on Virtualization-Based Security (VBS), they are separate Windows security technologies. Turning off Memory Integrity may resolve some compatibility issues, but Credential Guard can continue running until you disable it using the appropriate registry, boot configuration, or policy settings.
How do I disable VBS in Windows 11 Home?
Depending on your system configuration, you may need to turn off Memory Integrity, disable related virtualization features, modify the required registry values, and restart Windows. Some systems may also require additional changes if a UEFI Lock is protecting the feature.
How do I disable Device Guard without Group Policy?
Since Windows 11 Home doesn’t include Group Policy Editor, you can manage Device Guard-related settings through Registry Editor, PowerShell, Command Prompt, and Windows Security. The exact method depends on which security components are active on your PC.
Why can’t I save Remote Desktop credentials?
When Credential Guard is enabled, Windows may prevent Remote Desktop (RDP) from saving credentials for connections that use NTLM authentication. Disabling Credential Guard may restore credential saving if your RDP connections rely on this authentication method.
Can I enable Credential Guard again later?
Yes. You can reverse the changes by re-enabling Memory Integrity, restoring the original Registry settings, re-enabling the Windows hypervisor if you disabled it, and restarting your computer. Re-enabling Credential Guard restores the additional protection it provides against credential theft and advanced authentication attacks.
Wrapping Up
If Credential Guard is preventing VMware Workstation, VirtualBox, Remote Desktop, or other applications from working correctly, you now have several proven ways to disable it on Windows 11 Home.
In this guide, you learned how to:
- Check whether Credential Guard is enabled using PowerShell, System Information, and Windows Security
- Turn off Memory Integrity and review Virtualization-Based Security (VBS) settings
- Disable Credential Guard through the Windows Registry by modifying LsaCfgFlags
- Turn off the Windows hypervisor when virtualization software requires direct hardware access
- Use the advanced UEFI Lock removal method if standard changes don’t work
- Disable Credential Guard with Microsoft’s DG Readiness Tool on supported systems
- Verify that Credential Guard has been successfully disabled before testing your applications
For most Windows 11 Home users, starting with Memory Integrity and Registry Editor is usually enough. If Credential Guard is still active after those steps, work through the remaining methods one at a time instead of making multiple changes at once. This makes it much easier to identify exactly which step resolved the problem.
In most cases, the combination of turning off Memory Integrity, setting LsaCfgFlags to 0 in the Registry, and restarting Windows is enough to fully disable Credential Guard. If the feature still shows as enabled after that, the UEFI Lock method or the DG Readiness Tool are the next best options.
One last thing: Only keep Credential Guard disabled for as long as you need it. Once you’ve finished using VMware Workstation, VirtualBox, or other software that required the change, consider turning Credential Guard back on to restore Windows’ built-in protection against credential theft and advanced attacks.
Visit Our Post Page: Blog Page
Discover more from Izoate
Subscribe to get the latest posts sent to your email.