
Want to keep your Mac running smoothly in 2026? Learn how to check storage on Mac using simple, step-by-step methods. From viewing storage usage and finding large files to understanding System Data and freeing up disk space. Keep your Mac running smoothly today.
Whether you’re trying to install a macOS update, download a large file, or simply figure out why your Mac is running low on space, checking your storage is the first step. Fortunately, macOS includes several built-in tools that let you view available storage, identify large files, and understand what’s taking up space on your drive.
Quick Answer: How to Check Storage on a Mac Instantly
If you just need the fastest way to check your available disk space, follow these steps:
- Click the Apple menu () in the top-left corner.
- Select About This Mac.
- Click More Info.
- Open Storage Settings.
You will instantly see your total storage, your available space, and a color-coded breakdown of exactly what is using your storage.
Where Is the Storage Tab on Mac? (Locating Your Storage Settings)
Apple recently changed where storage settings live. The method you use depends entirely on which version of macOS your computer is currently running.
Checking Storage in macOS Sequoia, Sonoma, and Ventura
In recent updates, Apple moved the storage management tools into the main System Settings app.
- Click the Apple logo > System Settings.
- Click General in the left sidebar.
- Select Storage on the right.
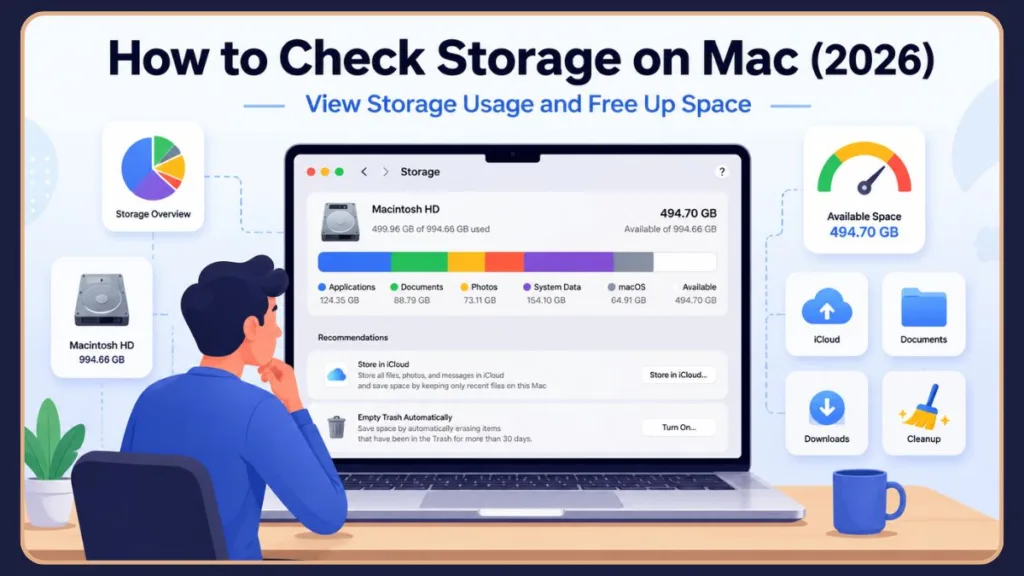
At the top of this menu, a horizontal bar graph provides a top-level overview. The bar represents your total capacity, the colored sections represent used storage broken down by category, and the empty space on the right indicates your available storage.
Checking Storage in macOS Monterey and Earlier Versions
If you are running macOS Monterey, Big Sur, or Catalina, the path is slightly different:
- Click the Apple logo > About This Mac.
- Click on the Storage tab at the top of the window.
You will see the same colored bar chart overview, and clicking Manage will let you dig into specific categories.
What Do Mac Storage Categories Mean? (Understanding Your Drive Usage)
When you view your storage graph in System Settings, you will see various categories. Understanding these is the key to successfully freeing up space. This is a crucial step, as knowing exactly what is consuming your drive prevents accidental deletions.
| Category | What It Includes |
| Applications | Installed apps |
| Documents | Files and folders |
| Photos | Photo library |
| Messages | iMessage media and texts |
| Local emails and attachments | |
| System Data | Caches, logs, temporary files |
| macOS | Operating system files |
| Other Users | Files from secondary accounts |
Applications (Installed Software & Programs)
This includes all software installed on your Mac. Often, old games or unused utilities sit here eating up dozens of gigabytes. Removing apps you no longer use is a quick way to reclaim a significant amount of space. If you find yourself managing various applications and want to streamline your workflow, learning how to use Apple Shortcuts on iPhone and Mac can help automate repetitive tasks and save valuable time.
Documents (Personal Files & Downloads)
This is a catch-all for your personal files, including PDFs, text files, and anything sitting in your Downloads folder. It also includes large media files like videos or project files you have saved locally. Sorting this folder by size often reveals massive forgotten files.
Photos (Apple Photos Library & Local Media)
If your Photos app is set to store original, full-resolution images locally rather than optimizing them via iCloud, this category will be massive. Moving your library to an external drive or utilizing cloud optimization can significantly shrink this footprint.
Messages (iMessage Texts & Shared Attachments)
This includes text messages and all the media shared via iMessage. Videos, GIFs, and high-resolution photos sent and received over the years are stored here on your hard drive, which can silently bloat over time.
Mail (Locally Stored Emails & Attachments)
This category consists of locally stored emails and their attachments. If you receive a lot of large files via email, your Mac saves them locally for quick access, which can quickly consume gigabytes of storage if left unmanaged.
System Data (Caches, Logs & Temporary Files)
Previously called “Other,” this is the most confusing category. System Data contains app caches, local Time Machine snapshots, temporary system files, and browser caches. While macOS manages this automatically, rogue apps can sometimes cause it to bloat to unmanageable sizes.
macOS (Core Operating System Files)
This is the untouchable core of your operating system. It includes the essential files and frameworks required for your Mac to function properly. You cannot and should not attempt to delete files from this category.
Other Users (Data From Secondary Accounts)
If you have multiple user accounts set up on your Mac, this accounts for the files and apps installed under those separate profiles. You will need to log into those specific accounts to manage or delete their data.
Alternative Built-In Methods to Check Mac Disk Space
Depending on your technical comfort level and what you need to achieve, macOS offers several other tools to check your storage.
| Method | Easy to Use | Detailed View | Best For |
| System Settings | Yes | Yes | Most users |
| Finder | Yes | Limited | Quick checks |
| Disk Utility | Moderate | Moderate | Drive information |
| System Information | Moderate | Advanced | Hardware details |
| Terminal | No | Advanced | Power users |
How to Check Storage on Mac Using the Finder App
If you want a fast way to check available storage without opening your system settings, the Finder app offers excellent shortcuts.
View Available Capacity With “Get Info”
- Open a new Finder window.
- Under “Locations” in the sidebar, select Macintosh HD (or your primary drive name).
- Press
Command + Ior right-click the drive and select Get Info.
A window will pop up displaying the drive’s total capacity, available storage, and used space.
Enable the Finder Status Bar for Constant Monitoring
You can set Finder to display your available storage constantly at the bottom of every window.
- Open Finder.
- Click View in the top menu bar.
- Select Show Status Bar.
Look at the bottom edge of your Finder window. It will now display the number of items in your current folder and the remaining available storage on your hard drive.
Use Quick Look for an Instant Storage Snapshot
You can also use macOS’s Quick Look feature directly from your desktop:
- Enable hard disks to show on your desktop (Open Finder, click Finder > Settings > General, and check Hard disks).
- Select Macintosh HD (or your drive’s name) on your desktop.
- Press the Spacebar.
A Quick Look window will pop up instantly showing the total capacity and available space on your drive.
How to Check Storage on Mac Using Disk Utility for Drive Information
Disk Utility is a built-in macOS app designed for managing and troubleshooting internal and external storage devices. If you are struggling with hardware connectivity, such as needing to add a printer to your Mac, remember that Disk Utility handles drive volumes, while System Settings manages your storage files.
- Open Finder > Applications > Utilities.
- Double-click Disk Utility.
- Select Macintosh HD (or your APFS volume) from the left sidebar.
The main panel will display your capacity, used space, and available space.
When to Use Disk Utility: This tool is best when you need to troubleshoot a failing drive, format an external hard drive, or see exactly how your APFS volumes and partitions are structured. It is less useful for simply finding out which of your personal files are taking up space.
How to Check Storage on Mac Using System Information for Hardware Details
For a highly detailed, technical breakdown of your hardware, use the System Information app.
- Open Finder > Applications > Utilities.
- Double-click System Information.
- In the left sidebar, under the Hardware section, click Storage.
This screen reveals in-depth details about your storage devices, including the file system type, volume UUIDs, and exactly how much space each partition is consuming.
How to Check Storage on Mac Using Terminal Commands
For system administrators and power users, the macOS Terminal provides instantaneous storage data without loading a graphical interface.
Run the df -h Command for Detailed Volume Sizes
- Open Terminal (via Spotlight or Applications > Utilities).
- Type
df -hand press Return.
This command displays a list of all mounted volumes. Look for the row representing /System/Volumes/Data. The columns will show you the total size, used space, available space, and capacity percentage. Note that Terminal calculates sizes in gibibytes (GiB) rather than standard gigabytes (GB), so the numbers will look slightly smaller than what Finder reports.
Run the du -sh Command to Check Specific Folder Sizes
If you want to know the size of a specific folder, type du -sh ~ and press Return. This will calculate and display the total disk usage of your current user’s home directory.
How to See Exactly What’s Taking Up Space on Your Mac
Knowing your drive is full is only step one; you need to identify the culprits.
- Method 1: Storage Settings. Go to System Settings > General > Storage and click the “i” (info) icon next to categories like Applications or Documents to see a sorted list of the largest items.
- Method 2: Finder Search. You can use Finder’s search functionality to filter your entire hard drive.
- Method 3: Sort Files by Size. Open any Finder window, switch to List View, and click the “Size” column header to bring the heaviest files to the top. (You may need to press
Command + Jand check “Calculate all sizes” for folders).
How to Find Large Files on Mac and Reclaim Drive Space
To hunt down massive files manually using Finder:
- Open Finder and press
Command + F. - Click the first dropdown filter and select File Size.
- Set the second dropdown to is greater than.
- Enter a value, such as
500and selectMB.
This immediately populates a list of every massive file on your system. Pay special attention to your Downloads folder, which is typically a graveyard for massive .dmg app installers and old ZIP archives.
Why Is My Mac Storage Full? Common Space Hogs Explained
If your drive is full, it is almost certainly due to one of these common causes:
- Large video files: 4K video clips take up massive amounts of space.
- Downloads: Years of unemptied email attachments and web downloads.
- Duplicate files: Accidentally saving the same photos or documents multiple times.
- System Data growth: App caches and local Time Machine backups inflating over time.
- Photos and backups: Storing full-resolution photos locally or keeping old iOS device backups on your hard drive.
- Applications: Massive software suites (like Adobe Creative Cloud or Logic Pro) and heavy games.
How Much Free Storage Should a Mac Have for Optimal Performance?
SSDs require empty space to perform “wear leveling” and background maintenance. If your drive is too full, your Mac will slow down significantly. A general rule is to keep 10% to 15% of your drive totally empty.
| SSD Size | Recommended Free Space |
| 256 GB | 25–40 GB |
| 512 GB | 50–75 GB |
| 1 TB | 100+ GB |
How to Free Up Storage Space on Mac Quickly and Safely
Once you know what is hogging your space, take these steps to reclaim it:
- Delete Unused Apps: Drag them from the Applications folder to the Trash.
- Remove Large Files: Use the Finder search trick above to delete massive, unnecessary files.
- Empty Trash: Files in the Trash still take up space until you actually empty it.
- Clear Downloads Folder: Sort your Downloads folder by date and delete anything older than a few months.
- Move Files to iCloud or External Storage: Offload heavy video and photo libraries to an external SSD.
- Use Optimize Storage: In your Mac’s Storage settings, enable Apple’s recommendations to “Store in iCloud” and “Empty Trash Automatically.”
Frequently Asked Questions About Mac Storage
How do I view my disc space on my Mac?
Click the Apple menu, select About This Mac or System Settings, then navigate to the Storage section to see your capacity and available space.
How to see disk space terminal?
Open Terminal and type df -h to see a list of mounted volumes and their storage details, or use du -sh ~ to check specific directory usage.
How do I free up disk space on my Mac?
You can free up space by deleting unused applications, removing large files from your Downloads folder, emptying the Trash, or utilizing the Optimize Storage settings in macOS.
How do I free up RAM on my Mac?
While checking storage is different from checking RAM, you can free up memory by closing heavy applications in the Activity Monitor or restarting your Mac to clear temporary memory processes.
How do I Check my Mac’s storage space?
Go to Apple Menu > System Settings > General > Storage to see a detailed visual breakdown of your drive capacity and usage.
How do I know if my Mac has a lot of storage?
You can check your total capacity by going to the Storage settings or using “Get Info” on your Macintosh HD in Finder.
How do I know if my Mac is using a lot of space?
If your Mac is running slowly or you receive “Disk Almost Full” warnings, you can verify your storage usage by opening the Storage tab in System Settings or checking the Finder Status Bar.
How to manage storage on a MacBook Pro?
You can manage storage on your MacBook Pro by following the same steps as other Mac models: navigate to System Settings > General > Storage and use the built-in recommendations to optimize or delete unnecessary files.
What does purgeable storage mean on Mac?
Purgeable storage consists of files that macOS can automatically delete when you need more space. This includes watched movies, old cached files, and local copies of files stored in iCloud.
Why does my Mac say storage is full when it isn’t?
This is usually caused by hidden files in the System Data category, such as local Time Machine snapshots or purgeable space that hasn’t been cleared yet. Restarting your Mac or running Apple’s built-in storage optimization tools can often resolve this discrepancy.
Can I add more storage to my Mac?
Modern Apple Silicon Macs (M1, M2, M3, etc.) have their SSDs soldered to the motherboard, meaning you cannot upgrade the internal storage after purchase. You must rely on external drives or cloud storage.
What files can I safely delete on Mac?
You can safely delete anything in your Downloads folder, old DMG installers, unused applications, and anything sitting in your Trash. Never delete files from the /System folder.
How much storage should macOS use?
A healthy macOS installation typically consumes between 15 GB and 25 GB of space.
Conclusion: Keep Your Mac Storage Optimized
Checking your Mac storage regularly helps prevent frustrating slowdowns, failed macOS updates, and sudden storage-related errors right when you need your computer the most. While tools like Finder, Disk Utility, and Terminal all provide valuable and detailed technical information, navigating to your System Settings remains the absolute easiest and most visually intuitive way to see your available space and accurately understand exactly what’s taking up storage on your drive.
If your Mac is consistently running low on space, taking a few minutes each month to review your specific storage categories, empty your trash, clear out old downloads, and remove unnecessary files can quickly restore your Mac’s optimal performance and extend the lifespan of your solid-state drive. By staying proactive about your disk space, you ensure a smoother, faster, and much more reliable computing experience.
Visit Our Post Page: Blog Page
Discover more from Izoate
Subscribe to get the latest posts sent to your email.