
Can’t find the hidden Facebook Trash or Recycle Bin? Learn how to empty trash on Facebook permanently. Get step-by-step guides for Android, iPhone, and desktop in 2026.
Let’s be honest: Facebook doesn’t exactly make it easy to clean house. If you’ve ever tried to find a simple “Empty Trash” button on your profile, you’ve likely realized that it’s like searching for a hidden level in a game—one that the developers buried deep behind three different menus and a confusing “Activity Log.”
It is incredibly frustrating when you delete a post for a reason—perhaps it’s outdated, personal, or just no longer fits your digital brand—only to realize it’s still lingering in a “trash” folder you can’t find. If you’re feeling a little confused or even slightly anxious about where your deleted data is sitting, don’t worry. You aren’t “bad at tech.” Facebook’s interface is notorious for moving things around.
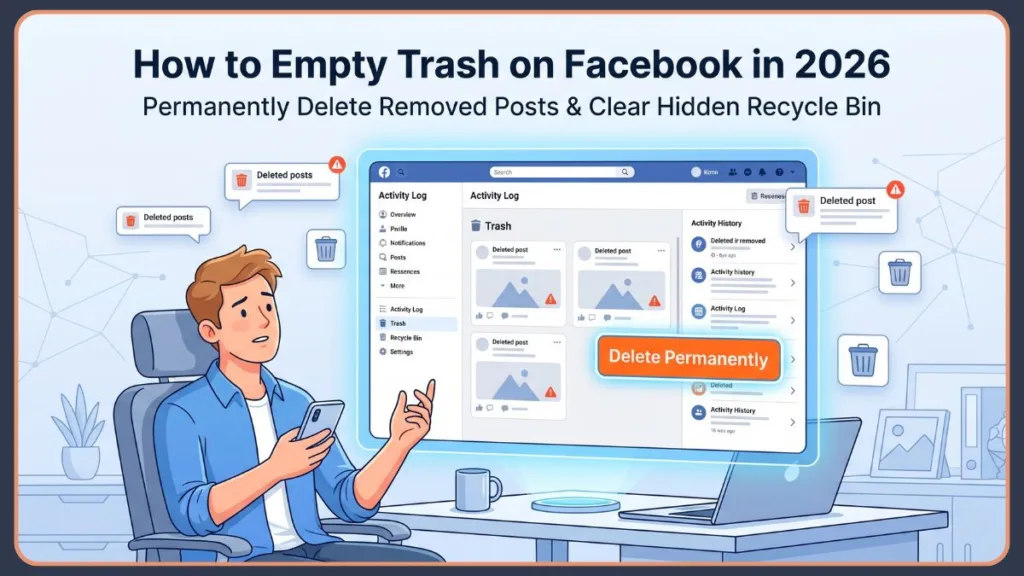
In this guide, I’m going to show you exactly how to empty trash on Facebook across every device you own. We’ll cover the “Recycle Bin” terminology on iPhones, the hidden path on Android, and the desktop workflow. By the end of this, you’ll have full control over your digital footprint.
Beyond just cleaning up your profile for aesthetic reasons, regular maintenance of your deleted items serves a deeper purpose in today’s privacy-conscious world. Undertaking a thorough Facebook account cleanup ensures that even if someone gained unauthorized access to your account settings in the future, they wouldn’t find a backlog of sensitive, previously deleted data waiting to be restored. This proactive approach to digital hygiene is a simple way to strengthen your overall Facebook data and privacy settings without needing complex technical skills.
Furthermore, this concept of digital minimalism is becoming essential as our social media histories span over a decade. By learning how to clear trash on Facebook, you are essentially performing a Facebook storage cleanup that removes the “ghost” data that might otherwise remain on Meta’s servers for the full 30-day trash deletion period. Clearing this data manually is the only way to ensure your deleted posts are gone before the automatic system takes over.
Where Is the Trash Folder on Facebook?
Before we jump into the “how,” we have to solve the “where.” Most people expect the Facebook trash folder to be a standalone tab on their profile or a clear option in the main menu. Unfortunately, it isn’t.
Facebook stores your deleted items inside the Activity Log. Think of the Activity Log as the “Black Box” of your account—it records every like, comment, and post you’ve ever made. Within that log, Facebook provides a temporary holding area where your deleted posts sit for a 30-day deletion period.
Furthermore, with the introduction of the Meta Accounts Center, your data management is becoming more centralized across platforms. This means that while you are searching for where is the trash folder on Facebook, you might also notice links to your Instagram deletion history or cross-platform activity. Meta continues to bridge the gap between these two services to streamline your privacy control, so learning the path through the Facebook Activity Log today prepares you for how these menus will evolve as the platforms become even more integrated.
In addition to searching for the folder itself, many users find it helpful to use the Facebook Manage Activity filters to narrow down the specific content type they are looking for. Because the Facebook Activity Log tracks everything from page likes to group interactions, the folder can sometimes appear overwhelmingly cluttered, making it difficult to spot the specific items you wish to purge.
The Naming Confusion
One thing that trips up many users is that Facebook uses different names depending on your phone’s operating system:
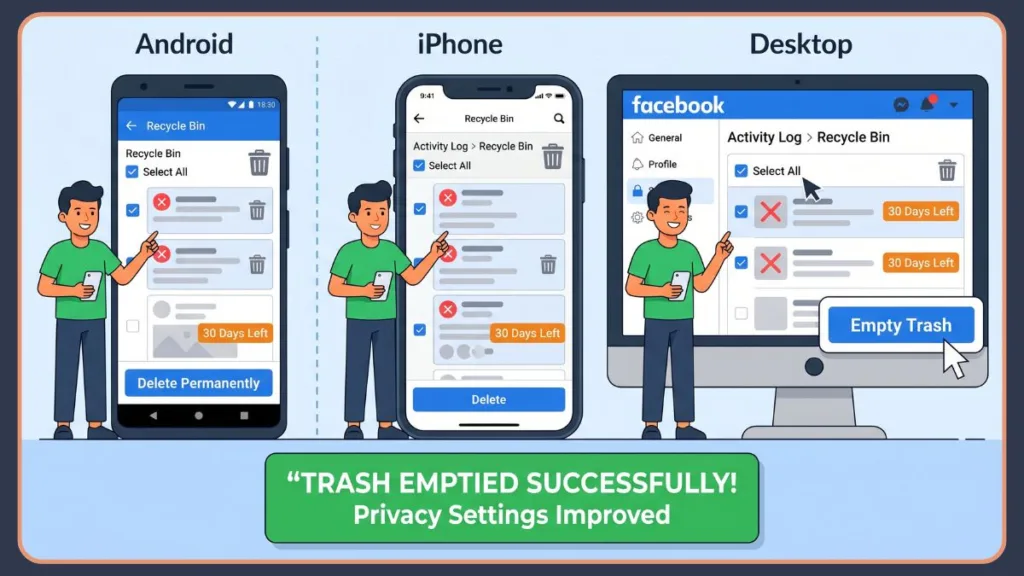
- Android and Desktop users will see it labeled as Trash.
- iPhone (iOS) users will almost always see it labeled as the Recycle Bin.
Regardless of the name, the function is the same: it’s a safety net. If you delete something by mistake, you have 30 days to restore deleted Facebook posts to your timeline. If you don’t act, Facebook purges them permanently after that window closes. But if you want them gone now, you have to go in and empty it manually.
How to Empty Trash on Facebook on Android
If you are using an Android device, the path to your trash is a bit of a trek through the settings. Here is how to navigate there without getting lost.
Step 3: Open the Activity Log
First, open your Facebook app and tap the three horizontal lines (Menu) in the top right corner. Scroll down and tap Settings & Privacy, then select Settings.
From here, you need to find the “Your Activity” section. It’s usually about halfway down the page. Tap on Activity Log.
Step 3: Navigate to the Trash Folder
Once you are in the Activity Log, you’ll see several buttons at the top of the screen (like “Archive” and “Activity History”). Tap the button labeled Trash.
Step 3: Permanently Delete Posts from Facebook Trash
You will now see a list of every post, photo, or status update you’ve “deleted” in the last 30 days. Next to each item, you’ll see how many days are left before it’s gone for good.
To delete an item immediately:
- Tap the three dots next to the specific post.
- Select Delete.
- A warning will pop up asking if you’re sure. Tap Delete again to confirm.
In some cases, users might find the Facebook trash not showing up despite following the correct menu path, which is often a result of a cluttered app cache.
Important Tip: If your list of deleted posts fails to load or appears frozen, it is helpful to go into your phone’s system settings and clear the Facebook app’s cache. This forced refresh clears out old temporary data and allows the Facebook Manage Activity tool to pull a fresh, accurate list of your 30-day trash deletion items directly from the server.
If you are struggling with how to empty Facebook trash on Android for multiple items simultaneously, remember that the interface is designed to prevent accidental mass wipes. Consequently, if you have hundreds of items, the app may take a moment to refresh the list after each manual deletion. Consistency is key when performing a deep Facebook account cleanup on a mobile connection.
Pro-Tip: If the “Trash” button isn’t visible in that top row, try swiping that row of buttons to the left. Sometimes it’s hidden just off-screen!
How to Empty Facebook Trash on iPhone (Recycle Bin)
For the iPhone crowd, the steps are nearly identical, but the terminology and UI layout differ slightly. Remember, you are looking for the Facebook recycle bin.
Step 3: Navigating the iOS Interface
Open your Facebook app and look at the bottom right corner of your screen. Tap your profile picture or the three lines (Menu). Tap the Gear icon (Settings) at the top right.
Scroll down to the “Your activity” section and tap Activity log.
Step 3: Entering the Recycle Bin
At the very top of the Activity Log screen, you will see a large button labeled Recycle Bin. Tap it.
Step 3: Purging Items Manually
Just like on Android, you’ll see your deleted items.
- Find the post you want to vanish.
- Tap the three dots icon.
- Choose Delete.
- Confirm the action.
When you are navigating the Facebook recycle bin on an iOS device, you can also leverage the “Filter” tool located at the top of the screen to sort through your history.
Important Tip: This is particularly useful if you only want to how to clear trash on Facebook for specific content types, such as tagged photos or old status updates, rather than scrolling through months of mixed activity. By filtering by date range or specific people, you can find the exact items you want to purge without the risk of accidentally losing a different memory you intended to keep.
Additionally, for those who need a quicker way to manage recent content, Facebook often provides a “Manage Your Posts” shortcut directly on your profile. To use this shortcut on iOS:
- Navigate to your own Facebook profile page.
- Tap the three dots next to the “Edit Profile” button.
- Select Manage Posts from the list.
- From here, you can select multiple posts and tap the Trash icon at the bottom.
- Remember that this only moves them to the Facebook recycle bin; you will still need to follow the steps above to permanently delete posts from Facebook trash for good.
This alternative method is often the most efficient way to delete old Facebook posts that you have recently realized are no longer appropriate for your public timeline. By using the profile-view shortcut, you avoid the deeper menus of the Facebook Activity Log and get straight to the content management.
Why it matters: iPhone users often get confused because they are looking for “Trash.” If you see “Recycle Bin,” you are in the right place. It’s the same thing, just localized for Apple’s naming conventions.
How to Empty Facebook Trash on Desktop
Working on a laptop or PC is actually the fastest way to manage your content because you have a much better view of the sidebar.
Step 3: The Profile Shortcut
Go to Facebook.com and click on your profile picture in the top right corner. Once you are on your profile page, look for the three dots (…) button located on the far right of your profile menu (underneath the “Edit Profile” button).
Select Activity Log from that dropdown menu.
Step 3: Using the Sidebar Navigation
On the left-hand side of the screen, you will see a menu of all your activity types. Look for Trash at the bottom of that list and click it.
Step 3: Confirming Deletion
Click the checkbox next to any item you want to remove. Once checked, a menu will appear at the top. Click Delete and confirm. Facebook will likely give you a “Final Warning” pop-up here—this is normal. They just want to make sure you aren’t accidentally losing a memory you can’t get back.
Similarly, the browser version offers a highly granular “Filter” icon that allows you to view your activity by specific years or even months.
Important Tip: This makes it much easier to delete old Facebook posts from a specific era of your life—such as an old job or school period—without having to manually hunt through your entire digital history. This level of organization is one of the primary reasons why many power users prefer the desktop interface when performing a deep Facebook storage cleanup.
Furthermore, if you are an administrator of a Facebook Business Page, the desktop interface is essential. Content deleted from a professional page is often stored in a separate “Content Library” or “Trash” within the Meta Business Suite. To find this:
- Open Meta Business Suite from your desktop sidebar.
- Go to Content and then select the Published or Archived tab.
- Look for the Trash icon or tab, where you can follow the same confirmation steps to ensure professional data is also wiped clean.
This distinction is vital because personal and professional deleted posts do not always appear in the same unified folder. If you only perform a Facebook storage cleanup on your personal account, your business page’s data might still be lingering.
How to Delete All Facebook Trash at Once (The Secret Workflow)
Here is the unique insight that most guides miss: Facebook does not have a single “Empty All” button.
It’s a bizarre design choice, but you won’t find a “Clear Bin” button like you do in your email. Instead, you have to use the bulk delete workflow.
Step 3: The Select-All Strategy
Whether you are on mobile or desktop, the trick is the “All” checkbox.
- Go to your Trash or Recycle Bin.
- At the top of the list, you will see a box labeled All. Check it.
- Once every item is highlighted, look for the three dots in the corner or the Trash icon at the bottom of the screen.
- Tap Delete.
Step 3: The Confirmation Trap
Because you are trying to bulk delete Facebook posts, Facebook is going to get very protective. You will usually have to:
- Confirm the deletion in a pop-up.
- In some cases, re-enter your Facebook password.
- Wait a few seconds for the server to process the request.
However, one technical detail to keep in mind is that Facebook sometimes implements a rate limit on how many items you can purge at one time.
Important Tip: If you attempt to delete all Facebook trash at once and receive an unexpected error message, it is likely that the platform has temporarily throttled your activity to prevent automated bot behavior. If this happens, try selecting smaller batches of twenty-five to fifty posts at a time to ensure the bulk delete Facebook posts request processes successfully without triggering the platform’s anti-spam filters.
Moreover, if you find that the bulk delete process is taking several minutes to update your screen, do not refresh the page immediately. The server is working through a large volume of deleted posts, and interrupting the process can sometimes cause a sync error where the items appear to return to the folder temporarily. Once you have initiated the request to delete all Facebook trash at once, give the system time to finalize the permanent removal.
This might feel like a hassle, but it’s a security feature designed to stop hackers from wiping your entire account history in two seconds.
Facebook Archive vs. Trash: What’s the Difference?
While doing your digital cleaning, you probably noticed an Archive folder sitting right next to the Trash. It’s important to know the difference so you don’t accidentally lose something important.
| Feature | What it does | Who can see it? | Time Limit |
| Archive | Hides posts from your timeline but keeps them saved. | Only You | Indefinite |
| Trash | Prepares posts to be permanently deleted. | Only You | 30 Days |
Choosing the right option often depends on your long-term goals for your personal brand and digital legacy. For instance, many people utilize the Facebook archive vs trash distinction when they are undergoing a professional rebranding or moving on from a past relationship. You might move casual photos to the archive so they remain a private memory for your eyes only, while simultaneously using the trash to permanently remove content that no longer aligns with the public image you wish to project today.
Important Tip: Think of the Facebook archive as a private digital scrapbook and the Facebook recycle bin as a shredder with a 30-day delay. If you aren’t 100% ready to say goodbye to a post but know it shouldn’t be public, always choose the Archive first. You can always move items from the Archive to the Trash later, but the reverse becomes impossible once the 30-day trash deletion window closes.
When to use Archive: If you have an old photo or post that you don’t want the public to see anymore, but you still want to look back on it for the memories, move it to the Archive. It stays there forever.
When to use Trash: If you want the content gone from the internet entirely, move it to the Trash.
Proactive Privacy: Using Trash for a Digital Footprint Audit
Regularly reviewing what sits in your Facebook recycle bin is a great way to perform a “Digital Footprint Audit.” This practice allows you to see exactly what you’ve been removing and ensures that no sensitive information—like old addresses in event posts or phone numbers in status updates—is lingering.
When you delete old Facebook posts that contain personal information, you are closing potential loopholes that could be used for social engineering or data scraping. Therefore, making it a habit to permanently delete posts from Facebook trash manually rather than waiting for the 30-day timer is a hallmark of a tech-savvy user. It adds an extra layer of protection to your Facebook data and privacy settings that the automated system simply cannot replicate in real-time.
What Happens After You Empty Facebook Trash?
This is where the mild anxiety usually kicks in: Is it really gone?
Yes. Once you manually permanently delete an item from the trash, it is completely removed from your profile and your friends’ feeds.
- The 30-Day Shortcut: By emptying the trash manually, you are simply bypassing the 30-day waiting period.
- Server Sync: It might take a few minutes for the changes to reflect globally across all devices. If you delete it on your laptop and still see it on your phone, just refresh the app.
- Data Downloads: If you use the Download Your Information tool immediately after deleting, the post might still appear in that file for a very short window, but for all intents and purposes, it is invisible to the world.
While you have successfully learned how to permanently delete posts from Facebook trash, it is important to remember that the “permanence” of the internet has its limits.
Important Tip: Even after Facebook removes the data from its internal servers, external search engines or third-party archival sites might still have cached versions of your public posts if they were crawled before you deleted them. For this reason, it is always best to act quickly within the 30-day window to minimize the chance of your data being captured by outside scrapers.
Consequently, if you are deleting a post due to a safety concern, you may also want to request a “re-crawl” from major search engines to ensure that their cached snippets of your Facebook profile are also updated. This ensures that your Facebook account cleanup is reflected beyond the walls of the social network itself.
Specialized Cleanup: Managing Stories and Reels in the Deletion Workflow
It is important to note that Facebook Stories and Reels follow a slightly different path within the Facebook Manage Activity ecosystem. Unlike standard timeline posts, stories that are deleted before their twenty-four-hour window expires are often moved to a specific story archive rather than the general trash area.
Important Tip: This requires a separate visit to your Archive settings to ensure those temporary moments aren’t being stored indefinitely against your wishes.
Similarly, if you are looking for how to delete Facebook trash specifically for short-form video content like Reels, you may find these items categorized under a different activity header. Staying on top of these various content types is the only way to perform a truly comprehensive Facebook storage cleanup. By understanding these subtle differences in how to empty Facebook trash on iPhone and how to empty Facebook trash on Android, you can maintain a profile that is as current and professional as possible.
One often overlooked detail in how to delete Facebook trash is how the system treats posts you didn’t create yourself. When you remove a post you were tagged in, it doesn’t actually enter your Facebook recycle bin. Instead, it moves to a section within the Facebook Activity Log labeled “Hidden from profile.” To truly clear these:
- Go to your Activity Log.
- Filter by Activity You’re Tagged In.
- Select the items and choose Remove Tag or Hide from Profile.
- Unlike your own posts, these do not have a separate “trash” confirmation because you are essentially just breaking the link between your profile and someone else’s content.
Troubleshooting: Why Can’t I Find the Trash Option?
If you’ve followed the steps above and the Trash option is simply missing, check these three things:
- App Updates: Facebook changes its UI constantly. Ensure your app is updated to the latest version in the App Store or Google Play Store.
- Facebook Lite: If you use Facebook Lite, the “Activity Log” is found under Settings > Your Information. It’s a much simpler list, but the functionality remains the same.
- Nothing to Show: If your Facebook trash is empty, the button sometimes disappears or appears “grayed out.” If you haven’t deleted anything in the last 30 days, there won’t be a folder to manage!
In addition to these common issues, occasionally Facebook trash not showing can be a temporary server-side glitch. If you know you have recently deleted items but the folder appears empty, try logging out and back into your account. This forces a fresh synchronization of your Facebook data and privacy settings, which often resolves the issue where the interface fails to display the Facebook recycle bin correctly.
Frequently Asked Questions
Can I recover a post after the 30-day period?
No. Once the 30 days are up—or once you manually empty the trash—the content is gone for good. There is no “undo” button after that point.
Does emptying trash delete my whole account?
Not at all. This is just “digital housekeeping” for your posts. Your profile, friends list, and messages remain untouched.
Can my friends see what’s in my trash?
Absolutely not. The Trash and Recycle Bin are 100% private. Only the account owner can see what’s in there.
If I delete a comment I made on a friend’s post, does it go to my trash?
Yes. Any activity you “delete” (including comments) will appear in your Activity Log’s trash section for 30 days.
Is there a way to automate how to empty trash on Facebook?
Currently, Facebook does not offer a setting to bypass the 30-day holding period automatically. You must manually intervene if you want items deleted sooner. However, setting a monthly reminder for a Facebook storage cleanup is the best way to stay on top of your privacy manually.
Conclusion: Taking Control of Your Digital Footprint
Facebook makes this process harder than it should be, but now you have the map. Whether you call it the Facebook recycle bin or the trash folder, you now know exactly where it’s buried and how to clear it out.
Managing your Facebook account cleanup shouldn’t feel like a chore. By checking your Activity Log once a month, you can ensure that your profile only shows what you want it to show. Taking a few minutes each month to verify that your history is clear and knowing how to empty trash on Facebook is a skill that saves time and protects your peace of mind. You are now fully in control of your data and your privacy.
Visit Our Post Page: Blog Page
Discover more from Izoate
Subscribe to get the latest posts sent to your email.