
Windows 10 keeps changing the words you type? Learn how to turn off autocorrect in Windows 10 in just a few clicks — plus how to fix it in Word, Chrome, Outlook, and Edge.
If Windows 10 keeps changing the words you type — replacing names, abbreviations, or technical terms you actually meant to write — you’re not alone. Autocorrect is turned on by default in Windows 10, and while it’s designed to help catch spelling mistakes, it often does the opposite. It interrupts your workflow, changes words you typed correctly, and forces you to stop and undo what Windows “fixed.”
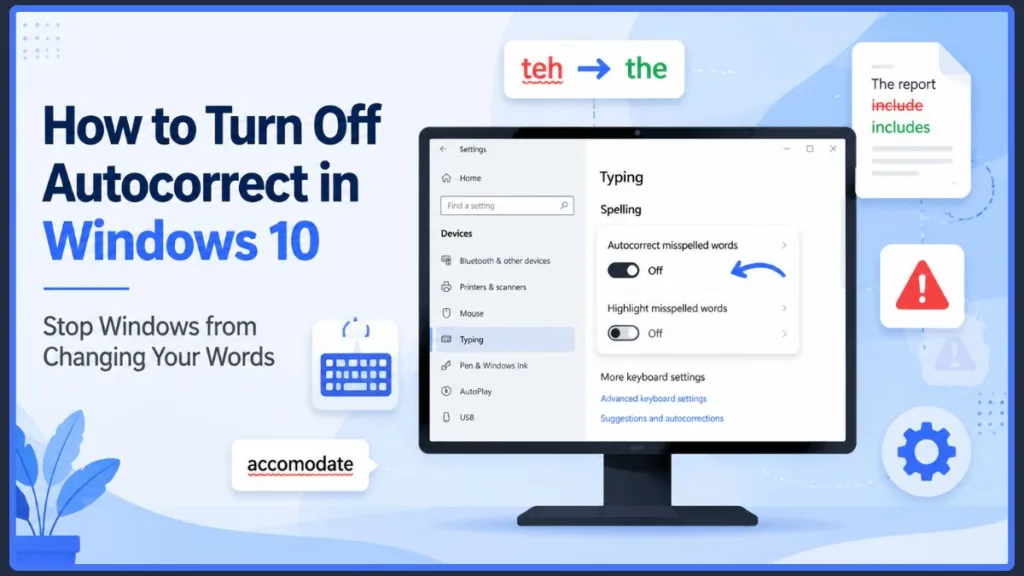
The good news is that turning it off takes less than a minute. This guide walks you through exactly how to disable autocorrect in Windows 10, what to do if it keeps happening in specific apps, and how to troubleshoot when the setting doesn’t seem to work.
How to Turn Off Autocorrect in Windows 10 in Just a Few Clicks
This is the fastest fix. If Windows is changing your words as you type, here’s how to stop it straight away.
- Press Windows + I on your keyboard to open Settings. You can also click the Start button and select the gear icon.
- Click Devices.
- Select Typing from the left sidebar.
- Under the Spelling section, find the option that says Autocorrect misspelled words.
- Click the toggle to turn it off.
That’s it. The change takes effect immediately, and Windows will stop replacing your words automatically.
Tip: Pressing Windows + I is the quickest way to open Settings without clicking through the Start menu. It works from anywhere in Windows.
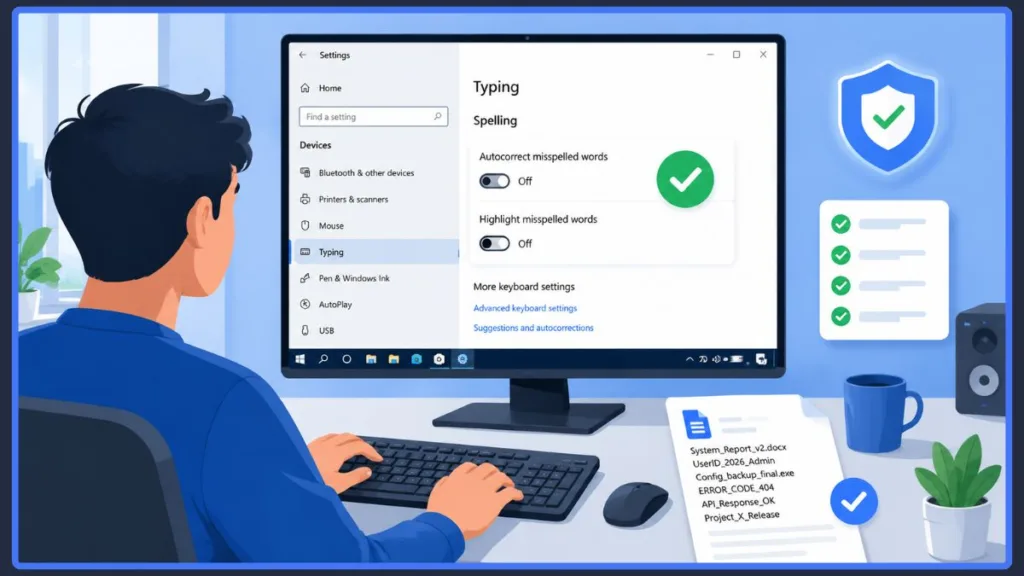
While you’re in the same menu, you’ll also see a second option called Highlight misspelled words. This controls the red squiggly underlines that appear under words Windows doesn’t recognize. These two settings work independently, so you can turn off one without affecting the other.
If you want Windows to leave your typing completely alone, turn off both toggles. If you just want the corrections to stop but don’t mind seeing the red underlines as a reference, only turn off Autocorrect misspelled words.
How to Remove the Red Underlines Without Disabling Autocorrect Completely
A lot of people search for how to turn off autocorrect when what they actually want is to get rid of the red lines. If the underlines are what’s bothering you — not the automatic corrections — you can remove them separately without touching the autocorrect setting at all.
Go back to Settings > Devices > Typing and toggle off Highlight misspelled words. That removes the red squiggly underlines while keeping the rest of your spelling settings exactly as they are.
Here’s the key difference between the two settings:
- Autocorrect misspelled words — Windows automatically replaces what it thinks is a spelling error while you type. You don’t get a choice. It just changes the word.
- Highlight misspelled words — Windows puts a red underline under words it doesn’t recognize, but it doesn’t change anything. You can right-click the word for suggestions or ignore it completely.
Note: Turning off Highlight misspelled words only removes the underlines. It does not stop Windows from auto-correcting text. If you want both features disabled, make sure both toggles are switched off.
Understanding this difference saves a lot of frustration. Many users turn off autocorrect but leave highlighting on as a light safety net — especially if they occasionally mistype but don’t want Windows making changes without permission.
Why Windows 10 Keeps Changing the Words You Type
Now that you’ve turned it off, it helps to understand why it was happening in the first place — especially if you’re someone who types technical content, uses unusual names, or works with abbreviations regularly.
Windows 10 comes with autocorrect enabled on every fresh installation. It uses a built-in dictionary to scan what you type and automatically replace words it thinks are misspelled. When it finds a close enough match in the dictionary, it swaps the word without asking.
That works reasonably well for everyday typing mistakes. But it becomes a real problem when you’re typing something Windows doesn’t recognize as a real word — like:
- Product names or brand names with unusual capitalization
- File names or folder paths that include numbers or special characters
- Abbreviations and acronyms used in your industry
- Command-line instructions or programming-related text
- Usernames or custom terminology
Windows treats all of these as spelling errors and corrects them anyway. For programmers, IT professionals, students, and writers, this is one of the most common complaints about Windows typing behavior.
Autocorrect is also not truly system-wide. It only works in apps that are built to use the Windows Spell Checking API. This is an important detail that many guides overlook. Some universal apps — including several built-in Windows apps and popular apps like Microsoft Edge — use this API and will respond to your Windows typing settings. Most traditional desktop apps, however, have their own independent spelling systems that ignore your Windows settings entirely.
This is exactly why turning off autocorrect in Windows Settings sometimes doesn’t seem to fix the problem.
Why Windows Is Still Auto-Correcting Your Text After You Turned It Off
This is one of the most common follow-up frustrations. You’ve gone into Settings, turned off autocorrect, and words are still being changed. Here’s why that happens.
When you disable autocorrect in Settings > Devices > Typing, you’re only turning off the Windows-level spelling feature. Apps like Microsoft Word, Outlook, Google Chrome, and Microsoft Edge each have their own built-in spelling and correction systems that run completely independently of Windows settings.
Turning off Windows autocorrect has no effect on these apps. You need to disable the feature separately inside each one.
Here’s a quick overview of where to look:
| You’re Typing In | Why It’s Still Happening | Where to Fix It |
|---|---|---|
| Microsoft Word | Has its own AutoCorrect engine | File > Options > Proofing > AutoCorrect Options |
| Outlook | Uses Office proofing tools | File > Options > Proofing > AutoCorrect Options |
| Google Chrome | Has a built-in spell checker | Chrome Settings > Languages > Spell Check |
| Microsoft Edge | Has a Writing Assistance feature | Edge Settings > Languages > Writing Assistance |
| Grammarly | Extension overrides all spelling tools | Grammarly Extension Settings |
| Microsoft Editor | Runs as an independent browser extension | Microsoft Editor Extension Settings |
Important: If you have Grammarly or Microsoft Editor installed as a browser extension, these tools run on top of everything else. They will continue correcting your text even after you’ve turned off Windows autocorrect and browser spell check. To stop corrections from these tools, you need to either disable the extension or turn off auto-correction within the extension’s own settings.
The reason this confuses so many people is that corrections feel the same regardless of where they’re coming from. Whether Windows, Word, or Grammarly is doing the correcting, the result looks identical — your word gets changed. Knowing which system is responsible helps you fix the right setting instead of going in circles.
How to Turn Off Autocorrect in Microsoft Word on Windows 10
Microsoft Word has one of the most aggressive autocorrect systems of any app. It runs entirely separately from Windows and has its own extensive list of automatic replacements, formatting corrections, and capitalization rules.
If Word keeps changing your words after you’ve turned off Windows autocorrect, here’s how to disable it directly inside Word:
- Open Microsoft Word.
- Click File in the top-left corner.
- Select Options at the bottom of the left menu.
- Click Proofing in the Word Options window.
- Click the AutoCorrect Options button near the top.
- In the AutoCorrect window, uncheck Replace text as you type.
- Click OK to save the change, then OK again to close Options.
Word will no longer automatically replace text as you type. You can still run a manual spell check using F7 whenever you want to review your document.
Tip: The same steps apply to Microsoft Outlook. Open Outlook, go to File > Options > Proofing > AutoCorrect Options, and uncheck Replace text as you type. Outlook and Word share the same proofing settings within the Office suite.
If you use Word for professional writing, technical documentation, or coding notes, disabling AutoCorrect here makes a significant difference. Word’s autocorrect list is far more extensive than Windows’ built-in system, and it corrects capitalization, formatting, and symbols in addition to spelling.
How to Disable Spell Check and Autocorrect in Chrome and Edge
If you’re doing most of your typing inside a browser — filling in forms, writing emails in webmail, using online tools — the corrections you’re seeing may be coming from your browser, not from Windows at all.
How to Turn Off Spell Check in Google Chrome
Chrome has a built-in spell checker that underlines words and can suggest corrections as you type in any text field.
To turn it off:
- Open Chrome and click the three-dot menu in the top-right corner.
- Select Settings.
- Click Languages from the left sidebar.
- Find the Spell Check section.
- Toggle off Basic Spell Check or Enhanced Spell Check — whichever is active.
Once turned off, Chrome will stop flagging or correcting text in any web-based text field.
How to Turn Off Writing Assistance and Spell Check in Microsoft Edge
Edge includes a feature called Writing Assistance that goes beyond basic spell check. It can rewrite sentences, suggest corrections, and auto-correct as you type.
To disable it:
- Open Edge and click the three-dot menu in the top-right corner.
- Select Settings.
- Click Languages from the left sidebar.
- Find Writing Assistance and toggle it off.
- You can also scroll down to find Spell Check and disable that separately.
Tip: If you’re using a web app like Google Docs, Notion, or any other browser-based writing tool, those apps have their own spell check systems built in. Turning off Chrome or Edge spell check won’t affect corrections happening inside those specific apps. You’ll need to disable spell check within the app itself.
How to Turn Off Text Suggestions and Autocorrect on the Windows 10 Touch Keyboard
If you’re using Windows 10 on a tablet, Surface device, or any touchscreen-enabled laptop, you’ll notice additional options in the Typing settings menu that don’t appear on standard desktop or laptop setups.
These extra settings are tied to the touch keyboard and include:
- Show text suggestions as I type — Displays word suggestions above the keyboard while you’re typing on a touchscreen.
- Add a space after I choose a text suggestion — Automatically inserts a space when you tap a suggested word.
- Add a period after I double-tap the Spacebar — Inserts a full stop when you double-tap the space bar, similar to mobile keyboards.
- Capitalize the first letter of each sentence — Automatically capitalizes sentence beginnings on the touch keyboard.
To turn off any of these, go to Settings > Devices > Typing and toggle off the options you don’t want.
Note: These touch keyboard options only appear if Windows detects a touchscreen on your device. If you’re on a standard desktop PC or a laptop without a touchscreen, these settings won’t be visible in your Typing menu — that’s completely normal.
For tablet users and people who frequently switch between typing and touch input, disabling text suggestions and predictive text can make the experience feel much cleaner and less intrusive.
Can’t Find the Windows 10 Typing Settings? Here’s What to Do
Some users open Settings and can’t find Devices or the Typing option at all. This is more common than you might think, and there are a few likely reasons.
| Reason | What’s Happening | What to Do |
|---|---|---|
| You’re on Windows 11 | Windows 11 moved the Typing settings | Go to Settings > Time & Language > Typing |
| Work or school device | IT policies may restrict access to certain settings | Contact your IT administrator |
| Older Windows 10 build | Settings layout may look slightly different | Use the Windows search bar instead |
| Settings app is acting up | A temporary glitch in the Settings app | Restart your PC and try again |
The quickest workaround on any version of Windows 10 is to use the search bar. Click the Start button, type “Typing settings”, and press Enter. Windows will take you directly to the right page without needing to navigate through menus.
Tip: If the toggles for autocorrect are greyed out and you can’t click them, your device is likely managed by a workplace or school IT policy. In that case, the settings are locked at the admin level and you won’t be able to change them yourself. Reach out to your IT department to request the change.
How to Turn Autocorrect Back On in Windows 10
If you turned off autocorrect and later decide you want it back — maybe you’re lending your PC to someone else or you’ve changed your mind — switching it back on is just as straightforward.
- Press Windows + I to open Settings.
- Click Devices.
- Select Typing from the left sidebar.
- Toggle Autocorrect misspelled words back on.
- Toggle Highlight misspelled words back on if you also turned that off.
The changes apply immediately. Windows will start catching and correcting spelling errors again straight away, with no restart needed.
Tip: If you turned off autocorrect in Microsoft Word or your browser as well, remember to go back into those apps and re-enable their settings separately. Each app controls its own spelling tools independently.
How to Disable Autocorrect in Windows 10 Using the Registry Editor (Advanced Method)
If you’re comfortable working with the Windows Registry — or if the Settings toggles aren’t responding correctly on your device — you can disable autocorrect directly through the Registry Editor. This method gives you precise control over the underlying settings that power the Typing options.
Important: Editing the Windows Registry incorrectly can cause system issues. Only use this method if you’re confident working with the Registry, and always back up the Registry before making any changes.
Here’s how to do it:
- Press Windows + R to open the Run dialog.
- Type regedit and press Enter.
- Navigate to the following path:
HKEY_CURRENT_USER\SOFTWARE\Microsoft\TabletTip\1.7
- To turn off autocorrect, find the DWORD value named EnableAutocorrection and set it to 0.
- To turn off spell check highlighting, find the DWORD value named EnableSpellchecking and set it to 0.
- To re-enable either feature, set the corresponding value back to 1.
- Close the Registry Editor and restart your PC for the changes to take full effect.
The values work as follows:
| Registry Value | 0 | 1 |
|---|---|---|
| EnableAutocorrection | Autocorrect OFF | Autocorrect ON |
| EnableSpellchecking | Highlight OFF | Highlight ON |
This method is particularly useful for IT administrators who need to apply these settings across multiple devices, or for advanced users who prefer managing Windows features at the system level.
Frequently Asked Questions About Turning Off Autocorrect in Windows 10
Does turning off autocorrect in Windows 10 affect all apps?
No. Windows autocorrect only applies to apps that use the Windows Spell Checking API. Apps like Microsoft Word, Outlook, Google Chrome, Microsoft Edge, Grammarly, and Microsoft Editor all use their own independent spelling systems. You need to disable autocorrect inside each of those apps separately.
Do the changes take effect immediately?
Yes, changes to the Windows Typing settings apply immediately. However, if you had an app open when you made the change, you may need to close and reopen it before the new setting takes effect inside that app.
Does this process work on Windows 11?
The process is slightly different on Windows 11. Instead of going to Settings > Devices > Typing, you go to Settings > Time & Language > Typing. The toggles work the same way once you find them.
Why does autocorrect work in some apps but not others?
This comes down to how each app is built. Apps that use the Windows Spell Checking API respond to your Windows typing settings. Apps that have their own built-in spelling engines — like Word, Chrome, and Edge — do not. This is why the same typing settings can behave differently depending on where you’re typing.
Can I turn off autocorrect for just one specific app?
Yes. Since most major apps manage their own spell check settings independently, you can disable autocorrect inside individual apps without affecting anything else. Use the app-specific instructions in this guide to target exactly the app that’s causing the problem.
What if the autocorrect toggle is greyed out?
If the toggle is greyed out and unclickable, your device is likely managed by a workplace or school through group policies. These settings are controlled at the admin level. Contact your IT administrator and ask them to adjust the typing policy for your account.
Will turning off autocorrect also turn off spell check in Microsoft Office?
No. Microsoft Office — including Word, Outlook, Excel, and PowerPoint — has its own proofing system that is completely separate from Windows. Turning off Windows autocorrect has no effect on Office applications. You need to adjust AutoCorrect settings inside each Office app individually through File > Options > Proofing.
You’re Now in Full Control of Your Windows 10 Typing Settings
In most cases, stopping Windows 10 from changing your words takes less than a minute. Open Settings, go to Devices, click Typing, and toggle off Autocorrect misspelled words. If you also want to remove the red underlines, turn off Highlight misspelled words while you’re there.
If corrections are still happening after that, the issue is almost certainly coming from a specific app — Word, Outlook, Chrome, Edge, or a browser extension like Grammarly. Use the app-specific steps in this guide to track down exactly where the corrections are coming from and turn them off at the source.
From this point on, Windows types exactly what you type. No more automatic replacements, no more undoing changes you didn’t ask for — just clean, uninterrupted typing on your own terms.
Visit Our Post Page: Blog Page
Discover more from Izoate
Subscribe to get the latest posts sent to your email.