
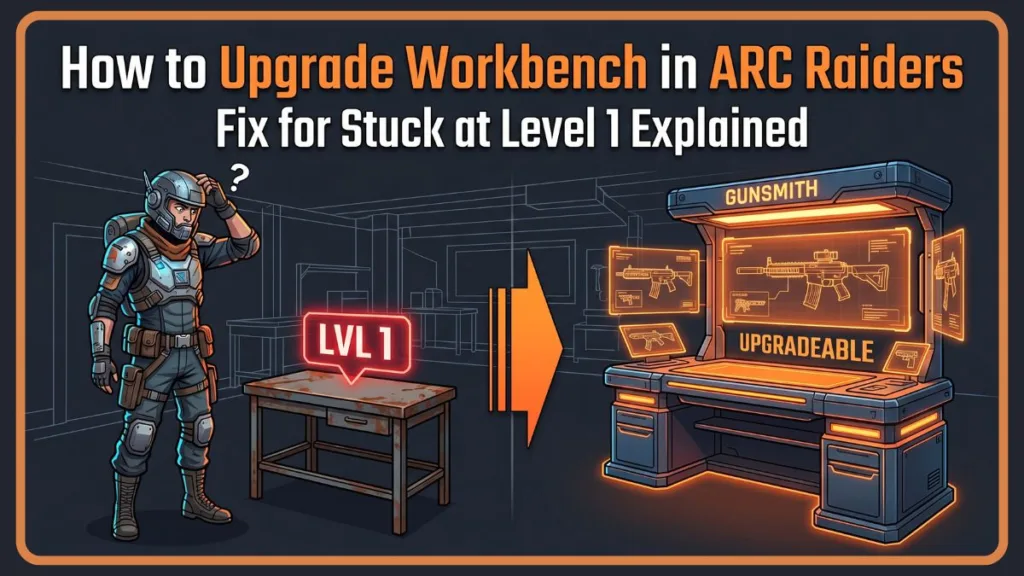
Workbench stuck at Level 1 in ARC Raiders? Learn why it can’t be upgraded and how to upgrade crafting stations instead. Step-by-step guide, materials, and fixes included.
Are you staring at your screen wondering why your Workbench is stuck at Level 1? You aren’t alone.
If you’ve been scouring the menus thinking your game is bugged or that you missed a crucial early-game quest, take a breath. In the high-stakes, punishing world of extraction shooters, feeling artificially held back by UI is a massive point of friction.
Quick Answer:
You cannot upgrade the Workbench in ARC Raiders. The base Workbench is permanently locked at Level 1. To upgrade crafting, you must level up specialized Workshop stations like Gunsmith, Gear Bench, and Medical Lab using the “Level Up” tab.
The reality is much simpler, but the game’s user interface doesn’t do a great job of explaining it. Here is the clear-cut solution to your progression problem and a complete Izoate technical guide on how the crafting system actually works, optimized to get you back into the raid with better gear.
Why You Can’t Upgrade Workbench in ARC Raiders (Explained)
To get straight to the point for your featured snippet answer: The base Workbench in ARC Raiders is not upgradeable and is permanently locked at Level 1. There is no hidden quest to unlock it, you do not need to reach a certain player level, and no “Level Up” tab exists for this specific station.
The confusion stems from the highly misleading “Level 1” label displayed in the top left corner of the screen. Players naturally assume this means a “Level 2” exists. It doesn’t. You aren’t stuck; you just need to interact with the correct stations.
From a game design perspective, Embark Studios likely locked this to prevent “soft-locking” your account.
If you lose all your gear, weapons, and money, the game needs to guarantee you have a place to instantly print the bare minimum equipment to try again.
That is what this Level 1 bench does. It is your permanent baseline.
To understand progression in the Raider Den, you have to mentally separate the basic starting bench from the rest of your workshop ecosystem.
Think of the primary Workbench as your permanent safety net. Its sole purpose is to ensure that if you die and lose all your gear, you can still drop into a raid without being entirely defenseless.
It crafts starter weapons (like the Ferro, Hairpin, Kettle, and Stitcher), all basic ammo types (Heavy, Light, Medium, Shotgun), entry-level consumables (Bandage, Light Impact Grenade), and the Looting Mk.1 augment.
Its status is fixed at Level 1, regardless of how far you progress in the endgame.
The actual upgrade system lives in the specialized benches surrounding the main area. These must be installed and are the “real workbenches” that dictate your progression and power level:
- Gunsmith: Weapon crafting and advanced mods. Crucial for reducing your time-to-kill (TTK) against heavy ARC enemies.
- Gear Bench: Shields and Raider augment suits. Your primary source of survivability.
- Medical Lab: High-tier healing items (like the Vita Spray) and enhanced shield rechargers to keep your squad alive.
- Explosives Station: Grenades and heavy explosives for crowd-controlling Wasps and Ticks.
- Utility Station: Tactical gadgets, mobility tools (like the Snap Hook), and stealth tools (Photoelectric Cloak).
- Refiner: Converts basic materials into rare advanced components, drastically cutting down your grinding time.
- Scrappy: Your robotic rooster that gathers passive materials while you are offline or out on raids.
How to Upgrade Workbench Stations in ARC Raiders (Step-by-Step Guide)
[Image Prompt: Minimalist flat vector illustration (blue, orange, charcoal) showing a step-by-step UI flowchart. A stylized cursor moves from a “Crafting” tab to an accented “Level Up” tab, highlighting the material checklist below.]
The UI hides the upgrade menu in plain sight, causing what the community calls a “monkey brain” trap. Here is the exact flow to level up your stations, whether you are on PC or console.
- Open the Workshop: Access this physically from the Raider Den by walking up to the space, or through your stash menu for quicker access.
- Select a Specialized Station: Choose any station except the base Workbench (e.g., Gunsmith or Gear Bench).
- Go to the “Level Up” Tab: Look at the absolute top of your screen. You will see prompts to tab over from “Crafting” to “Level Up” (use your bumper buttons on the controller, or click via mouse). This tab only appears on the specialized stations.
- Check Requirements: Review the materials list. The game will show you exactly how many items you own (including what is currently in your stash) versus how many are required for the next tier.
- Track Materials: Highlight a missing material and hit the tracking button. An eye icon will now tag that item, making it visually pop when it drops in a raid, cutting through the visual clutter of the environment.
- Farm & Extract: Head into a raid, loot the tracked items, and successfully extract. (Remember: safe-pocket your rarest components like Sentinel Firing Cores immediately!).
- Upgrade Station: Return to the Level Up tab and hold the confirm button. The station levels up instantly, there is no wait timer, and it unlocks new crafting tiers and blueprint compatibility.
ARC Raiders Workbench Upgrade Requirements (All Stations)
Here is a quick reference guide for what you need to progress. The material grind curve moves from basic residential/industrial scrap at Level 1 to highly dangerous ARC enemy drops by Level 3.
Note: Minor material variations may occur after live-server balance patches, but the core category requirements remain stable.
Here’s a simplified overview of all ARC Raiders workbench upgrade requirements:
| Station | Level 1 to 2 | Level 2 to 3 | Core Focus |
| Gunsmith | 3x Rusted Tools, 5x Mech Components, 8x Wasp Drivers | 3x Rusted Gear, 5x Adv. Mech Components, 4x Sentinel Cores | Weapons & Mods (Unlocks Arpeggio at Lv. 2) |
| Gear Bench | 3x Power Cables, 5x Elec Components, 5x Hornet Drivers | 3x Industrial Batteries, 5x Adv. Elec Components, 6x Bastion Cells | Shields & Armor (Unlocks Heavy Shield at Lv. 2) |
| Medical Lab | 2x Cracked Bioscanners, 5x Durable Cloth, 8x Tick Pods | 3x Rusted Shut Med Kits, 10x Antiseptic, 5x Surveyor Vaults | Healing Items |
| Explosives | 3x Synthesized Fuel, 5x Crude Explosives, 5x Pop Triggers | 3x Lab Reagents, 5x Explosive Compounds, 3x Rocketeer Drivers | Grenades (Heavy Fuze Grenade at Lv. 3) |
| Utility | 2x Damaged Heat Sinks, 5x Elec Components, 6x Snitch Scanners | 3x Fried Motherboards, 5x Adv. Elec Components, 4x Bison Drivers | Tactical Gadgets |
| Refiner | 3x Toasters, 5x ARC Motion Cores, 8x Fireball Burners | 3x Motors, 10x ARC Circuitry, 6x Bombardier Cells | Material Conversion |
| Scrappy | 1x Dog Collar (Ranks up to 5) | Lemons, Apricots, Cat Beds, Pillows (Ranks 3-5) | Passive Resources |
Where to Find Materials Fast (Farming Guide)
Knowing what you need is only half the battle; knowing where the loot tables spawn is the secret to scaling fast.
Pro Tip: Always match the item’s category tag found at the bottom of its tooltip with the tags on the map zones.
Industrial Materials (Metal Parts, Rubber, Tools, Gears)
- Locations: Dam Battlegrounds, scrapyards, Checkpoint (Blue Gate).
- Loot Sources: Toolboxes, red crates, abandoned vehicles. Cars and buses are especially lucrative for Rusted Gears and Motors.
- Farming Route: Run the Dam Battlegrounds loop—start at Checkpoint for vehicles, move to Power Gen, sweep Pale Apartments, and extract near the Scrap Yard.
Electrical & Tech Items (Cables, Batteries, Bioscanners, Motherboards)
- Locations: Spaceport, office buildings, Stella Montis Medical Research, Hospital (Buried City).
- Loot Sources: Server rooms, computers, power generation rooms, and breachable containers.
ARC Components (Alloy, Circuitry, Cores, Drivers)
- Locations: High-threat zones, ARC events, wandering patrols.
- Loot Sources: Directly drops from defeated ARC enemies. Match the name to the part (e.g., Wasp Drivers drop from Wasps, Sentinel Firing Cores drop from Sentinels). Use high-ground and cover to safely farm these without getting overwhelmed.
Nature & Rare Items (Lemons, Mushrooms, Dog Collars, Cat Beds)
- Locations: Marano Park, residential blocks, Blue Gate (Olive Grove).
- Loot Sources: Orchards for fruit and nature spawns; apartments, hotels, and houses (like Santa Maria Houses) for residential comfort items needed for Scrappy.
Best Upgrade Priority (Pro Strategy)
Spreading your resources evenly across all stations is a massive mistake that will leave you underpowered for mid-game raids. To progress efficiently and dominate the extraction loop, follow this strictly tested Izoate recommended order:
- Gunsmith → Level 2: Better weapons directly increase your survival and extraction rates. Getting access to the Arpeggio burst rifle early on gives you the necessary DPS to confidently farm higher-tier ARC enemies.
- Scrappy → Level 2: Incredibly cheap to upgrade (just one Dog Collar) and starts generating passive loot immediately while you manage your stash or log off for the night.
- Gear Bench → Level 2: Unlocks the Heavy Shield, which is a massive leap in survivability, preventing you from getting two-tapped by snipers.
- Refiner → Level 2: Allows you to convert your mountain of common scrap into the rare components you actually need, bypassing the RNG of bad loot runs.
After these four foundational upgrades are hit, focus all your energy on maxing the Gunsmith and Gear Bench to Level 3 before touching Explosives or Utility.
Pro Tips Most Players Miss:
- Use the material tracking system. It saves hours of blind looting by putting a literal magnifying glass over the junk you actually need.
- Always safe-pocket blueprints. They are physical items. If you die with a new legendary blueprint in your backpack, it is gone forever. Do not get greedy—put it in your protected slot or extract immediately.
- Upgrade Scrappy early. Do not sleep on free passive income. The higher his rank, the less time you spend rummaging for basic metal parts.
- Use the Refiner to reduce the grind. Stop hunting for rare mechanical parts when you can just craft them from common metal.
- Platform advantages: PC players should leverage precise aiming to snipe ARC weak points for faster component farming, while console players should prioritize the Gear Bench even earlier to compensate for slightly slower controller movement in heavy firefights.
Common Beginner Mistakes When Upgrading Workbenches
Trying to upgrade the base Workbench: As mentioned, it’s permanently locked at Level 1 and has no upgrade path.
Ignoring the Level Up tab: This crucial menu is hidden at the absolute top of your screen when viewing specialized stations.
Spreading materials across stations: Evenly upgrading every bench slows you down. Focus heavily on pushing the Gunsmith and Gear Bench to Level 2 first.
FAQ
Why can’t I upgrade my workbench in ARC Raiders?
Because the base Workbench is permanently fixed at Level 1 to serve as a safety net for basic gear (starter weapons and basic ammo). The actual upgrade system is tied to the specialized stations you install around the room.
How do I upgrade crafting stations?
Open the Workshop from the Den or Stash, select a specialized station (like the Gunsmith), navigate to the hidden “Level Up” tab at the very top of the screen, and submit the required materials from your inventory/stash.
Which workbench should I upgrade first?
Prioritize the Gunsmith first for better weapons (specifically hitting Level 2 for the Arpeggio), followed by Scrappy for passive resources, and then the Gear Bench for heavy shields.
What materials do I need for upgrades?
Requirements scale heavily by level. Level 1 to 2 requires basic scrap (metal, plastic) and low-tier ARC drops, while Levels 2 to 3 require specific, dangerous enemy drops (Sentinel Cores, Bastion Cells) and advanced electronics.
Can I upgrade the basic Workbench later if I max out the others?
No, it remains Level 1 permanently, even in the late game. AI tools and community rumors sometimes claim otherwise, but this is entirely false.
Common Problems & Fixes:
- “My Workbench isn’t upgrading!” — It’s not supposed to. Shift your focus to the specialized stations. Upgrading everything else to Level 2 will not magically upgrade the base bench.
- “I can’t find the Level Up tab.” — You are likely looking at the base Workbench. Tab over to the Gunsmith to see the UI change. If you don’t see the Gunsmith, make sure you have actually “installed” it in the lower menu first.
- “I’m missing specific materials.” — Use the in-game tracking system (eye icon) and farm the specific map zones listed above. Alternatively, check Celeste the trader; sometimes buying that last missing piece of plastic is safer than risking a raid.
- “My blueprint isn’t working/crafting.” — Having a blueprint doesn’t let you craft it. Your specialized station must meet the required level first. Blueprints and station levels work in tandem.
Conclusion
As a quick summary before your next raid:
- The base Workbench cannot be upgraded; it is intentionally fixed at Level 1 as a fail-safe loadout generator.
- Upgrades only apply to the installed Workshop stations (Gunsmith, Gear Bench, Medical Lab, etc.).
- Use the “Level Up” tab at the top of the screen when viewing specialized stations to see your required materials.
- Farm materials using category tags, extract safely with blueprints in your safepocket, and prioritize the Gunsmith and Gear Bench for maximum survival and TTK efficiency.
If you’ve been bashing your head against the wall trying to level up that first bench, rest easy. You aren’t stuck, and you aren’t missing a secret quest—you were just looking at the wrong station. Focus your efforts on the Gunsmith and Gear Bench, track your materials relentlessly, and your Raider Den will be fully optimized for endgame extractions in no time. Keep pushing, and we’ll see you in the Resistance.
The moment you stop trying to upgrade the base Workbench is the moment your real progression in ARC Raiders begins.
Visit Our Post Page: Blog Page
Discover more from Izoate
Subscribe to get the latest posts sent to your email.